Store all your images, videos, PDFs, and any other digital assets in Plytix
In Plytix, not only can you manage all your product information from our tool, but you can also store and manage all of your digital assets too! This article explains what digital assets are, and where Plytix stores them.
💡 For frequently asked questions about storing assets in Plytix, take a look at our Assets - FAQ page.
*Skip to any section in this article by clicking on the links above
Assets in Plytix
Assets come in many forms. They can be images, videos, sounds, text, and more. In Plytix, you can store almost all types of assets. Assets uploaded into Plytix can be found in the "All Assets" tab.
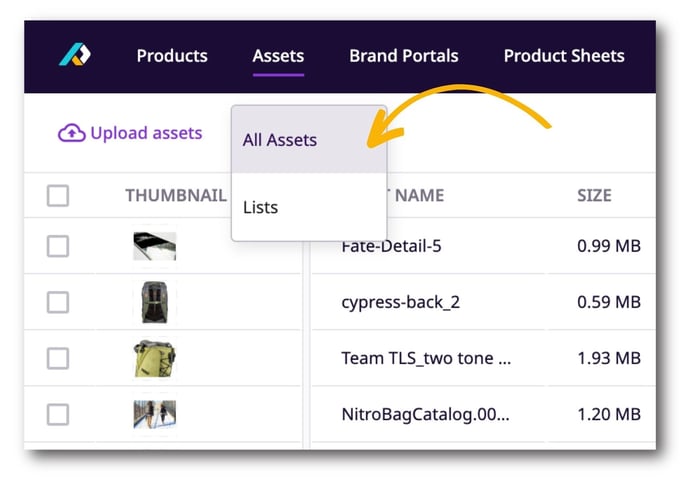
From the "All Assets" page there are 3 main sections:

Filters menu
The Filters menu makes finding and viewing assets quick and easy. From this menu you can filter through your assets, save filters to a Smart List, or load a pre-existing asset list.

Filter through your assets
When you have hundreds or even thousands of assets, it can be difficult to find a specific one if you search through them one by one. Applying asset attribute filters can help you narrow down your search.
To do this, head to "All Assets"
- Click "+" in the Filters menu
- Select the attribute you want to filter by
- Set the condition parameters
- Click "Apply filter"
ℹ️ As you select attributes and define filter conditions, assets that meet them will appear in the asset table on the right.
Check out the table below for more information on filter conditions available:
| Asset Attribute
|
Filter conditions |
Conditional value |
|
Assigned |
equal to not equal to |
True False |
|
Type |
contains any of does not contain any of |
Images Sounds Videos Compressed Reports Texts Other |
|
Modified |
equal to after on or after before on or before |
Date |
|
Created
|
equal to after on or after before on or before |
Date |
|
Privacy
|
equal to not equal to |
Public Private |
|
Filename
|
contains does not contain equal to not equal to |
[Text] |
|
Extension
|
contains does not contain equal to not equal to |
[Text] |
|
Category
|
is defined is not defined contains any of does not contain any of |
N/A |
|
File Size |
equal to greater than greater than or equal to less than less than or equal to |
[Number] |
|
Static lists |
contains any of does not contain any of |
[Select from pre-existing static lists] |
Assets Overview menu
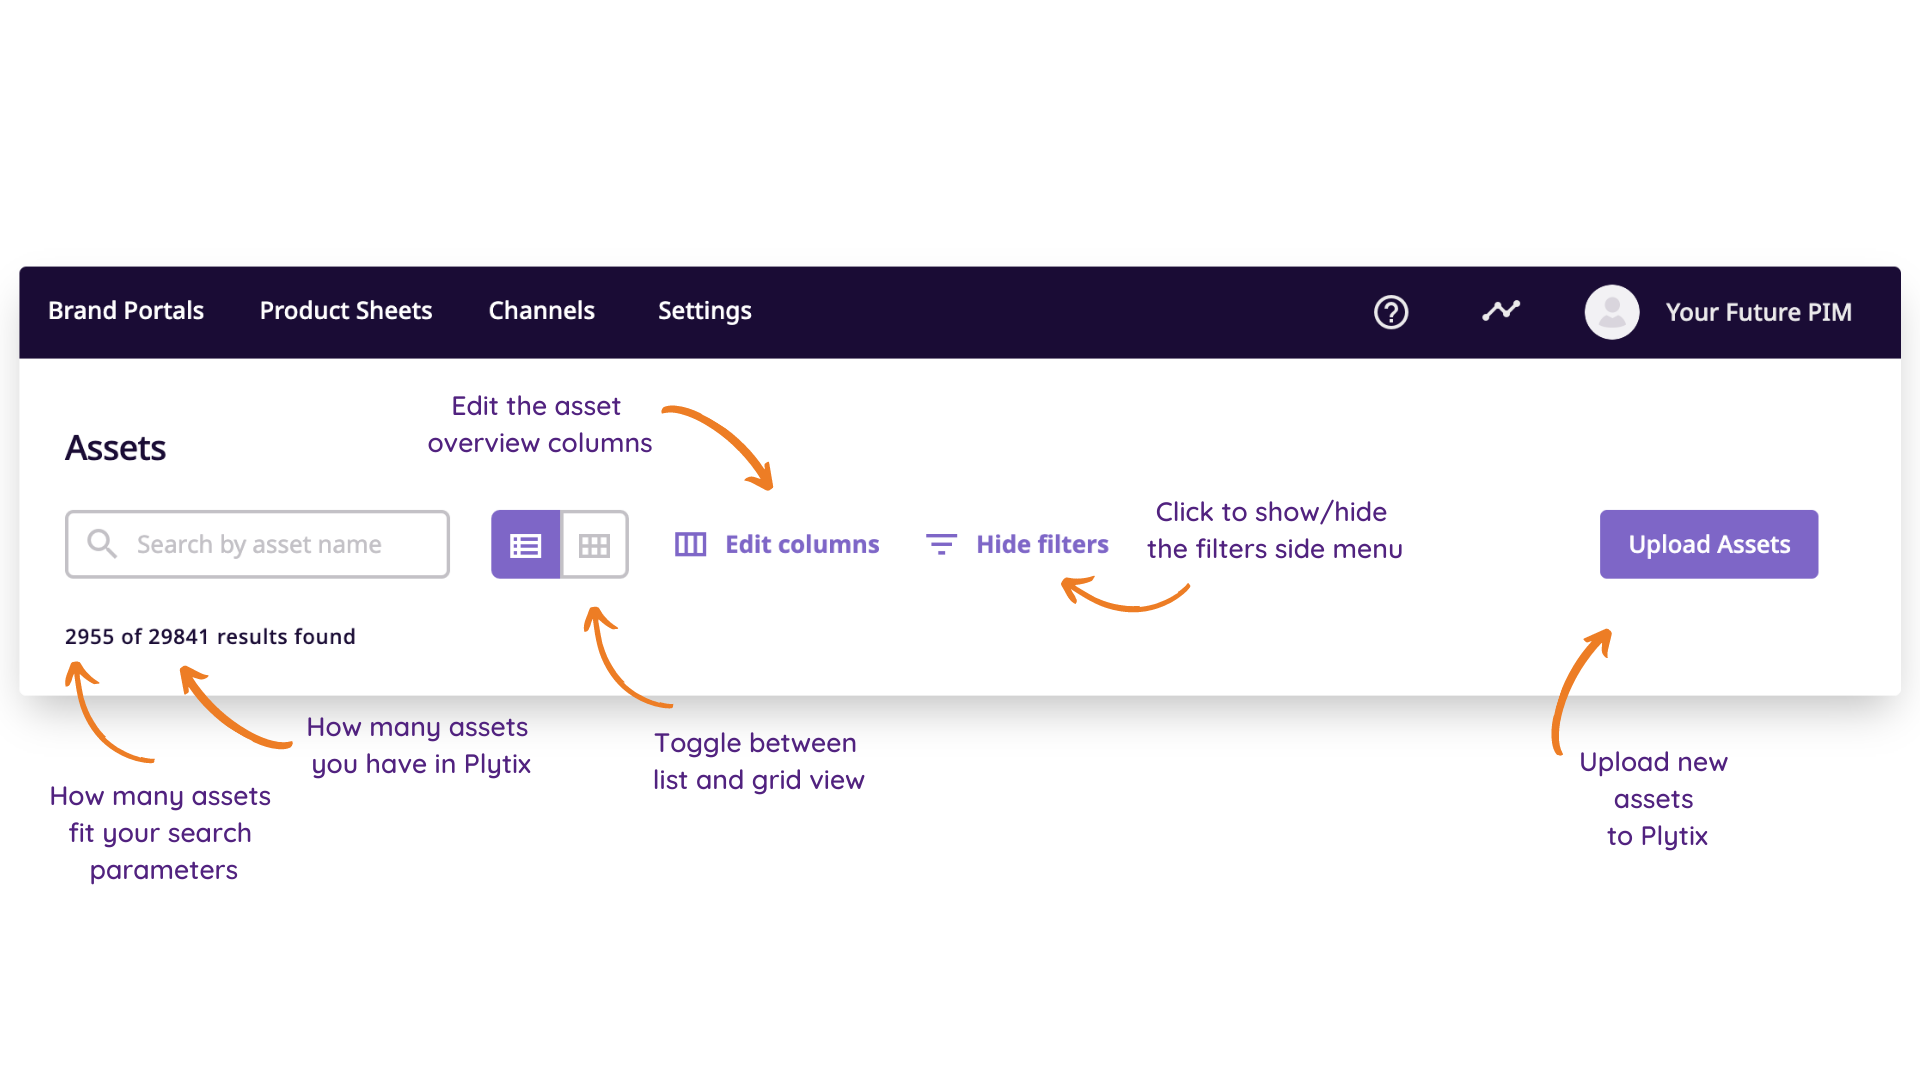 The asset overview menu lets you
- Search for an asset in the table by asset name
- Choose if you want to view assets in a list or in a grid
- Choose from three grid sizes (small, medium, large)
- Edit the asset overview columns
- Show/Hide the Filters side menu
- Upload assets
Asset table
This is where all your assets will show up (whether they are linked to a product or not).
There are two ways to view assets:

List View

In the list view, you can choose to see the following information:
- Checkbox
- This is how you can select your assets.
- Thumbnail
- This column shows you a small thumbnail image of your asset.
- Hovering over the thumbnail will give you an enlarged preview.
- Clicking on this thumbnail will take you to that asset's details page.
- Asset name
- This will give you the name of the asset followed by its extension.
- Hovering over the column name and clicking on the arrow that appears lets you order assets by this column in ascending or descending order.
- Hovering over an asset's name will give you the option to open that asset's detail page in a new tab.
- Clicking on the asset's name will allow you to edit it right on the table
- You can edit the asset's name from the asset overview page or asset's detail page.
- Size
- This column identifies the size of the asset in MB.
- You can reorder assets by ascending/descending order based on this column.
- Products linked
- This column tells you how many products this asset is linked to.
- Clicking this number will open a window that lists all the products this asset is linked to.
- You can reorder assets by ascending/descending order based on this column.
- Privacy
- This column identifies if the asset is public or private
- You can reorder assets by ascending/descending order based on this column
- Created
- This column identified the date and time this asset was created or imported into your PIM
- You can reorder assets by ascending/descending order based on this column
- Last modified
- This column identifies the last time this asset was modified. This can include if it was renamed, linked/unliked to a product, added/removed from a category, or replaced.
- You can reorder assets by ascending/descending order based on this column
- Category
- This column identifies the customised category an asset is assigned to. Learn how to create asset categories here.
- Categories cannot be reordered in ascending/descending order based on this column
- Extension
- This column identifies the extension of your assets which can be .jpg,.mp4,.png,.pdf etc.
- You can reorder assets by ascending/descending order based on this column
💡 The information displayed in the asset overview table is customisable (see below for further information)
💡 Hover over an asset row and click on the three dots (...) that appear to the right of the Modified Date column to open the following additional options:
1. open
2. open in a new tab
3. download asset
4. copy link to clipboard
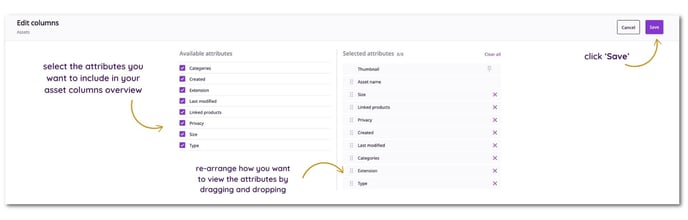
Edit the asset overview columns
The asset overview columns can be hidden, added, or re-ordered. This way you can see different attributes in your asset overview to facilitate filtering and linking with products.
To change the columns in your overview:
- Click 'Edit columns' in the asset overview menu
- Select the attributes you want to be shown on the left side
- Re-arrange the selected attributes by dragging and dropping them
- Click 'Save'
Grid View

In grid view, you will see
- A thumbnail of the asset (you can choose the size of this)
- The asset's name
- The size of the asset
⚠️ In the grid view, you will not have the option to edit the asset information displayed
If you hover over an asset, more options will appear:
- Click on the asset's thumbnail to expand it to full screen and show in slideshow mode.
- Open asset in a new tab
- Download asset
- Copy download link to clipboard
Selecting assets
Selecting an asset or assets in either grid or list view will open up more options for editing.

From left to right we have:
Link assets to a Product or link assets to a Static List
Add, replace or remove assets to categories
Export the asset in a CSV, XLSX or asset file
What's next?
- Learn how to link assets to products
- Learn how to organize assets in categories
- Learn how to create asset lists
If you have any questions just click on the chat box in the bottom-right corner and we'll be happy to answer them...
and please let us know 👇