
The AI Autofill feature lets you generate and optimize content for individual products in the Product Detail page. This article will go over how to use AI to edit content with some best practices to make the most out of this tool.
⚡ AI Autofill consumes AI credits each time you generate content.
Best practices for using AI in Plytix
*Skip to any section in this article by clicking on the links above
Auto-generating text using AI
This article is about using AI to edit text attributes for individual products in the Product Detail page. To edit products in bulk with AI, check out this other guide to learn more.
In the Product Detail page:
1. Click on the attribute you would like to edit. AI Autofill is only available on Short Text, Paragraph, and HTML attribute types.
2. Select the magic wand button to open the AI Edit panel.
3. At the top of the panel, you'll see the name of the attribute you're editing. A note below it reads "Existing content will be overwritten", keep this in mind before applying any AI-generated text.
4. In the Prompt area, write your instructions in natural language. You can type directly or select one of the quick-start prompt chips:
-
- Translate content
- Improve SEO
- Create descriptions
- List selling points
- Optimise for AI search
You can also add Brand Guidelines to give Plytix AI standing instructions about your brand voice, writing rules, and restricted terms, see the Brand Guidelines section below for how to set these up.
5. To reference a product attribute in your prompt, type $ATT. and select your attribute from the dropdown. You can reference as many attributes as needed.
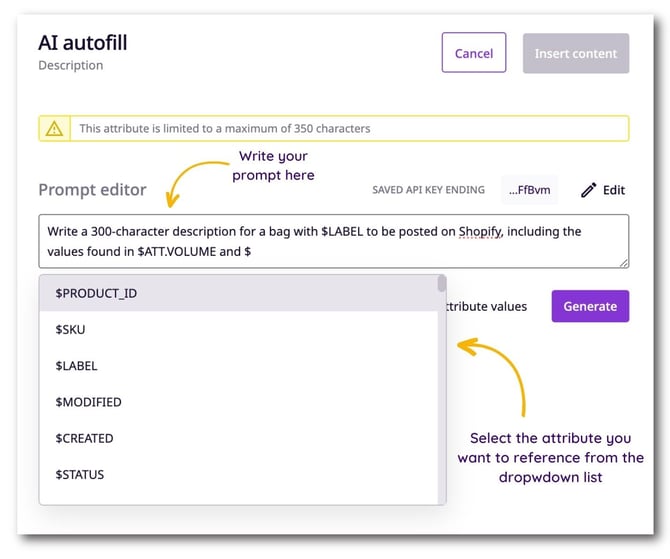
ℹ️ Make sure there is a space between any punctuation and your $(ATTRIBUTE) reference, both before and after. Otherwise, the referenced attribute will not be recognised.
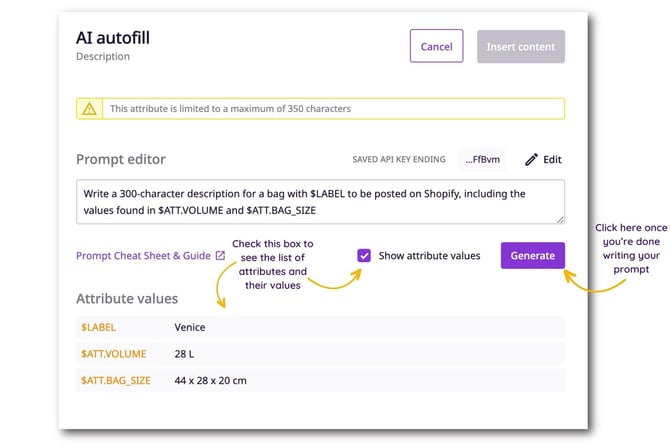
ℹ️ When referencing an attribute, AI Autofill uses the value of that attribute for the product, not the attribute name. For example, $ATT.VOLUME might resolve to 28 L in your prompt.
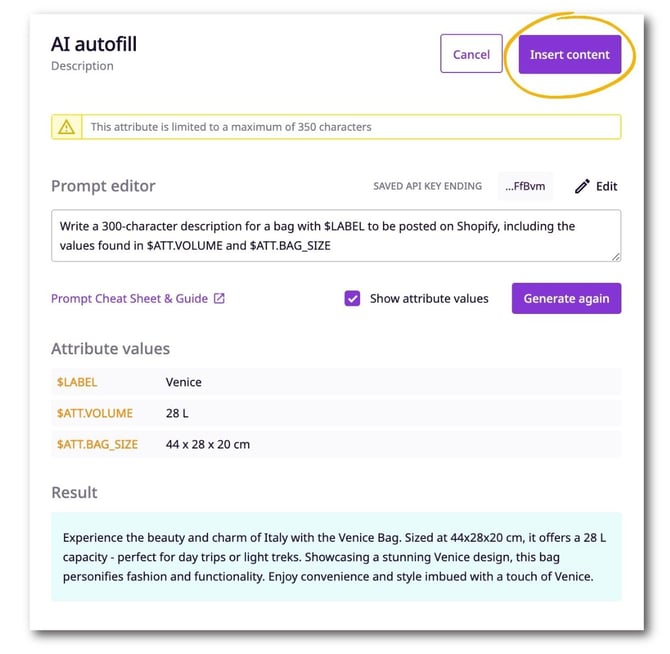
6. Once your prompt is ready, press Generate. The panel will display the AI-generated result below the product preview.
7. If you're happy with the result, click Apply to insert the content into the attribute. This will overwrite the previous value.
⚠️ Clicking Apply closes the AI Edit panel and clears your prompt and result. The generated text will only be accessible in the attribute value itself. If you want to keep the previous value, select Discard changes before applying.
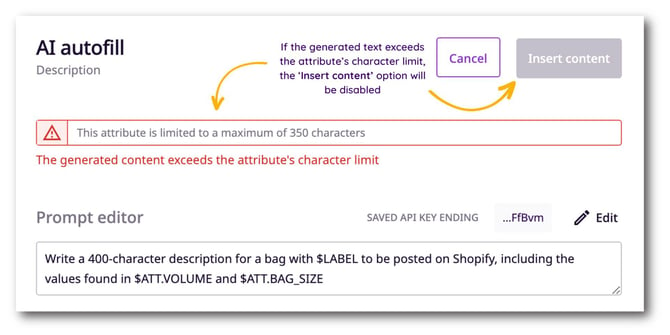
If the generated text exceeds a character limit set on the attribute, it won't be inserted and an error will appear. To fix this, add a character limit instruction to your prompt (e.g. "limit your response to 350 characters").
8. Select Save changes.
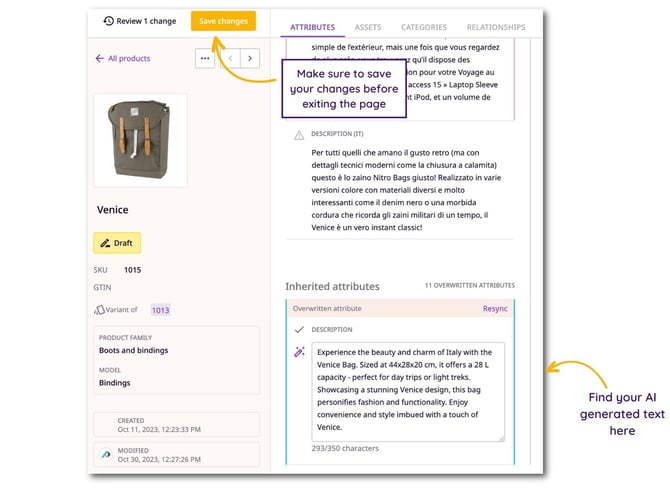
If you wish to continue editing the AI-generated text, you can do so only after it's already inserted in your attribute value. After inserting the text, you can edit it by clicking on the pencil icon.
Adding Brand Guidelines
Brand Guidelines let you give Plytix AI standing instructions about your brand voice, writing rules, and restricted terms, so every generation stays on-brand without repeating yourself in every prompt.
To add a Brand Guideline:
- In the AI Edit panel, select Add now from the banner that reads "Add content guidelines so Plytix AI can follow your style, rules, and preferences."
- The Brand Guidelines modal will open with three fields:
- Name (required): give your guideline a recognisable name.
- Guideline context (up to 300 characters): tell AI what to consider when using this guideline, such as brand voice, target audience, language, market, or campaign context.
- Writing rules (up to 300 characters) : specify tone, formatting, capitalisation, translation preferences, or any glossary terms AI should follow.
- Blocked terms: add any words or phrases AI should never use, separated by commas.
- Click Save to store the guideline.
Once saved, your Brand Guideline will be applied automatically when generating content in the AI Edit panel.
Best practices for using AI in Plytix
If you are unsure of how to get started with AI Autofill, check out these prompt examples.
Keep the following tips in mind to come up with a good prompt structure for the content you need to generate:
- Be specific: include the desired tone of voice (e.g. witty, formal, concise), any character limits, and the context of use. The more detailed your prompt, the better the result.
- Define your audience: include your target demographic so the language and framing fits the right reader.
- Reference the channel: whether the content is for a Shopify store, an e-catalogue, or social media, let AI know so it adjusts the style accordingly.
- Use Brand Guidelines for consistency: rather than repeating tone and style rules in every prompt, set them once in your Brand Guideline and let AI apply them automatically.
- Mind your credits: each generation uses AI credits. If you're testing prompts, refine them before hitting Generate to avoid unnecessary credit spend.
What's next?
- Learn how to use different attribute types
- Learn how to create and manage attribute groups
- Learn how to create, edit, and test formulas for attribute transformations