
The more assets you have, the more difficult it may be to keep track of them all. In Plytix you can create categories of up to six levels to make finding and managing your assets easier. Asset categories can also be added to your Brand Portals as a way of filtering assets. In this article you'll learn how to create and manage asset categories to better organize your digital files in Plytix.
*Skip to any section in this article by clicking on the links above
Creating Asset Categories
You can create asset categories from the Asset Categories settings.
- Click on Settings in the top navigation menu
- Choose "Categories" under the "Assets" section from the left side menu

When you begin creating categories and subcategories they will be listed here:
Creating a main category
To create a first-level category:
- Click Index under the Asset categories section
- Click + Add category
- Type in a name for your category
- Click enter to save
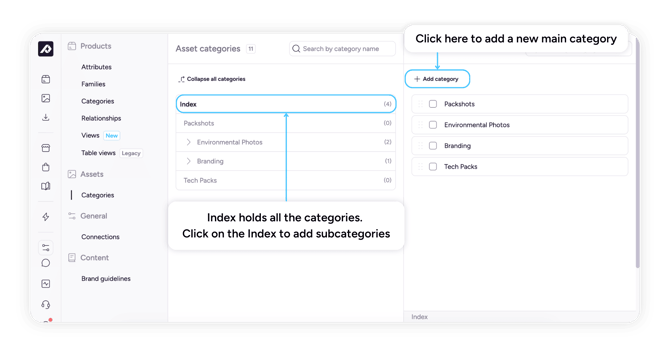
💡 All you main categories are listed under Index. You can add up to 1000 categories at each given level.
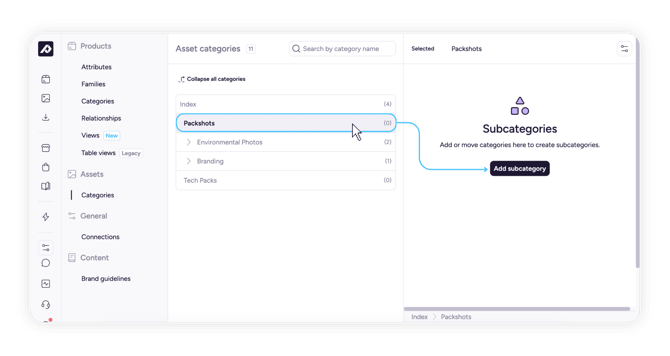
Creating Subcategories
To create a subcategory:
- Head to the Index section and click on the level you want the subcategory to fall under
- Click on Add subcategory
If you already have other subcategories, click on '+ Add category' on the upper left of the tab
3. Name the new subcategory
4. Click enter to save
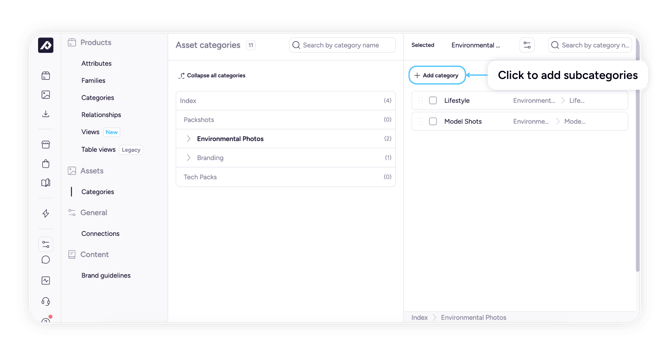
ℹ️ When you click a category or subcategory in the left column, the underlaying data from that section will become visible and editable on the right column.
Managing Asset Categories
Sorting
Every time you create a new part of your taxonomy, you can adjust the order of categories by dragging and dropping them around.

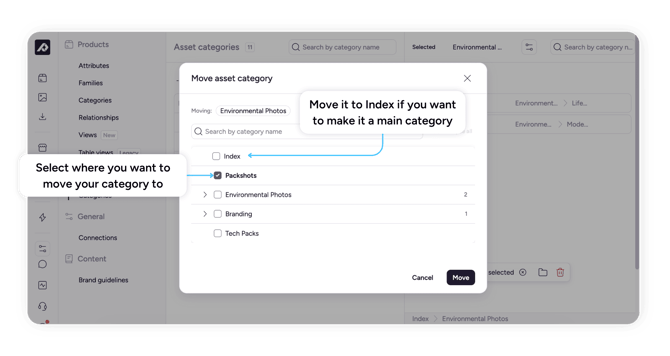
Moving
To move a category or subcategory to a different category level
- Select the category you want to move
- Click on the 'Move' option that appears
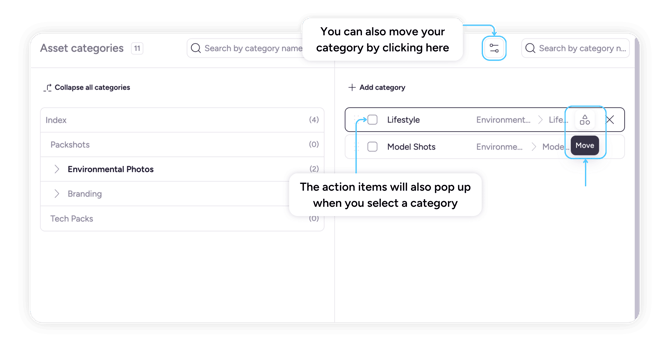
3. From the popup you can select a new parent category or make the category you are moving its own root category.
4. Click 'Move' to save
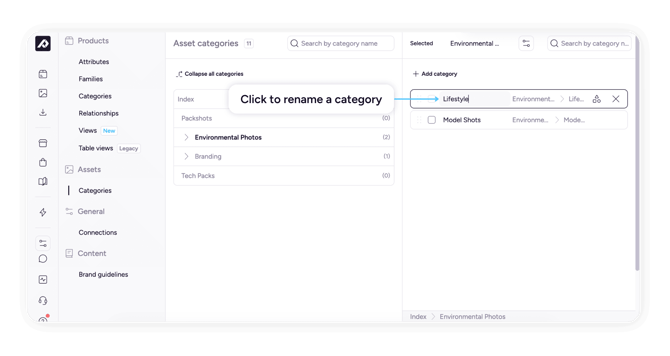
Renaming
To rename a category:
- Click on the category you want to rename
- Rename the category
- Press enter to save
Deleting
To delete a category:
- Hover over the category you want to delete
- Click 'Delete'
- Confirm by clicking 'Yes, delete now' in the popup
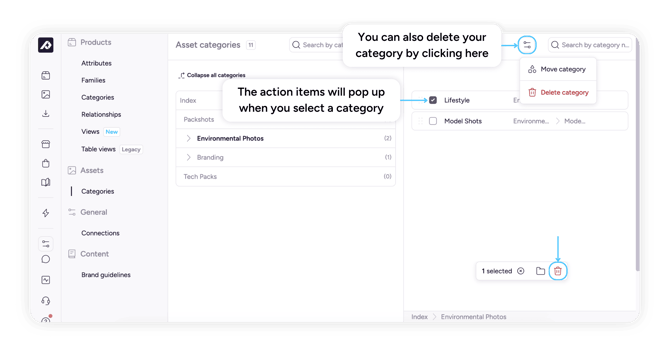
⚠️ Deleting a category cannot be undone. Be sure you want to delete before confirming.
What's Next?
- Learn how to assign assets to categories
- Learn how to create and manage product categories
- Learn how to assign products to categories