
Asset categories help keep all the assets in your Plytix account organized. You can create categories for internal use or in your Brand Portals. In this article, you will learn how to assign, replace, and remove asset categories.
ℹ️ Before assigning assets to categories, you must have already created asset categories. For guidance, see the article, "Creating and managing asset categories".
Assigning Asset Categories in Bulk
To assign more than one asset to categories in one go, head to the "All assets" page.
- Click on "Assets" in the top navigation menu.
- Select "All assets" from the dropdown. This will take you to the asset overview table.
- Select the assets you want to modify (this will make action options appear a the top of the table).
- Click the "Categories" button.
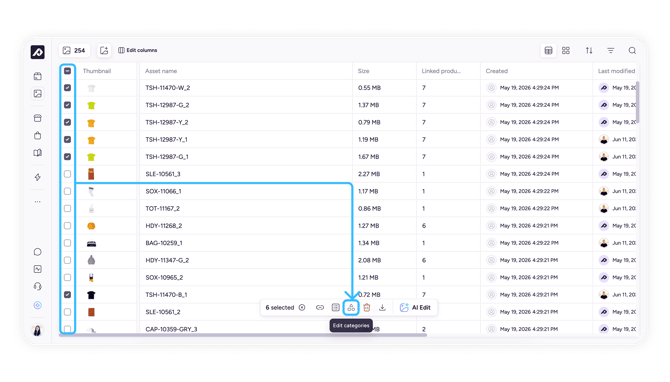
The window shown below will pop up.
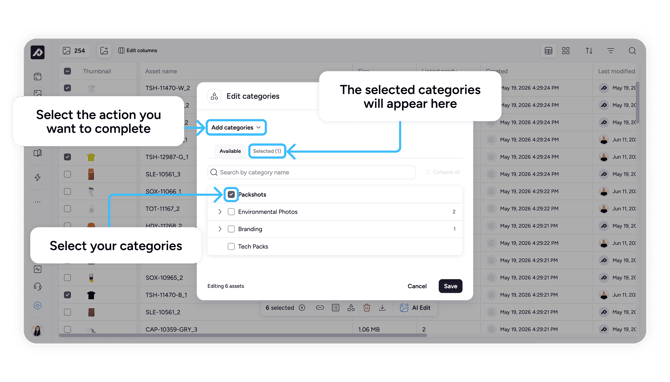
- Select the action you want to complete: Add, replace, or remove categories.
- Select the categories you want to complete this action for.
- Press "Save".
Assigning Categories from the Asset Detail
Categories can also be assigned individually. To do this:
- Click on the asset's name. This will take you to that asset's details page.
- Click on the "Categories" tab.
- Click on categories under "Available categories" to assign the asset to it or click on the "X" under "Selected categories" to remove an assigned category.
- Click "Save changes".
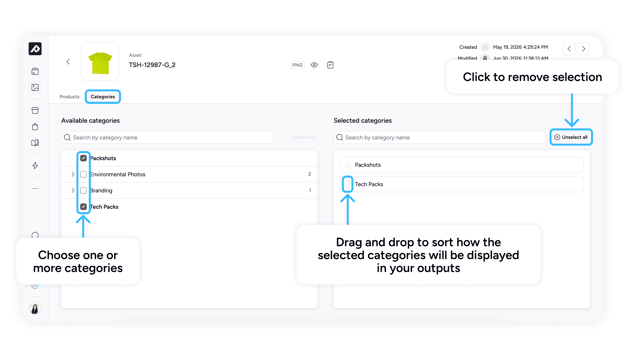
💡 Drag and drop categories in your "Selected categories" section to choose how your asset categories will be displayed in your outputs.
ℹ️ Assets can belong to multiple categories.
What's next?
- Learn how to create and manage product categories.
- Learn how to assign products to categories.