
Plytix channels are a great way to create various feeds to send your product data to different shopping sites — including Amazon Seller Central. You can either format your file following an Amazon template or directly upload a Plytix file into Amazon. This article will walk you through the steps of generating a Plytix feed to upload your products to Amazon considering these two options.
⚠️ Amazon Seller Central has different requirements of which product data is needed based on the product type and marketplace. This article provides a guide of how to generate a Plytix feed to upload products into Amazon, but specifications of elements such as which attributes are required differ according to Amazon’s guidelines. Please refer to Amazon Seller Central’s documentation to have the most accurate information on what product data needs to be included in your feed.
Downloading an Amazon Template
Creating a Plytix Feed for Amazon
Uploading Your Products into Amazon
*Skip to any section in this article by clicking on the links above
Downloading an Amazon Template
There are two main ways you can go about uploading your products from Plytix to Amazon:
- One is to generate your feed in Plytix and then format the file using one of Amazon’s templates before uploading your products into Amazon Seller Central. This is helpful because all the columns and fields will be formatted according to Amazon’s requirements and no manual matching will be needed.
- The second option would be to directly upload your Plytix feed into Amazon and map the required fields upon upload.
If you would rather have your columns in Amazon’s format for your product type, the first step is to download a file template from Amazon Seller Central.
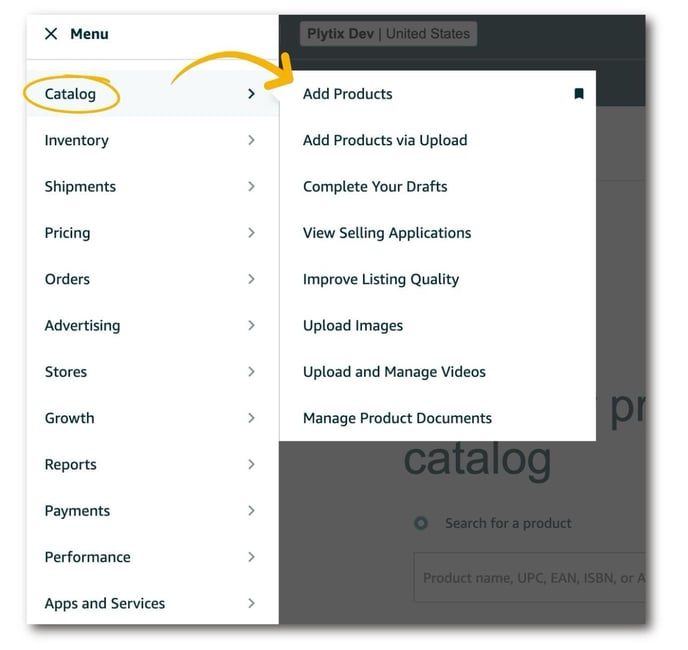
To do so, head over to Amazon Seller Central and click on the side bar menu.
1. Click on 'Catalog', then 'Add Products'.
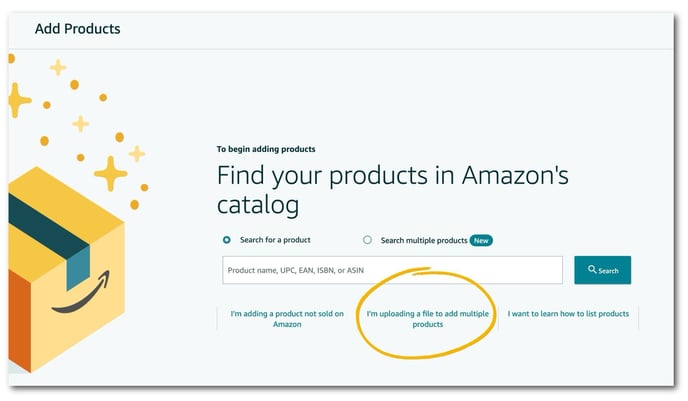
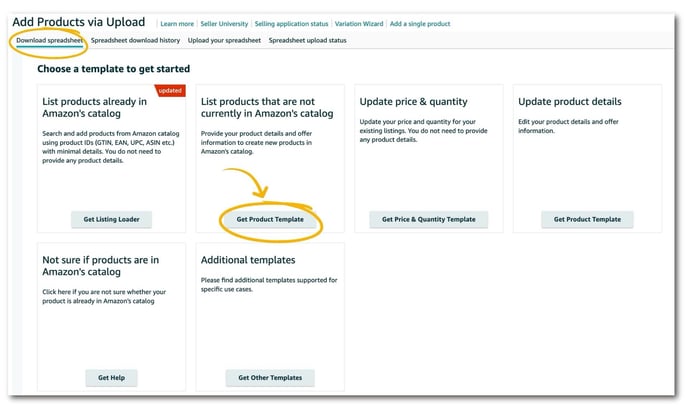
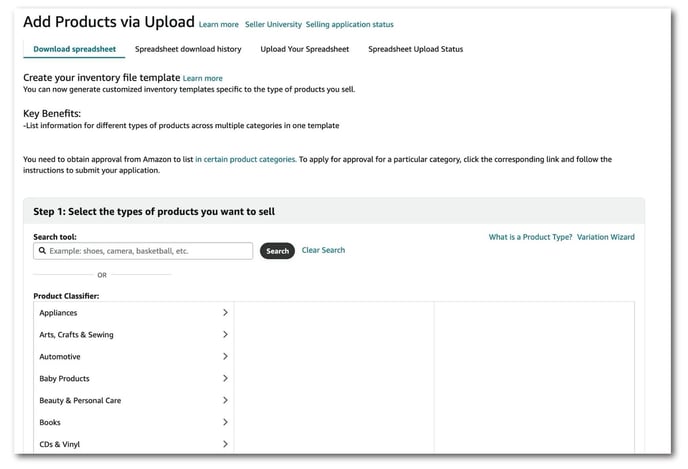
3. Then, select the tab “Download spreadsheet”. Click ‘Get Product Template’.
4. A pop up window will show up with Marketplace options to choose from based on where you’re selling your products to.
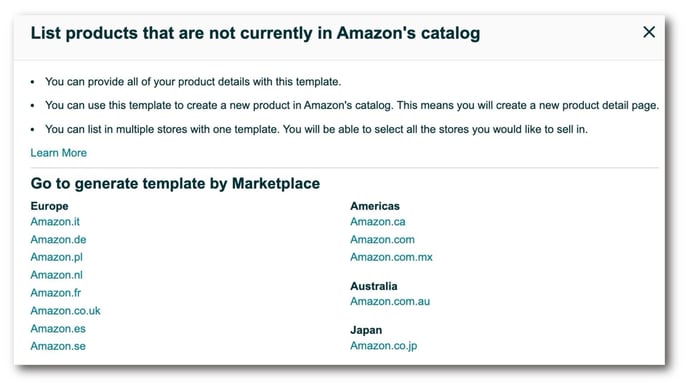
5. Follow through the settings to select the types of products you’re selling.
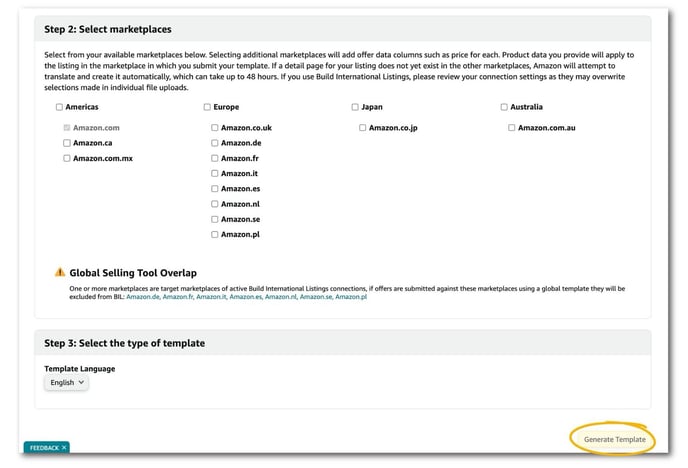
6. Select the marketplaces you’re selling to and the language of your template. Then, click ‘Generate Template’.
Save your template for later use before you upload your products to Amazon. Find more information about it below.
Creating a Plytix Feed for Amazon
Creating a feed for Amazon Seller Central is a similar process whether you will later use the Amazon file template you generated or will directly upload your Plytix file into Amazon.
To create a feed for Amazon Seller Central:
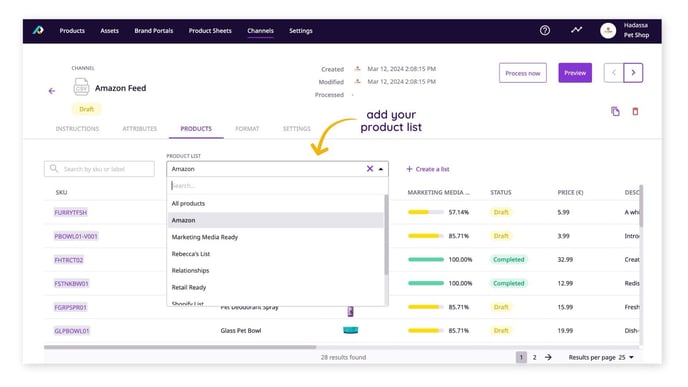
- First, make sure that you have already created a product list with the products you will be syndicating to Amazon.
ℹ️ Click here to learn how to create a product list.
2. Once you have your product list set up, create a CSV/XLSX channel for your Amazon feed.
ℹ️ Click here to learn how how to create a channel.
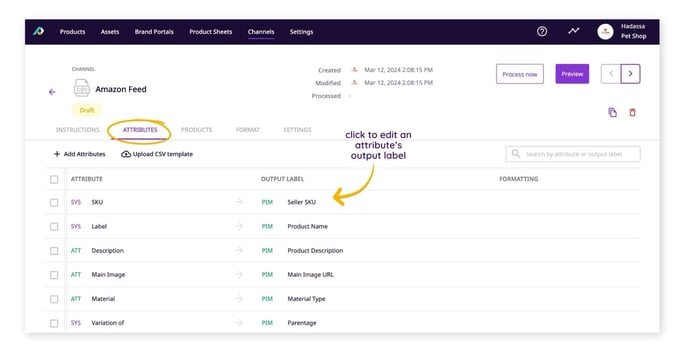
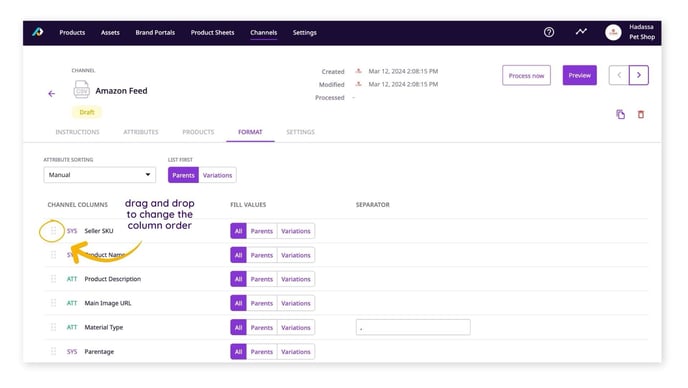
3. In the “Attributes” tab, add all the attributes you will be sending over in your file as an output.
To simplify this step, you can also upload a CSV template to your “attributes” tab. By doing this, you will not have to manually rename and reorder your attributes to match the columns of the Amazon template you’re using.
Please note that Amazon templates are in XLSM format and have an additional row in their file. So, in order to import your Amazon template into your Plytix channel, you must first:
- Delete the first row of your Amazon template.
- Convert the file into a CSV format. This can easily be done by opening the file with a spreadsheet reader and exporting it as a CSV.
If you are using an Amazon template, this step is particularly important, since you will need to follow the column order of the Amazon template we selected; so, the order of the attributes need to match the one in the template.
💡 If you have previously uploaded your Amazon template in your channel, the attributes will already be in the right order. Otherwise, you can always drag and drop your attributes to reorder them as needed.
7. If you are using an Amazon template, copy and paste the text from your Plytix feed to your Amazon template file to populate the template with your product information.
If you're uploading your Plytix CSV directly into Amazon, skip to the next section.
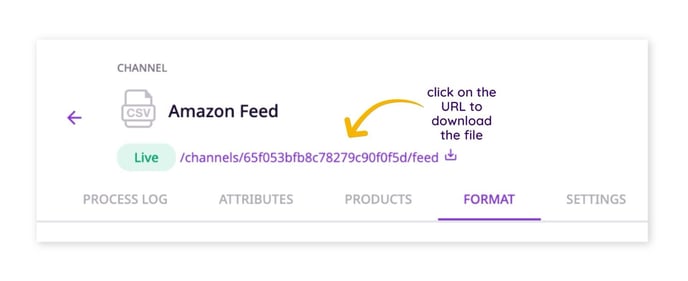
Once you have this file set up, you can then upload it to your Amazon account.
Uploading Your Products into Amazon
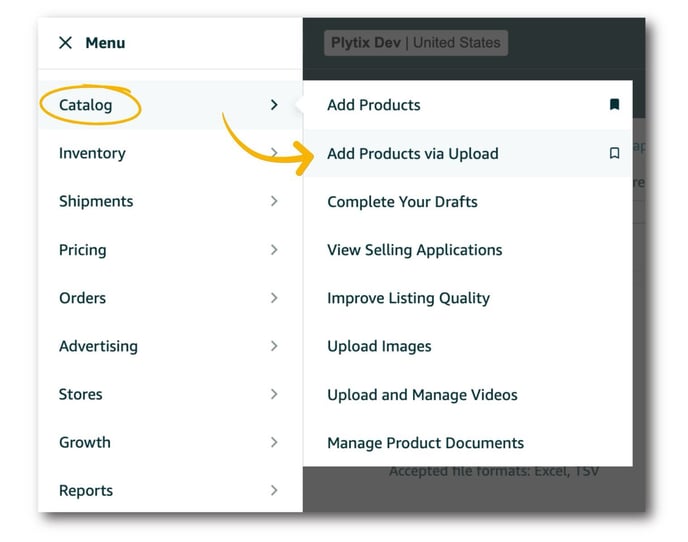
- In your Amazon Seller Central profile, click on the left-hand side menu of the page. Select “Catalog” then, 'Add Products via Upload'.
2. Upload your file. Then, in the “File Type” options, click on “Inventory Loader File”.
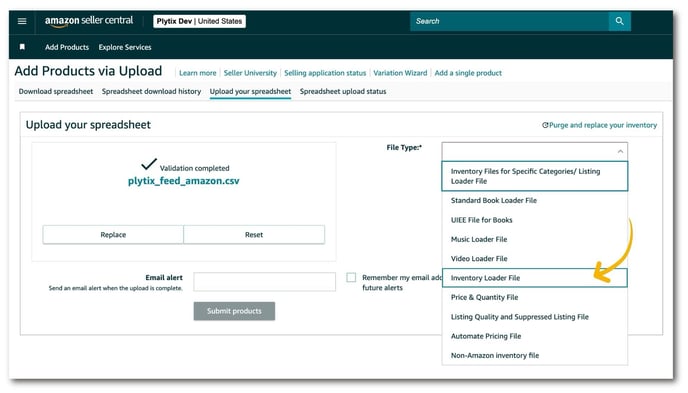
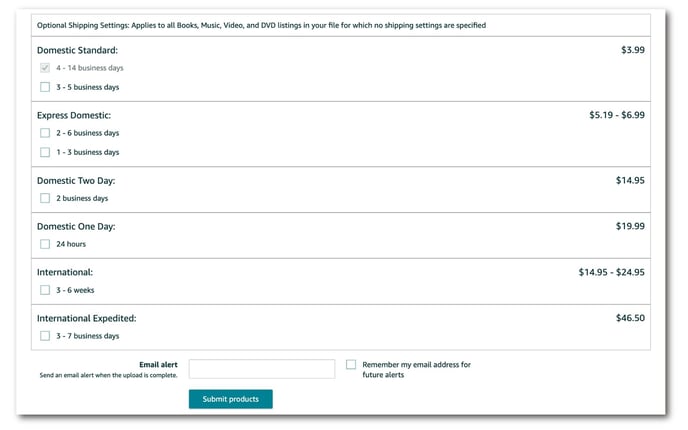
If you’re not including books, music, video, or DVD products in your listings, you can ignore the “Optional Shipping Settings".
3. Click ‘Submit Products’. If you are submitting a file that does not follow Amazon’s template formatting, you will need to follow a couple of extra steps to select your product categories and map Amazon’s fields.
ℹ️ Columns will be automatically matched if you are using the same Amazon product fields label in your column names.
4. After you’ve uploaded your file, you will see a confirmation message saying your file has been uploaded.
If there are no errors, your products will be added to your Amazon product listings.
What's next?
- Learn about Plytix's Shopify integration
- Learn how to import products to WooCommerce
- Learn how to create a product data feed with Plytix's Google Shopping template
Is there anything you were hoping to find in this article that is missing? Did this article answer the questions you had? Let us know in our Help Center feedback form! 🙌