
Channels is a module of Plytix where you can set up product feeds to syndicate information to different systems, marketplaces, and other platforms. In this article, we will show you how to add and set up channels.
Channel Type, Name, and Status
Types of Channels
There are 5 different types of Channels (not including our Shopify connector): XML, CSV/XLSX, NDJSON, and the Google Shopping template. Each has a similar basic set up, but the formatting section for each type of channel is a little different. This article will show you how to set up the basics. If you want to see more about the different format types, visit these articles:
- Output Format For CSV and XLSX Channels
- Defining the Data Format For XML Channels
- Defining the Data Format for NDJSON Channels
- Creating and Managing a Shopify Channel
-
Creating a Product Data Feed Using Plytix’s Google Shopping Template
ℹ️ CSV and XLSX are grouped into one channel type because they are interchangeable. You can choose the spreadsheet file format upon export or in the scheduling tab of the channel.
Adding a new Channel
All Channels are managed in the Channels section of Plytix. This area can be found on the top menu of the main navigation bar.
To create a new Channel:
- Go to the Channels section
- On the right of the screen, click "Add Channel"
 3. Then give your Channel a unique name, and choose the type
4. Click "Add Channel" to create the new Channel

5. You will be taken to the Channel Detail View where you will be greeted with some instructions that will tell you how to set up your Channel. You can add products and attributes to configure you Channel and you can also configure the settings for how to process the Channel data.
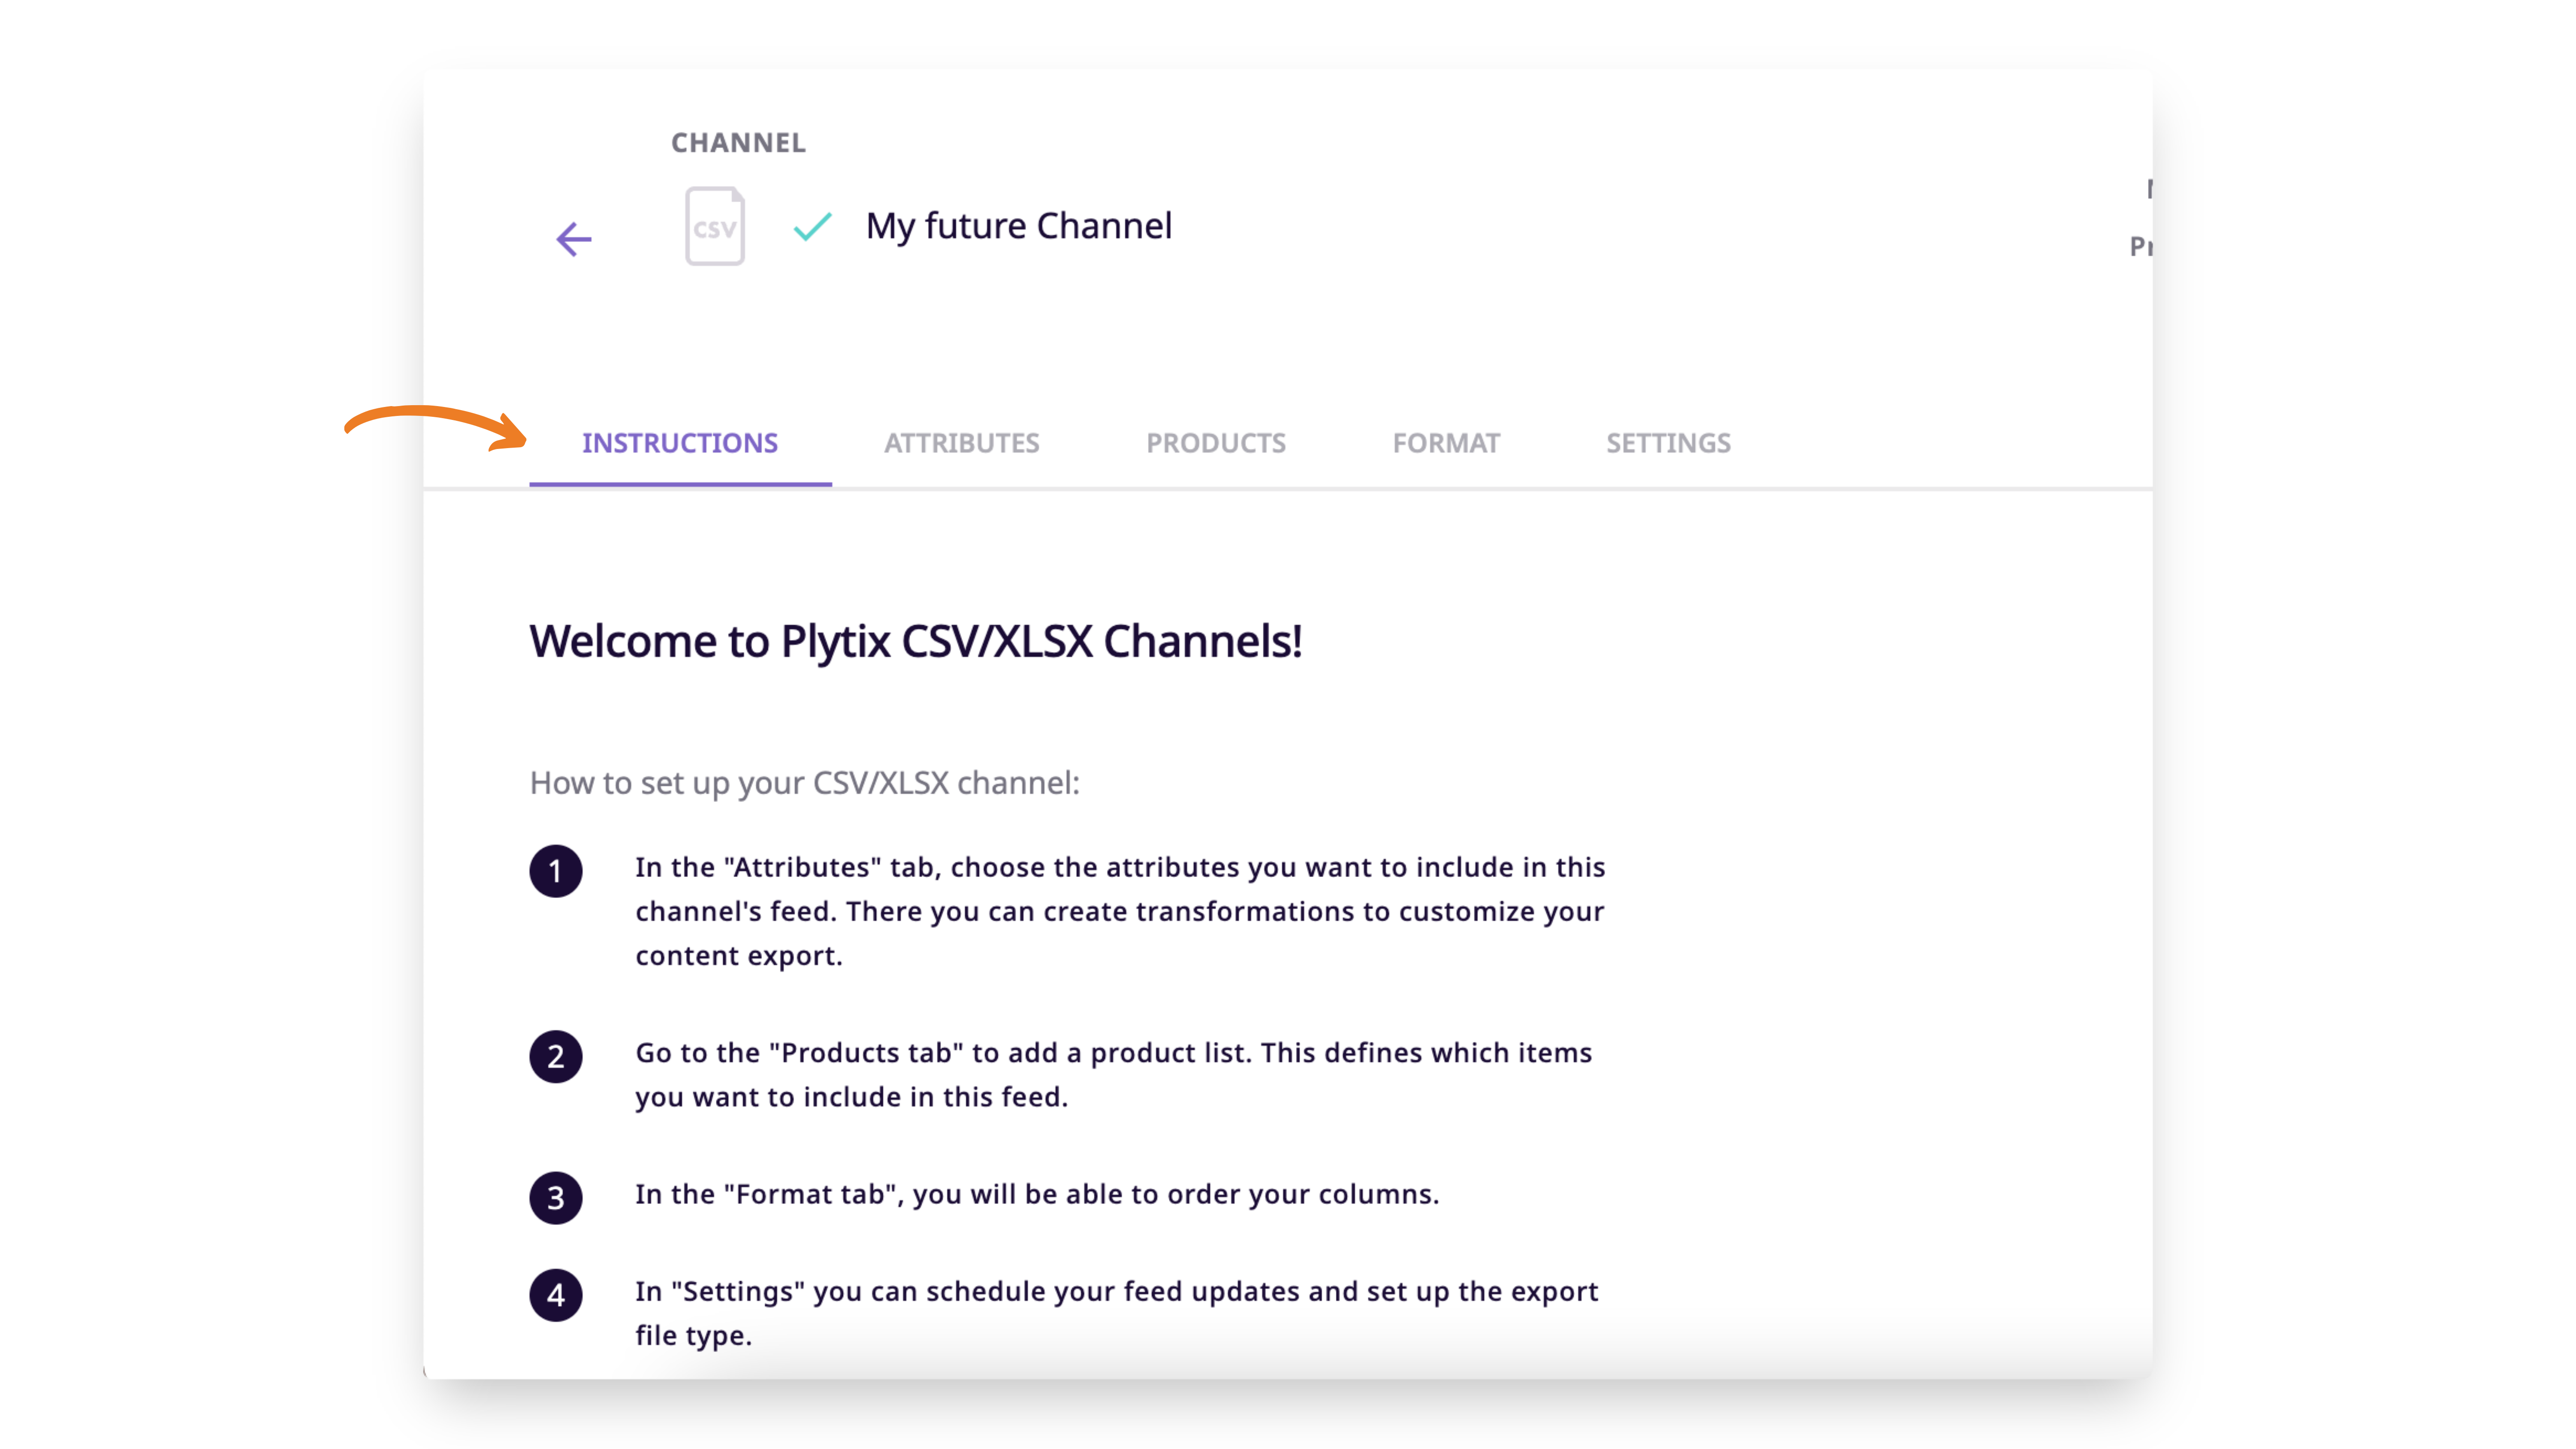
ℹ️ The "Instructions" tab becomes the "Process Log" tab after the channel is processed
ℹ️ All channels are set to "Draft" by default before they are processed. Any channel that is in "Draft" will not be counted towards one of your Live Outputs. After you process your channel, it automatically becomes "Live" and is counted as one of your live outputs. Click to learn more about Live Outputs.
Channel Detail Header
Every Channel type has the same available areas in its detail view. We will give you a quick tour of what you can find in the header area.
- Channel Name, Status and Type
- Channel Information
- Preview and Processing
- Navigation
- Duplicating and Deleting
- Channel Configuration Tabs: Instructions (which becomes the "Process Log" tab after the channel is processed) Attributes, Products, Format, Settings

Channel Name, Status, and Type
Here you can see what type of Channel you have created, if the Channel is active or not, and the name of the Channel.
Status
The status of the Channel is indicated below a channel's name as "Draft" in yellow or "Live" in green.
All channels are in "Draft" before they are processed. When a channel is in "Draft", it does not count towards your live outputs.
Once a channel is processed, it becomes "Live" and is counted as one of your live outputs. A "Live" channel will have a URL that is available for use and if it runs on a processing schedule, then the processing will occur at the scheduled time.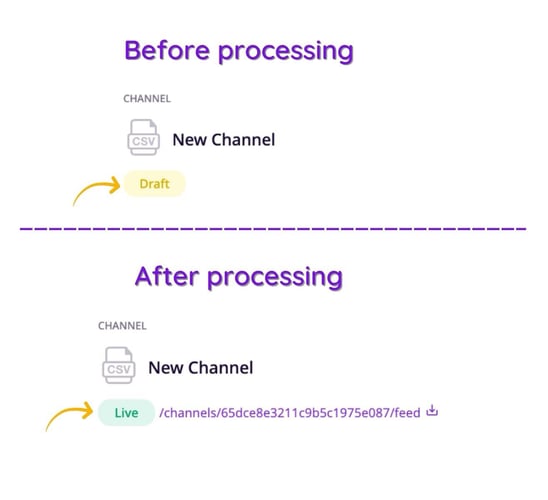
Name
You can also edit the Channel name by clicking on it, and to save press "Enter" on your keyboard. 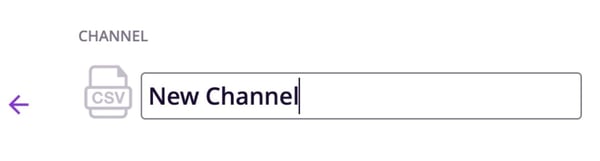
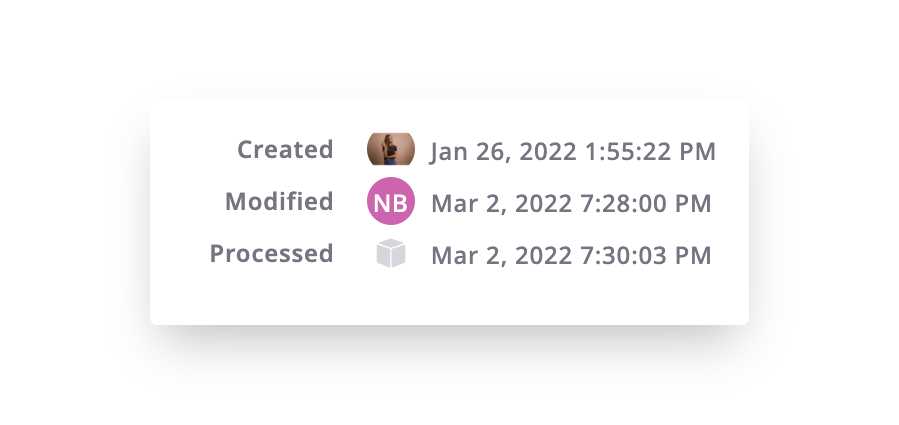
Channel Information
Here you can see when and by which user a Channel was created, last modified, or the last time the Channel was processed.
Process and Preview
The "Process" button will update the data in your Channel on command and will change your channel from "Draft" to "Live" .
The "Preview" button will let you see what your Channel output will look like before you process it. Per default, these are disabled because you need to select your attributes and product list before you can process your channel.
Preview
By clicking the preview, you can see how your information will appear before you process it. This preview will mimic the data output you have chosen, whether it is a spreadsheet or an XML file.
Processing
When you click the "Process now" button, you will see an overview that will provide you some options when updating and sending your product content:

⚠️ Processing a channel will add it to your count of Live Outputs. Do not process your channel if you only want to keep it as "Draft".
Product Processing
These options tell Plytix which products to include in your feed.
You can choose:
- All products: export every product in your channel list
- Updates only: export only products that are new or have had changes in your channel attributes since the last time it was processed.
💡 Only sending updates keeps your processing times short
Product Levels
Here you can choose your product preferences referring to parent-variant relationships. You can:
- Only export products included in the list
- Export all superior product levels for variants on the list: Process all parent products for the variants in your list. This option will include the parents, even if they're not in the product list.
💡 Some sales channels require parent products to always be included when processing variants. In this case, choose the second option "Export all superior product levels for variants on the list"
Navigation Buttons
The navigation buttons allow you to move to the next Channel in your list. This is helpful when processing many Channels or making updates across multiple Channels.
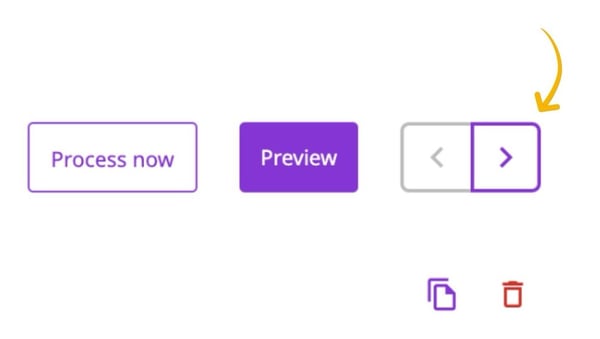
Duplicating and Deleting
You can also duplicate and delete a Channel from the detail view.

Duplicating a Channel will clone all the Channel settings down to the attributes and scheduling options. This is particularly useful if you have multiple storefronts or marketplaces that use the same type of set up.
ℹ️ Duplicating a channel does not include duplicating its status. If you duplicate a "Live" channel, its duplicated version will be in "Draft" and will only become "Live" after it is processed.
Deleting a Channel will require confirmation as this cannot be undone.
Attributes
Channels allow you to pull in select information from your catalog. The "Attributes" tab will allow you to select the different properties you want to include, that you can then adapt to the output labels for the Channels you wish to send your data to.
You can also upload a CSV template for any channel, that allows you to map your attributes against the information required for each channel.

Here you can:
- Add/remove attributes in your Channel
- Change the output label of your attributes
- Create new attributes using formulas with Attribute Transformations
- Resize your assets
- Rename your assets
- Change image formats
- Change decimal and date formats
- Upload a CSV template of attributes in the right order and format required for your output
💡 If you want to remove attributes from your channel in bulk, you can select the checkbox next to multiple attributes (up to 100 at a time) and then click 'Remove Attributes'.
💡 Search for a specific attribute in your channel by typing its name or output label in the search bar on the right side of the attributes tab.
Products
In this section you can choose which products to feature in your Channel by selecting a product list. The list of products will appear here so that you can review them easily.

⚠️ The attributes displayed in this view are fixed and cannot be customised.
Format
This tab is where you can set up your Channel format in terms of order of items and attributes. These are different depending on your Channel type. To learn more about each Channel type, see the articles below:
- Defining the Format for XML Channels
- Defining the Format for CSV/XLSX Channels
- Defining the Format for NDJSON Channels
Settings
Channel settings let you configure things like:
- What the file name will be
- If you want to include a timestamp in your file name
- The output format (only for CSV and XLSX)
- If you want to send your file to an FTP or Dropbox under "Connections"
- Scheduling automatic processing

Scheduling Automatic Processing
When scheduling your channel for automatic processing you can choose from the following intervals:
- Process every 3 hour
- Process every 6 hours
- Process every 12 hours
- Process daily at a specific time
- Process weekly at a specific day and time
- Process monthly at a specific day and time

When scheduling, you must also choose which products to process from the following options:
- All products
- Updates only
⚠️ If a channel is in "Draft" and you set up scheduled processing, this will automatically turn the channel into "Live" and it will count towards your number of Live Outputs.
Process Log
After you have processed your Channel for the first time, the the instructions tab will transform into a process log in which you can get insights into
- when a process started and who performed the process
- when a process finished
- the current status of a process
- how many products were processed
- the final result of the process
ℹ️ After you have processed your Channel for the first time, its status will change from "Draft" to "Live" and it will be counted towards your number of Live Outputs.
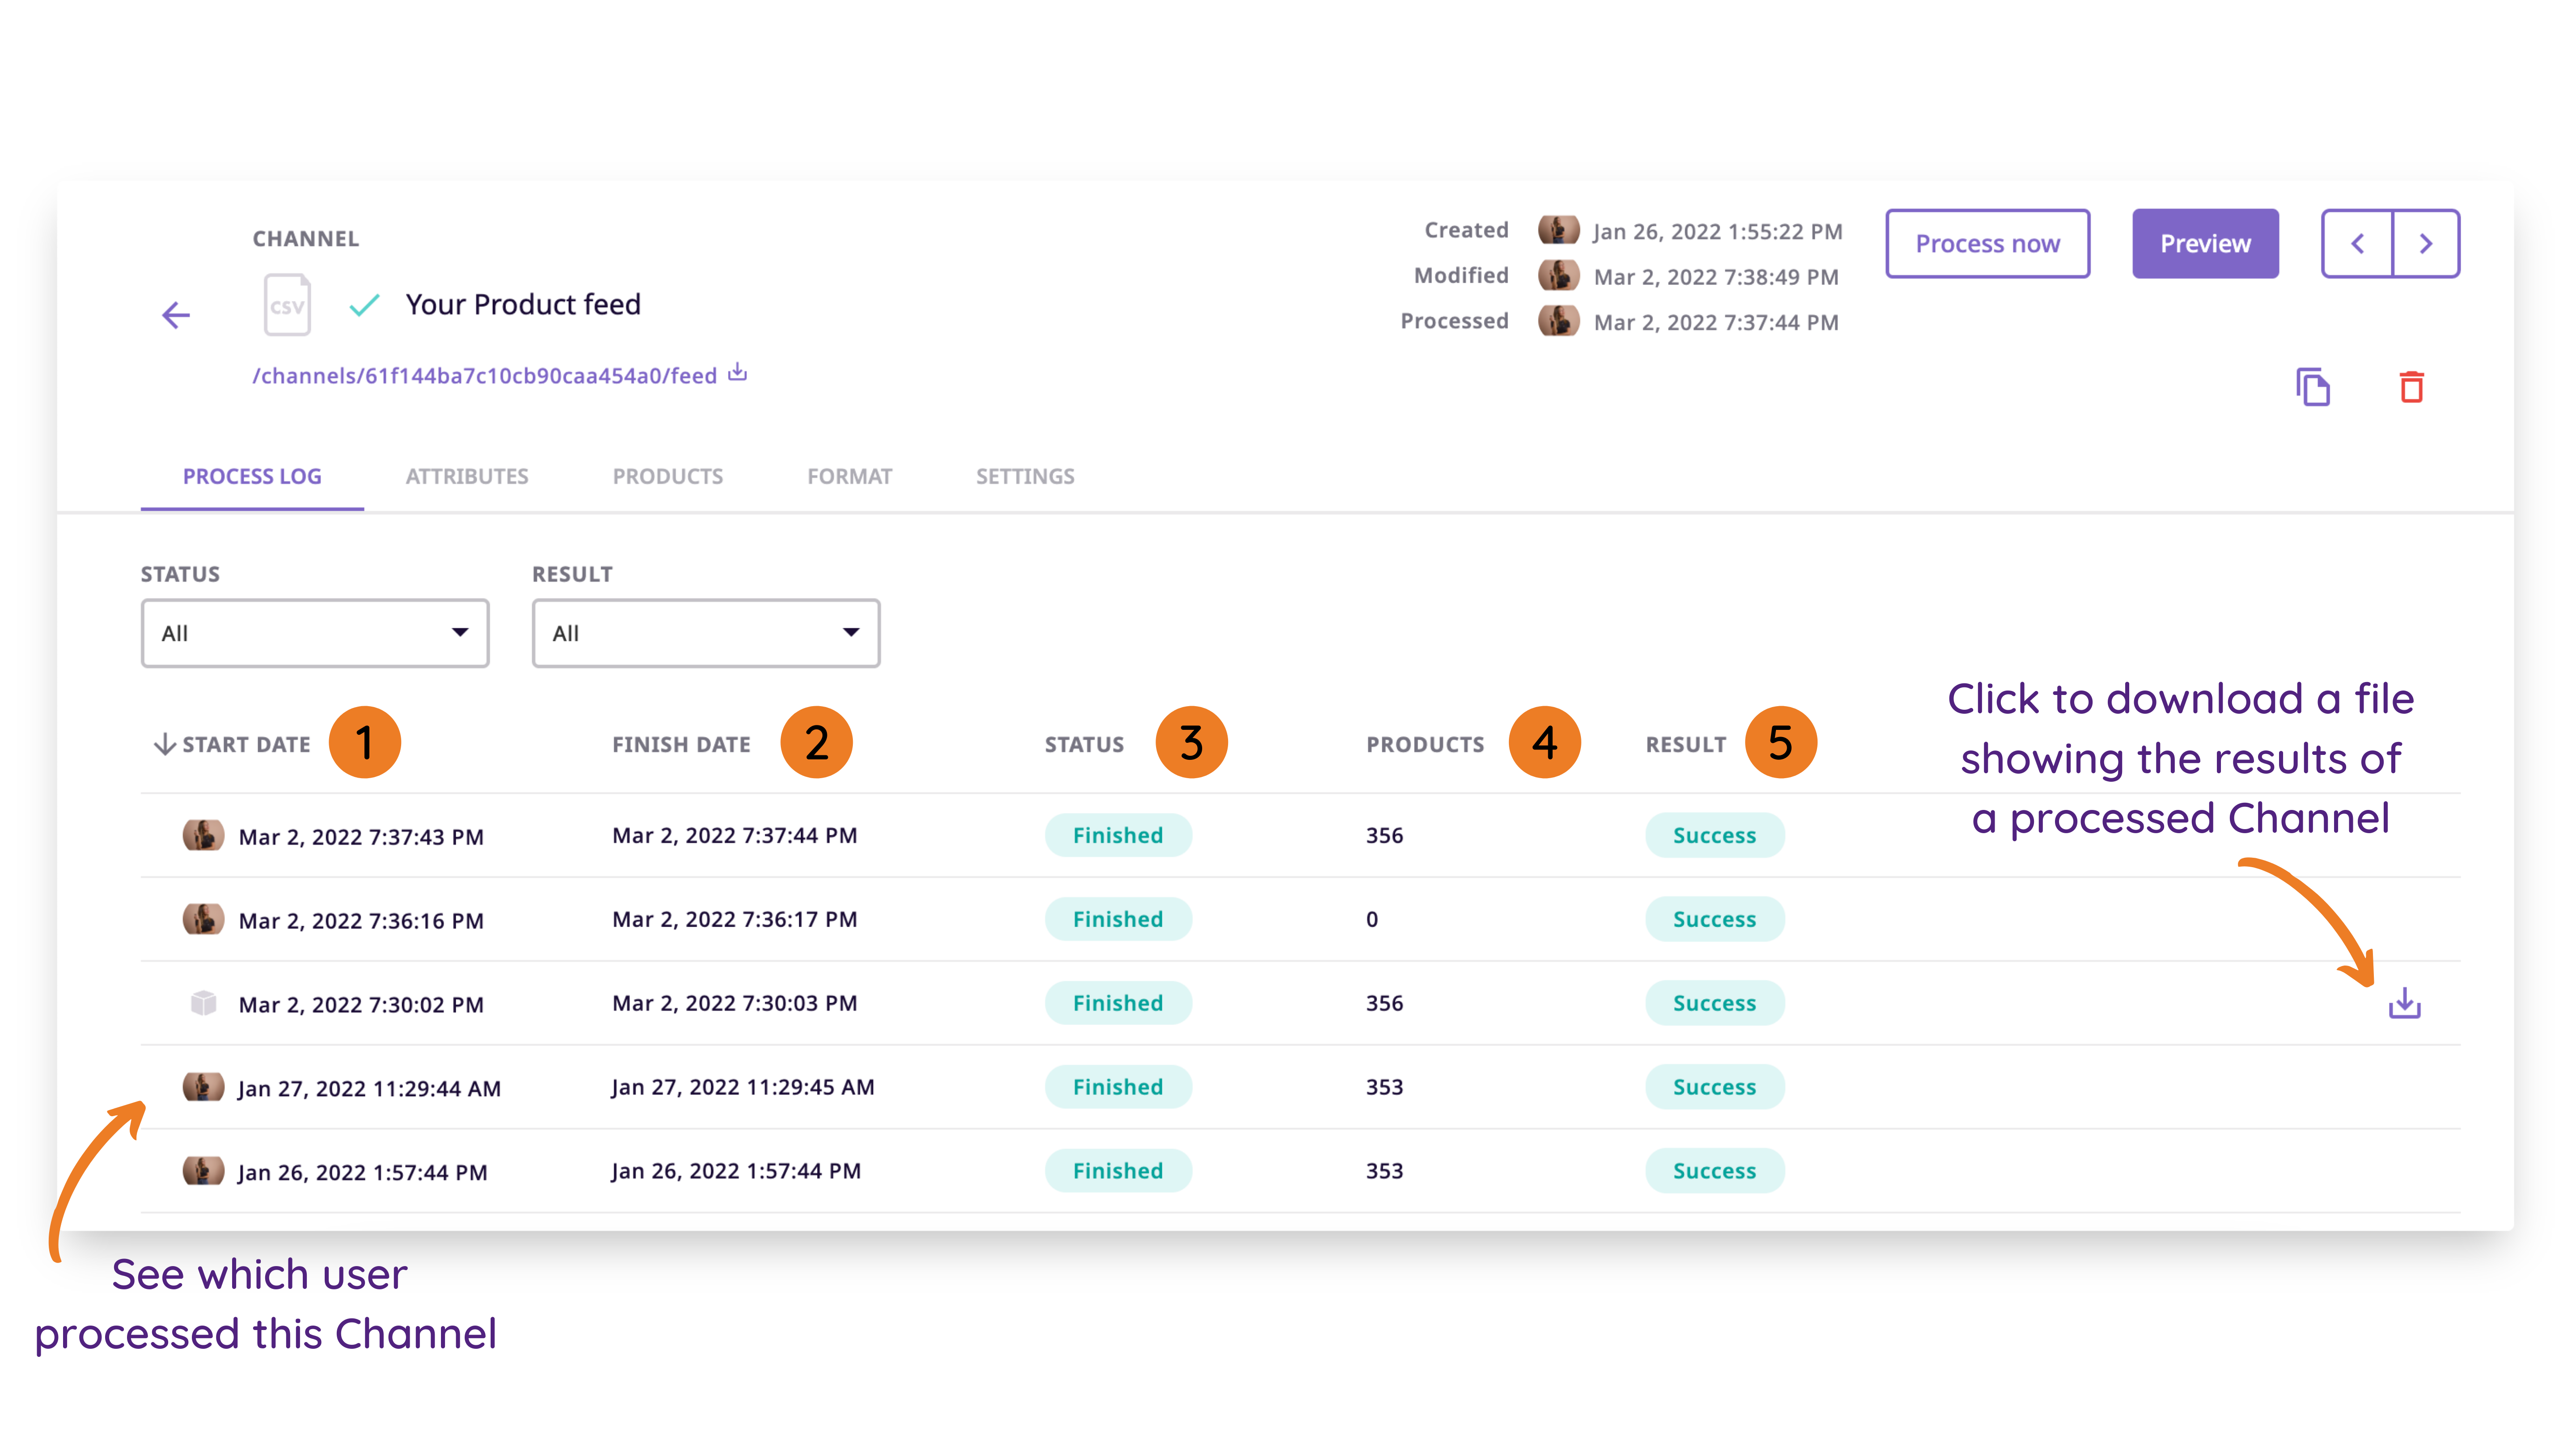
💡 You can download a file of any previous version of the channel within the log.
What's Next
- Learn about setting up FTP and Dropbox connections
- Learn how to set up a feed for Google Shopping
- Learn more about attribute transformations