Connecting a Plytix Channel with Google Sheets
How to use a dynamic URL from a channel in Plytix to send product data to a Google spreadsheet and re-import that data using import feeds
Although you maintain your product data in Plytix, there may be cases where you wish to export that information to a Google Sheet. Doing this one time is as simple as exporting a CSV and opening it in Google Sheets, but if you want a Google Sheet to continuously update, you'll need to do something a little different.
After editing data in a Google Sheet, you may also want to reimport that data to Plytix. This article will teach you how to create a connection between Plytix and a Google Sheet that flows both ways.
Importing Data into a Google Sheet
Importing Data into Plytix from a Google Sheet
*Skip to any section in this article by clicking on the links above
ℹ️ For this process you will need both a Google account and import feeds enabled for your Plytix account.
Exporting Data From Plytix
To begin, you will need to add the data you want to export to a CSV channel. If you're not familiar with this process you can learn about creating a CSV channel in Plytix here.
Once you have processed your CSV channel, you will see that a link appears below the name of the channel. Click on the icon that appears when you hover of the link to copy it.

Importing Data into a Google Sheet
Open a new Google Sheet. In cell A1, paste the following formula:
=IMPORTDATA("https://your_channel_link_here")

Replace the link above (the text between the quotations marks) with the link from your channel, which you copied in the last step. Once you hit enter, you will see the cell display the message, "Loading."
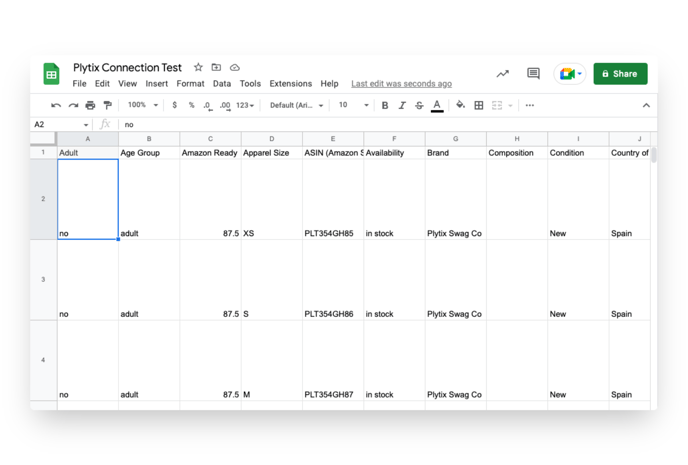
Shortly thereafter, your Google Sheet will populate with the product information you selected in your channel.
Widgets powered by spreadsheets using the ImportData function refresh approximately every 15 minutes.
ℹ️ Please note that, depending on your data type and format, Google Sheets may fail to process it.
Importing Data into Plytix from a Google Sheet
To make your Google Sheet accessible to Plytix, you will need to publish it to to the web. From your Google Sheet, click on 'File, Share, Publish to Web.'

In the popup that appears, select the sheet you have just created, be sure to select 'Comma-separated values (.csv)' format, then click publish. 
Copy the link that appears.

Now return to Plytix.
From the main menu, select 'Products,' and 'Import.' on the left side of the screen, click on 'Feeds.' From here, click on 'Add feed'.

On the page that appears, give your feed a name and paste the link (the one you copied after publishing your Google Sheet) into the "File URL" text box. Adjust the import settings to schedule imports at your desired interval. Click 'Next.'
To add your new feed, you'll go through the same process as you would for a normal import. Check the preview to ensure you're using the correct column separator, text delimiter, and charset. If the data looks good, click 'Next.'
For the last step, most of your attributes should be matched automatically since this data is already in the system. The only exceptions will be completeness attributes and system attributes that cannot be imported, like "Date Created" or "Date Modified." Simply leave these unmatched and Plytix will ignore them. 
Now click 'Save import settings' to finish setting up your feed. You'll see the new feed appear in your list of feeds on the 'Feeds' page. Make sure that it is switched to 'Active.' 
To test the feed, you can click on its name and select 'Process now,' then 'Start processing' to confirm.
Once the feed has finished processing, you'll see a record of the import in the 'Logs' section of the 'Import' area.

You have now created a successful import feed from a Google Sheet.
What's next?
- Check the status of your import with Import Logs
- Learn how to import products with a CSV
- Learn how to import products via feeds