
Setting up product categories helps you navigate your products more efficiently by sorting products into groups from broad to specific. In this article, we will show you how to create and work with categories in Plytix.
Creating Product Categories inside Plytix
Creating Product Categories Upon Import
Editing and Reordering Product Categories
*Skip to any section in this article by clicking on the links above
Creating Product Categories
There are two ways to create Product Categories with Plytix:
- directly inside Plytix
- upon import of a CSV file
Creating Product Categories inside Plytix
To create and manage your Product Categories inside Plytix:
- Navigate to 'Settings' in navigation bar.
- Open the 'Categories' section below "Products."
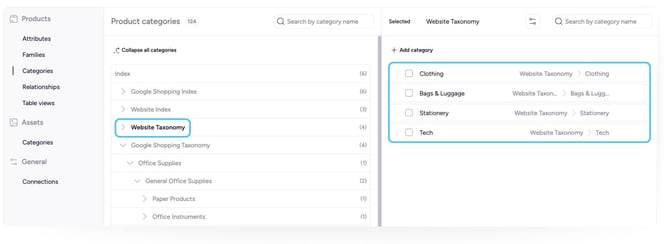
- On the left you can navigate your taxonomy. If you haven't created any categories yet, you'll just see 'Index'. Select 'Index' and click the 'Create Categories' button.
 Whenever you click a category or subcategory in the left column, the underlying data from that section will become visible and editable in the right column.
Continue adding subcategories to each of your categories until they are specific enough to classify all of your products.
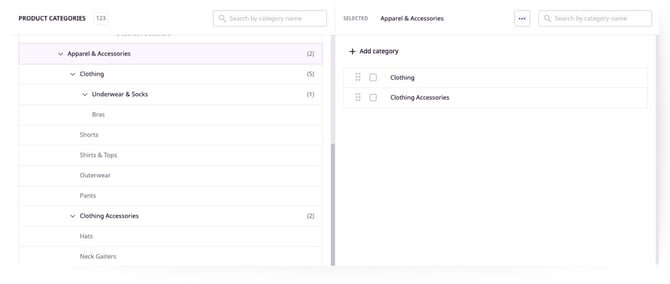
ℹ️ You can add up to 1000 categories at each given category level.
Creating Product Categories Upon Import
You can also create and assign your Product Category Trees in bulk within a CSV import. When doing so, there are a couple of things to keep in mind:
You can establish a hierarchical structure for your Categories by simply separating the Main Category from its respective Subcategories by using a separator such as ">", just as you can see within this example: 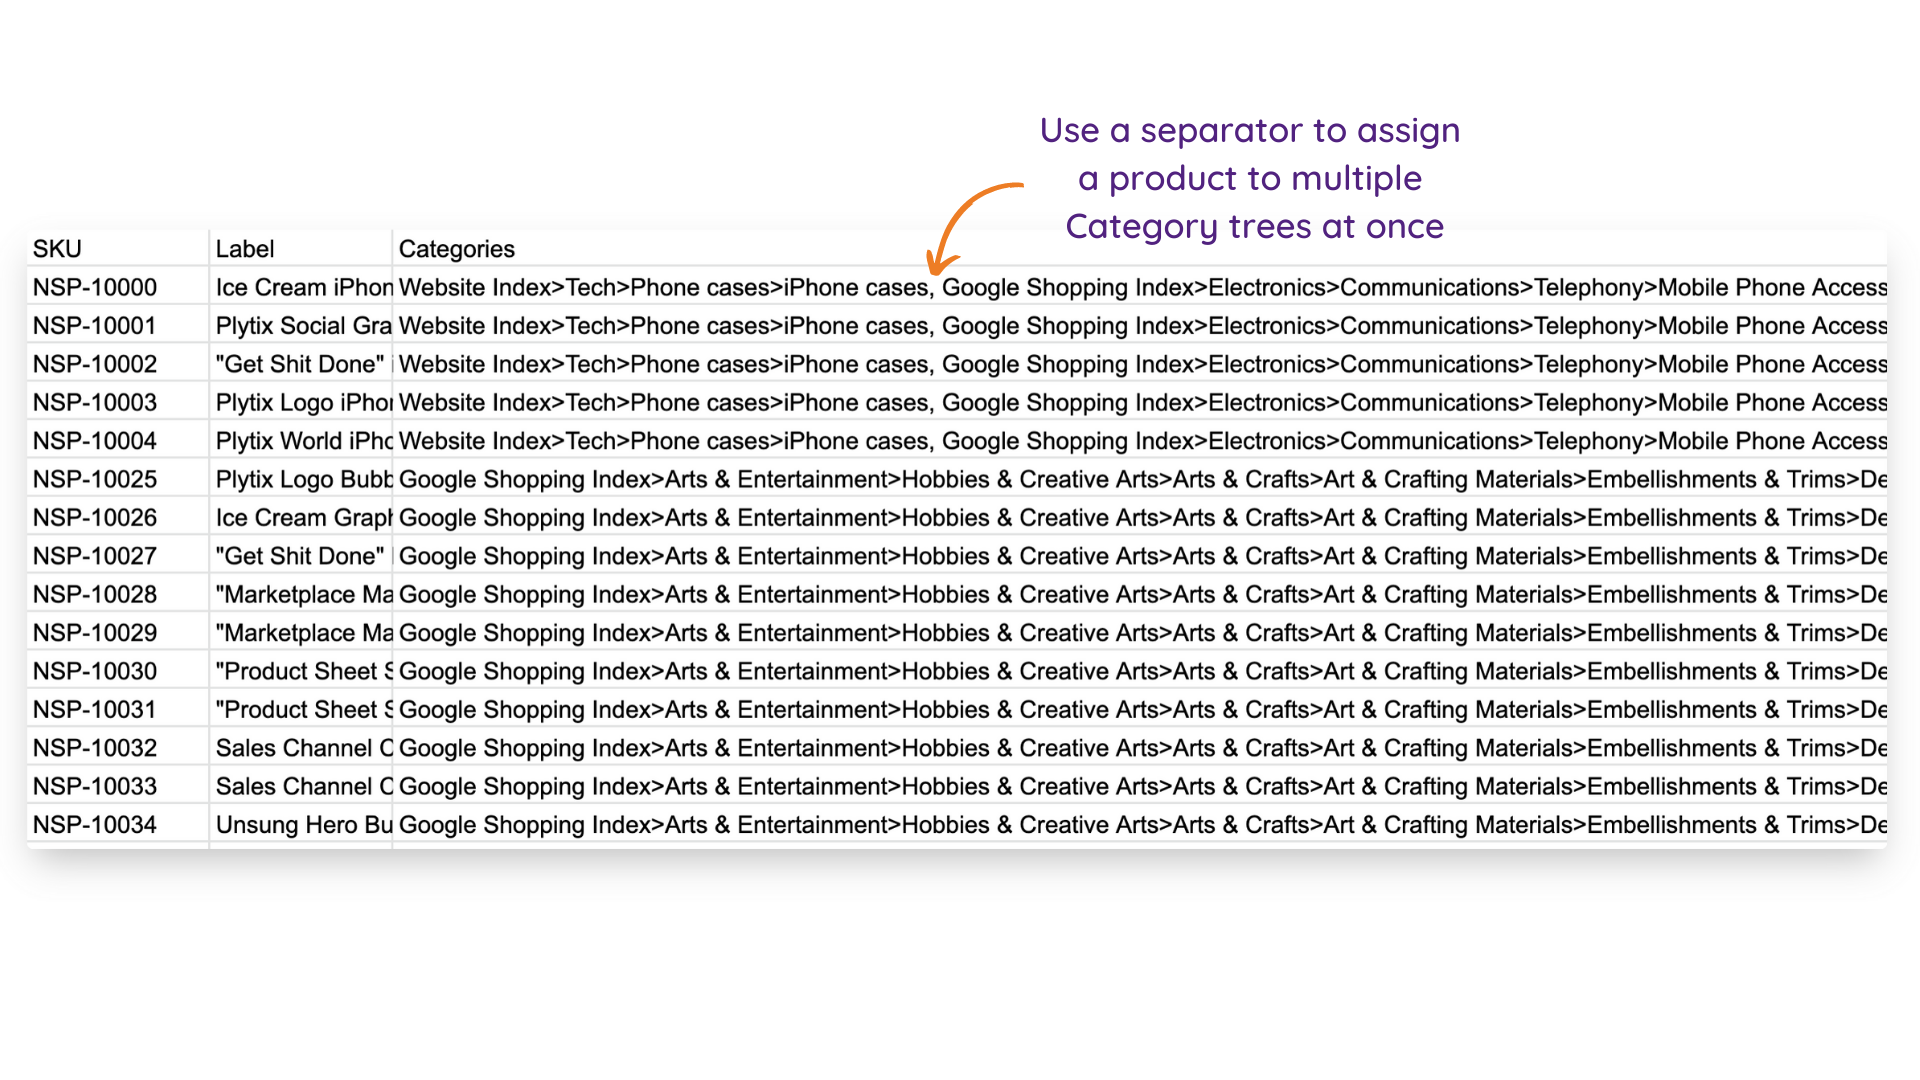
ℹ️ By default the system uses the ">" separator to separate categories from subcategories and a comma to separate distinct categories. However you can use your own custom separators, which you can define within the mapping process on import. Just make sure to use coherent separators.
💡 A Product can be assigned to multiple Category Trees at once. Just make sure to use a distinct separator as the ones used to define one Category Tree.
⚠️ Categories are case sensitive. Make sure to always use the same spelling for each category. If for instance you write "iPhone cases" and "iPhone Cases," two different categories will be created.
Editing and Reordering Product Categories
Editing and Deleting
To rename a category, click its name in the right column view, type the new name, and hit enter to save.
If you want to move or delete a category, you can hover or click on that that category and action buttons will appear.

You can find the same actions in the button at the top of the right column.
Reordering
Every time you create a new part of your taxonomy, you can adjust the content within the taxonomy level by dragging and dropping subcategories.
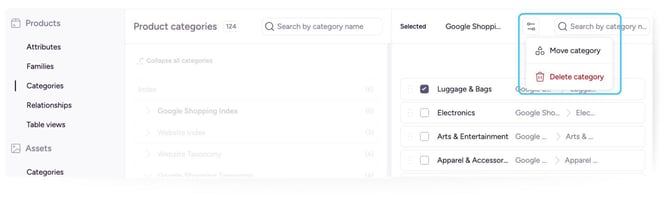
If you wish to move a category to a different level of the tree, you can do this by selecting the category and clicking the three dots that appear at the top of the column on the right.

If you choose to 'Move category', a new window will appear. Select a category to move it to, or type a category name into the search bar. Select the category and click 'Move'.
ℹ️ After you've created your categories, click here to learn how to assign products to them.
What's next?
- Find out more about how to assign products to categories
- Learn how to create and manage asset categories
- Learn how to set up product variations