
This article explains how to get your product data from Plytix to Magento using a scheduled feed. Since Magento does not support scheduled feeds for product data upload, it's necessary to use a plugin. In this case, we'll show you how to use Wyomind to take the information from your Channel in Plytix and push it through to your Magento store. For this process you'll need a Magento account and the Wyomind Mass Product Import & Update plugin, available here.
ℹ️ Please note that this guide is intended as a useful resource for Plytix customers, but Plytix cannot be held responsible for use of third-party tools.
Sync Product Data from Plytix to Wyomind
Adjust Import Profile Settings
*skip to any section in this article by clicking on the links above
Set up a Channel
With Wyomind, you have the option of uploading either an XML or CSV file from a URL. To get this URL, you'll need to create a channel in Plytix.
You can learn the basics of setting up a CSV or XML channel by following the steps outlined in our article, Creating a Channel.
Upload Product Data from Plytix to Wyomind
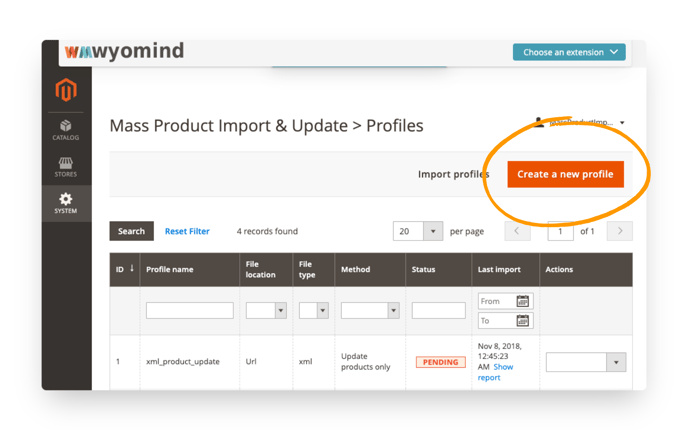
After logging into your account in Wyomind, click on 'System' in the menu on the left side of the screen. From here, you'll select 'Create a new profile' and add the link to your CSV or XML channel in Plytix.
Adjusting Import Profile Settings
A preview of your data will appear; you can minimize or drag it to the side of the screen so you can create your import profile.
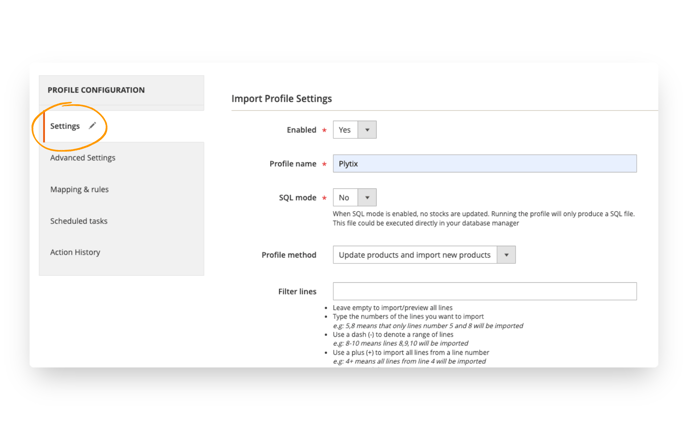
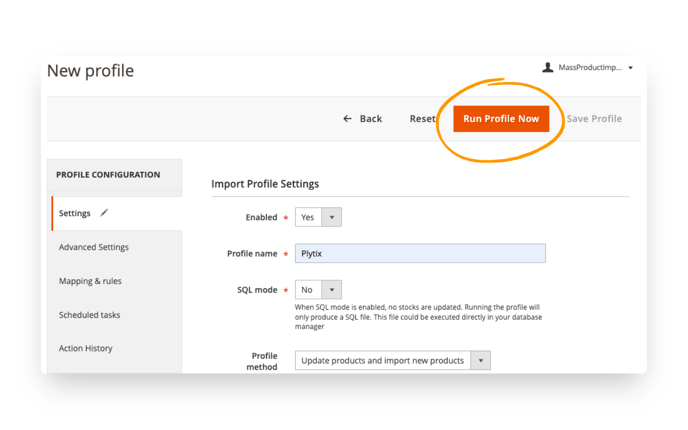
In the menu for creating an import profile, you'll see that there are five tabs. The first one that loads when you create a new profile is the 'Settings' tab.
- Make sure that your new profile is set to 'Enabled' or it will not run.
- Give your profile a name that clearly defines where your data comes from.
- Set 'SQL Mode' to 'No'.
- For 'Profile Method', choose 'Update products and import new products'.
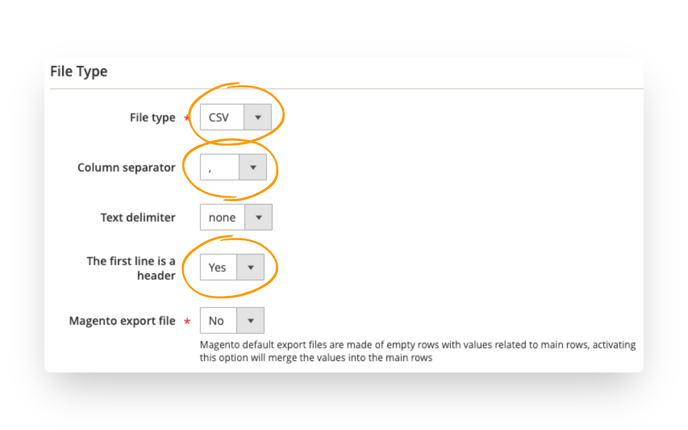
Further down, you'll see "File Type" settings. Choose 'CSV' with a comm as the column separator. For the 'first line is a header' dropdown, select 'yes'.
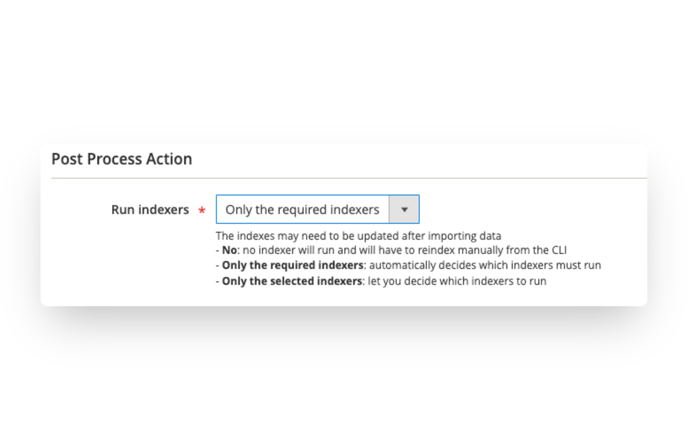
In the "Post Process Action" section, select 'Only the required indexers' for the 'Run indexers' dropdown.
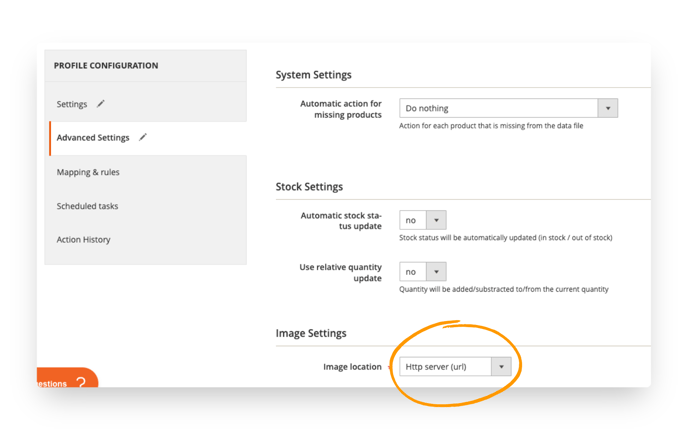
Next, navigate to the 'Advanced Settings' tab of the profile configuration menu. Make adjustments to the settings as needed for "System Settings" and "Stock Settings." For image settings, select 'Http server (url)' as the 'Image location'.
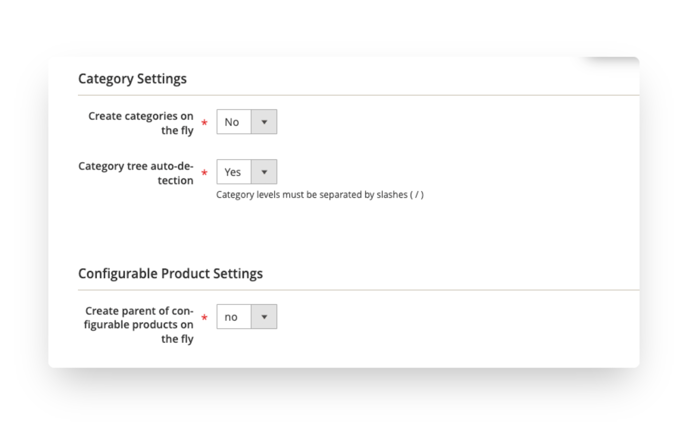
For setting up categories, we recommend selecting 'Yes' for 'Category tree auto-detection'.
ℹ️ Wyomind requires that categories be separated by '/' (slash) instead of '>' (greater than sign). You can change the categories separator by hovering over your categories attribute in your channel and clicking on the settings icon.
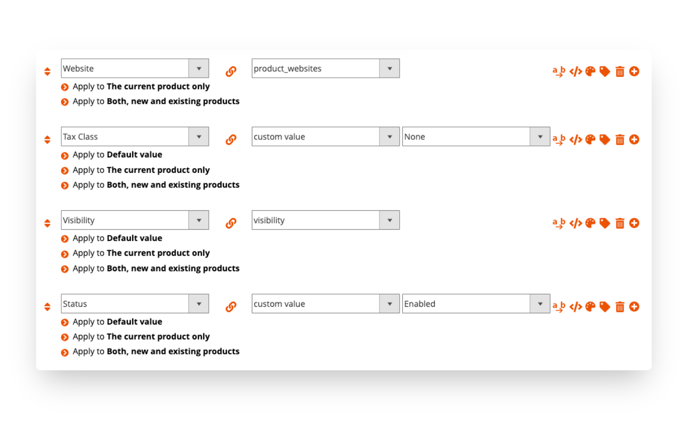
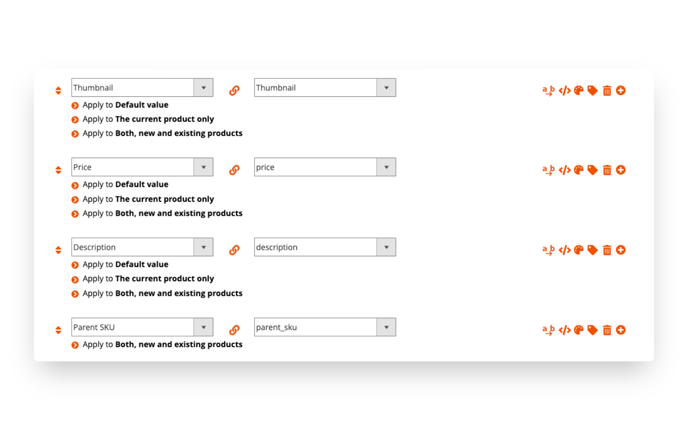
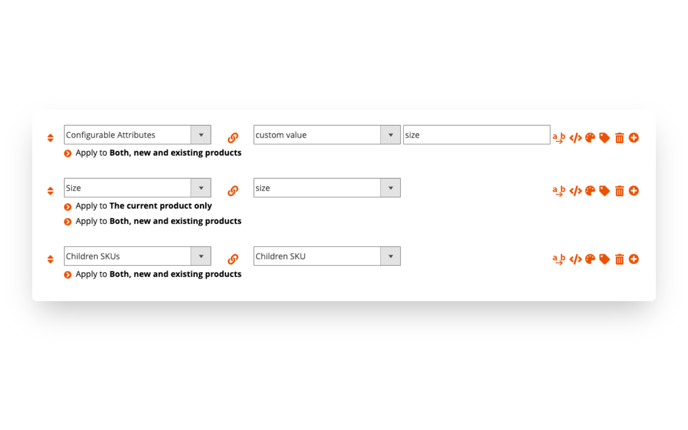
Now it's time to map your columns. This is a similar process to mapping attributes in Plytix. For some attributes like 'Has Options' you'll need to select a custom value and make adjustments to map it to your data.
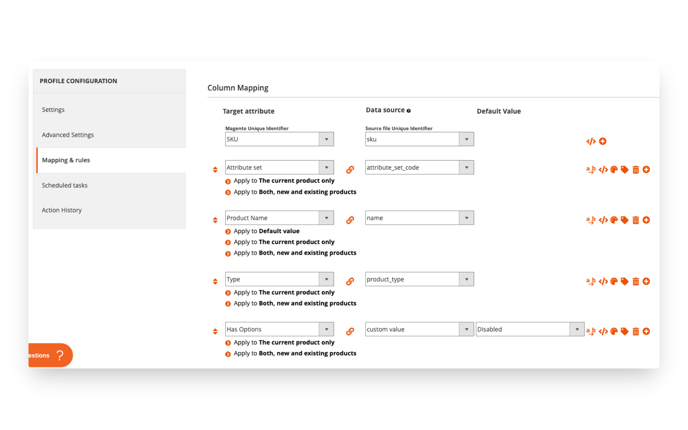
Continue adding attributes until all of the columns in your file have been mapped.
💡 Your setup will look similar to this, but it may not be exactly the same.
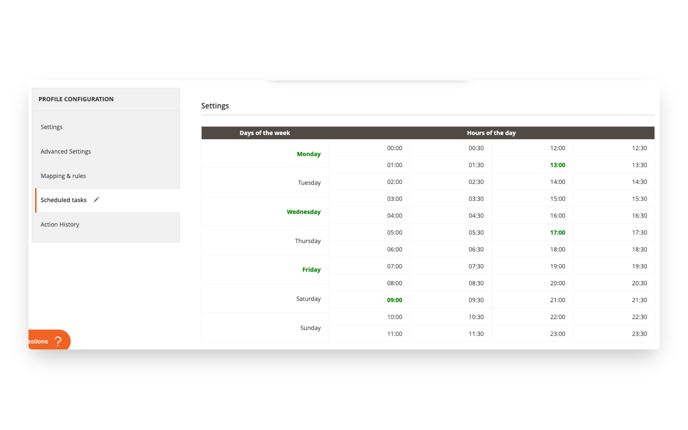
The next tab in the profile configuration menu is 'Scheduled tasks'. Here is where you can choose the days and times you wish to automatically import your product data.
Import Your Data
After you've finished scheduling, scroll up to the top and click 'Run Profile Now'.
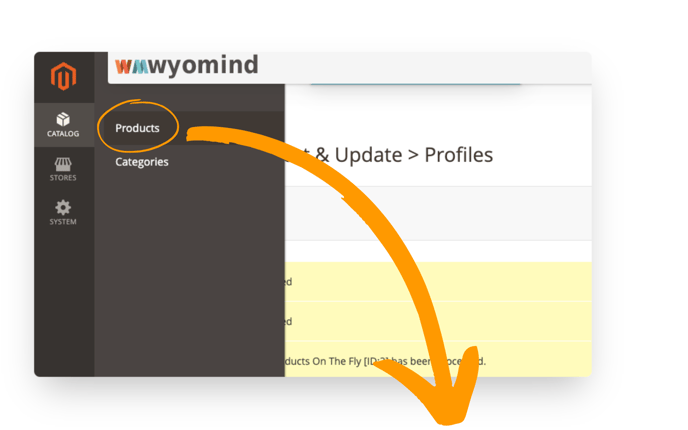
Once the import is complete, you'll see a notification in yellow that is has been processed. Select 'Catalog', then 'Products' from the Wyomind main menu on the left side of your screen to view your product listings.
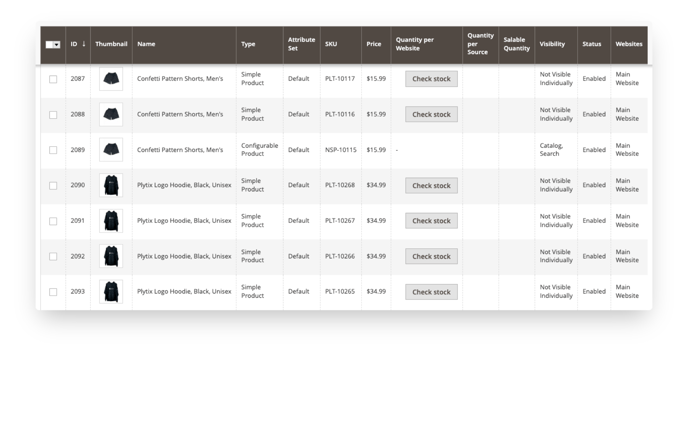
Your products will now be visible in your Magento store!
💡 Because of variations in product data, setting up Wyomind for Magento can require some experimenting and troubleshooting if it doesn't work on the first try. If you need additional support, feel free to reach out to a member of our customer success team and we'll be happy to assist you.
What's next?
- Learn how to create and manage a Shopify channel
- Learn how to create an XML feed for Facebook Catalog Manager
- Learn about importing products to WooCommerce via WP All Import