
Product relationships allow you to create connections between products to assign different types of associations, like recommended products, upsells, sets, or packs.
At an internal level, this can help you view related products if you're looking to optimize their information. At an external level, product relationships can help you improve your product searches on your e-commerce websites, or highlight the connection between products in your e-catalogs for clients.

ℹ️ Creating a relationship and assigning products to it are two separate steps. Creating a relationship (covered in this article) sets up the relationship type itself, such as "Recommended Products" or "Bundle Contents." It doesn't link any products together yet. Once your relationship exists, head to ourAssigning Products to a Relationship article to learn how to actually connect it to specific SKUs.
Formatting Relationships in a Spreadsheet
*Skip to any section in this article by clicking on the links above
How to Create Relationships
Relationships can be created either through your Plytix Settings directly in your PIM,or via import.
Create Relationships in Settings
- Navigate to 'Settings' in the navigation menu on the left side.
- In the left menu choose 'Relationships'.
- Click ' + Create Relationship' on the left.
- Name your relationship (don't worry, you can edit this later).
- Click 'Create relationship'.

From here, your relationship will now be available to assign to different products.
ℹ️ This step only creates the relationship itself, it doesn't assign any products yet. To connect this relationship to specific SKUs, check out our article on Assigning Products to a Relationship.
ℹ️ Your Plytix account has a default limit of 10 relationships. If you'd like to increase this limit, contact your customer success manager. You can assign a relationship from one product to up to 300 other products.
Editing Relationships
If you wish to change the name of the relationship you set, click on the table:

To delete a relationship, select it in the table and click the 'Delete' button that appears at the top of the table.
⚠️ You cannot delete relationships that are in use in other areas of the PIM, like Channels and Catalogs.
Creating Relationships upon Import
You can import relationships and create them when you upload a CSV to the system. This is very efficient during setup, because at the same time that you create your relationships, you can also assign products to them, all in one step.
- When preparing your CSV for import , add a column for the desired Relationship you want to add. Learn how to format relationships below.
- Go to 'Products > Import' and drag and drop your CSV into the importer
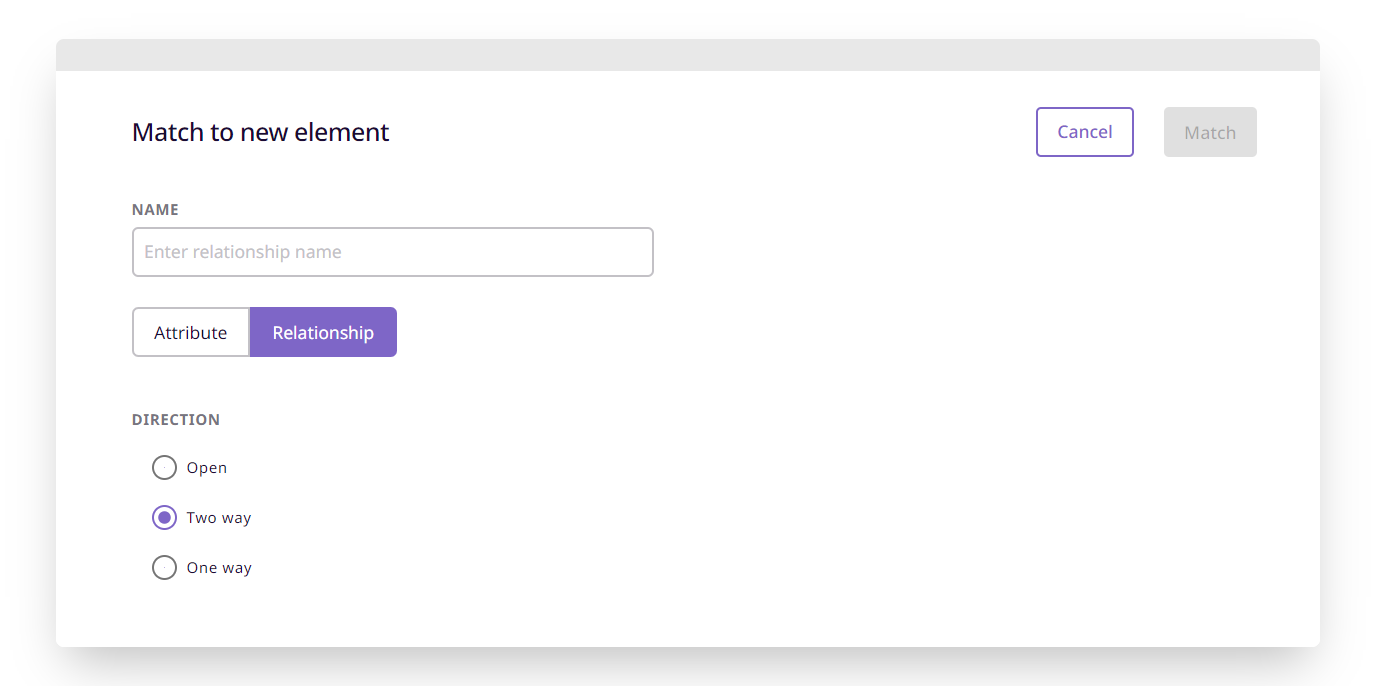
- When matching, go to the Relationship and click 'Match Existing'.

- Select 'Relationship' at the top of the window that appears, then choose the relationship you want from the dropdown. Click 'Match'.

- You can view which products have a relationship by setting the 'Relationships' filter to 'has related products'.

💡 Unlike creating a relationship through Settings, importing lets you create the relationship and assign products to it at the same time, which is why it's often the faster route during initial setup.
Formatting Relationships in an Import Spreadsheet
Relationships require you to match SKUs to each other, much like variations. So when you are ready to prepare your spreadsheet:
1. Name a column with your relationship name.
2. In the column, list the SKUs separated by a comma or another separator (you will be able to define this when you import).
3. If your SKUs display a quantity, you also need to put in a distinct separator for these.
💡 Note that relationships are only applied in a single direction at a time. If you want to have two products that relate to each other, you must apply the relationship to both products by assigning the SKUs to each other in the relationship column.
An example:
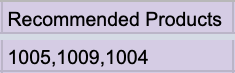
In the screenshot below, one example of this would be SKU 1001. In the "Recommended Products" column, one of the SKUs it contains is 1005. Because these products are related in both directions, SKU 1005 contains SKU 1001 in its "Recommended Products" column as well.
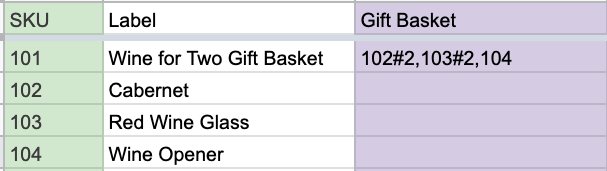
Your spreadsheet should look something like this (other product data is minimized to focus on the relationships):
- Green column: SKU
- Purple columns: Relationships

You'll notice that for relationships that match multiple SKUs, the example has these separated by commas:
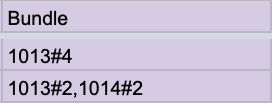
And for those SKUs that contain more than 1 quantity, there is a distinct separator:
What is Quantity?
If your relationship requires multiple units of the same SKU, you'll need to use the Quantity option. This is useful for things like bundles or gift basket options, where you may want to include several of the same product.
For example, say you have a gift basket that comes with two bottles of the same wine, two identical wine glasses, and one wine opener. To reflect this, you'd structure your spreadsheet like this:
What's Next
- Learn about product variations
- Learn how to export relationships
- Learn how to assign products to a relationship