
Views let you quickly switch between different sets of information. By creating Views, you can choose the attribute columns you want to see in the Product Overview table, along with filters, sorting, Product Family, and hierarchy levels, and save them for future use. You can work with Views from the Product Overview and from the Settings tab. This article covers managing Views from the Settings tab.
Creating a View
To create a View from the Settings tab:
- Go to the navigation menu and click Settings.
- On the left side menu, click Views.
- Click the + New button.
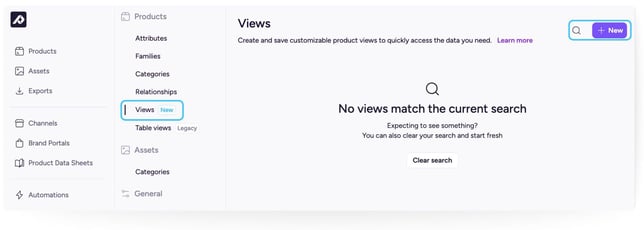
- Name your View.
- Configure the View settings, such as columns, filters, sorting, Product Family, or levels displayed.
- Click the Save button.
.jpg?width=670&height=290&name=New%20view%20(1).jpg)
Setting a View as Private or Shared
Every View is either Private (visible only to you, saved changes affect only your view) or Shared (visible to all users in the account, saved changes update the View for everyone).
This is the same Private/Shared setting described in Working with Views. From the Settings tab, you can set or change it the same way you would from the Product Overview, from the View's own options menu.
Only the View's creator, an Account Owner, or an Account Admin can change a View between Private and Shared.
Migrating legacy Table Views
If your account has existing Table Views, they're now in a legacy state. Table Views can no longer be created or edited, but you can migrate them into the new Views system.
When you migrate a Table View, its column setup is copied into a new View. Once the new View is saved, it's fully independent of the original Table View.
Migrating a Table View from the Settings tab:
1. Go to the navigation menu and click Settings.
2. On the left side menu, click Views.
3. Click the + New button and select From a table view (legacy).
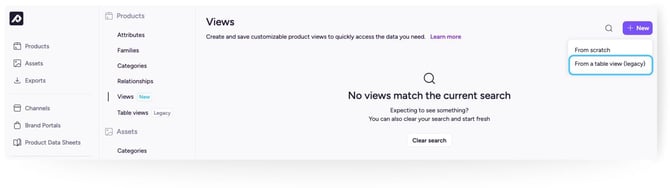
4. Click the Save button.
Editing a View
You can modify a View at any time. To edit it from the Settings tab:
- Click on the name of the View you'd like to edit.
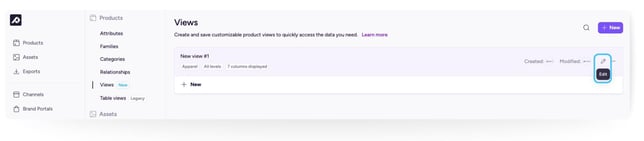
- Add attributes from Available attributes, remove attributes from Selected attributes, and change the order attributes are shown in.
- Change the filters, sorting, Product Family, or levels displayed.
- When you're done editing, click the Save button.
Exporting a View
You can export a View's products and attributes directly from the Settings tab, in just a couple of clicks. The export matches exactly what's configured in that View, its columns and whichever products meet its filters.
To export a View from the Settings tab:
- Go to the navigation menu and click Settings.
- On the left side menu, click Views.
- Find the View you want to export, and select the Export as CSV option from its options menu.
This is the same export option described in Working with Views.
Deleting a View
To delete a View:
- Click the Delete button that appears to the right of the search bar.
- Confirm by typing
DELETEin the box. - Click the Delete button.
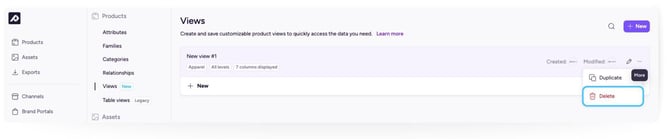
⚠️ Once you delete a view, it cannot be undone.
What's Next?
- Learn how to work with views from the product overview page
- Learn how to edit your products from the product overview table
-
Learn how to use filters to search through products