How to create a CSV or XML feed Channel to syndicate data to WooCommerce using the WP All Import plugin
This article explains how to get your product data from Plytix to WooCommerce using a scheduled feed. Since WooCommerce does not support scheduled feeds for product data upload, it's necessary to use a plugin. In this case, we'll show you how to use WP All Import to take the information from your Channel in Plytix and push it through to your WooCommerce store. For this process, you'll need a WordPress account for a WooCommerce store and the WP All Import Plugin, available here.
⚠️ WP All Import is a paid tool. Please note that this guide is intended as a useful resource for Plytix customers, but Plytix cannot be held responsible for use or billing of third-party tools.
Download Product Data from Plytix to WP All Import
Adjust Display of Product Information - Simple Products
Adjust Display of Product Information - Variations
*Skip to any section in this article by clicking on the links above
General Recommendations
Before you start importing your products into your WooCommerce store using the WP All Import plugin, we recommend considering the following best practices for optimal use of the tool:
- First, make sure that you have a product list with products that are ready to be sent to your store (you can learn more about creating product lists here).
- The following are some attributes we recommend that you include in your CSV or XML channel to be imported into WooCommerce which you can match to already existing WooCommerce fields:
- Product Name
- Product Description
- Product Short Description
- Product Image
- Product Gallery
- Price
- Product Category
- Product Tags
You will also be able to create custom attributes for attributes that are not already available in WooCommerce.
- Before, if you had single products as well as parents and variations, you had to create two different channel feeds (one for single products and another one for products with variations) and import the two files separately into WooCommerce. Now, however, you can import all products together and check your settings to make sure products without variations are created as single products (see section below).
Set up a Channel
With WP All Import, you have the option of downloading either an XML or CSV file from a URL. To get this URL, you'll need to create a channel in Plytix.
You can learn the basics of setting up a CSV or XML channel by following the steps outlined in our article, Creating a Channel.
Once you have created and processed your CSV or XML channel, copy your feed URL located under your channel name.

Download Product Data from Plytix to WP All Import
1. To start, log in to your Wordpress account. On the left side of the screen, you'll see the menu. Click on 'WP All Import' and then 'Import'.
2. You'll have several options for importing your data. In this case, select 'Download a file' and 'From URL', where you'll then paste the URL of the Channel you created in Plytix. Click 'Download'.
3. You can then choose to add new items or update existing items. In the dropdown menu, be sure to select 'WooCommerce Products'.
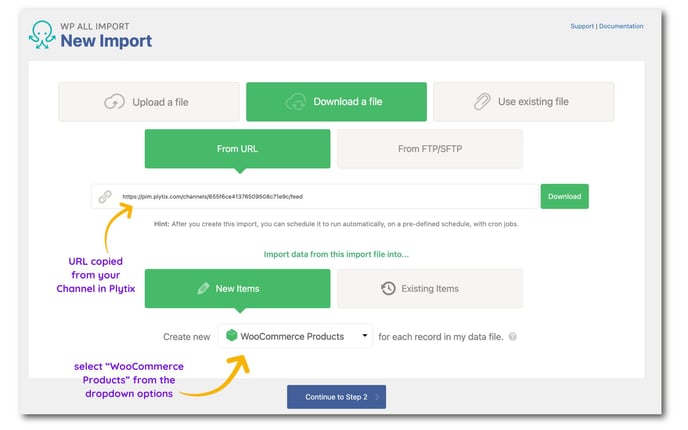
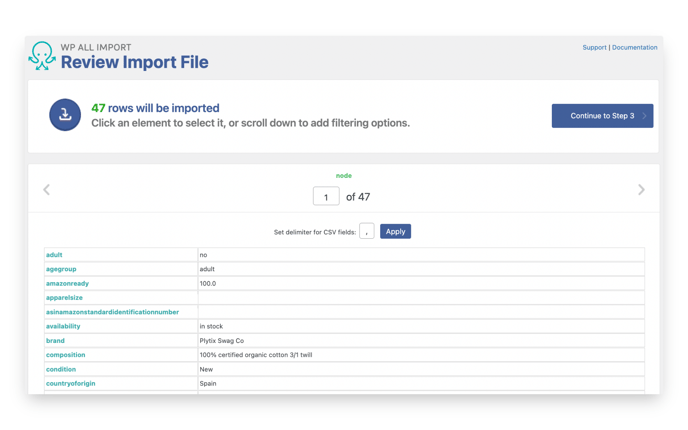
4. Step 2 will show you a preview of the file you're retrieving from Plytix. If it looks correct, click 'Continue to Step 3'.
Adjust Display of Product Information - Simple Products
ℹ️ This section is only relevant if you are only importing single products. If you have both single products as well as parents and variations, skip to the next section.
Now you'll be able to adjust the information contained in your product listings (the information displayed on your product page). Note that this section is largely the same for both simple products and variations, but variations require an extra step, which can be found below.
To adjust product listings, drag and drop the attributes from your Channel, shown to the right of the screen, to the "Title and Description" section on the left. Select your product title, description, and any other information you want customers to see in your WooCommerce store.
.png?width=688&name=Creating%20a%20URL%20Feed%20for%20WooCommerce%20via%20WP%20All%20Import%20(1).png)
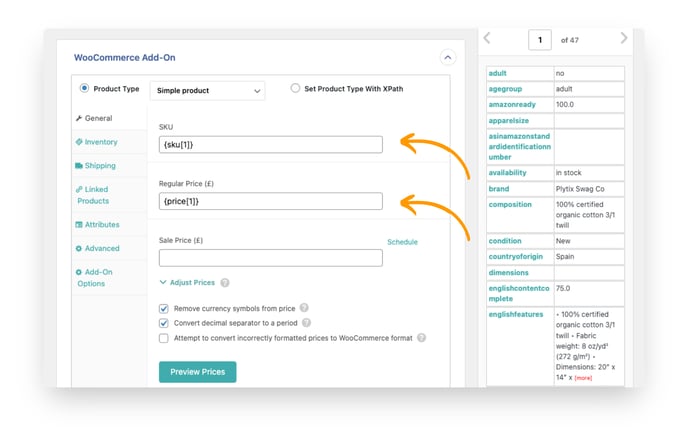
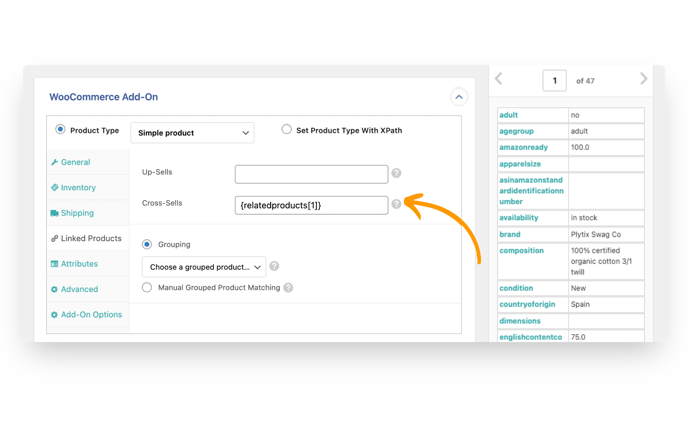
Next, you'll come to the WooCommerce add-on section. Here you have options to set your product type, add inventory information, customize shipping information, and more.
Some fields you can add in this section are:
- SKU
- Price
- Cross-Sells (like Related Products or Bundles)
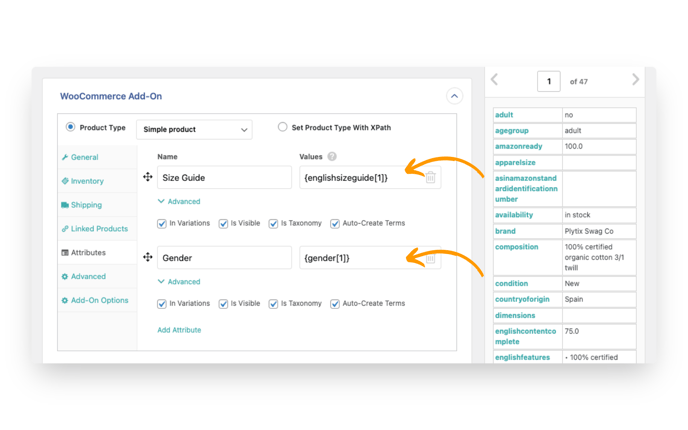
You can also create new attributes here:
ℹ️ The images above reflect just a few of the options you have to customize your shop with the WooCommerce add-on. You can find more information by checking out WP All Import's WooCommerce Add-On page.
Adjust Display of Product Information - Variations
When it comes to listing products with variations in WooCommerce, there are several different options. After selecting 'Variable Product' in the "Product Type" dropdown, click on the 'Variations' tab.
We recommend choosing the second option: 'All products with variations are grouped with a unique value that is the same for each variation and unique for each product.' Then, drag and drop the 'variationof' attribute to the "Unique Value" box.
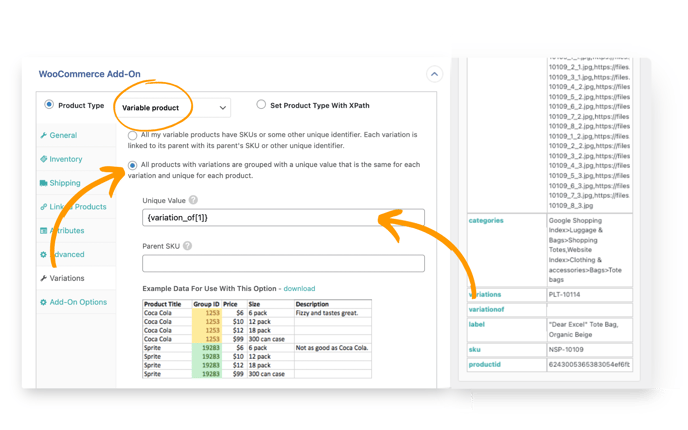
💡 The above option is our recommendation based on what has worked for many Plytix customers. Depending on the configuration of your product information in Plytix, you may want to try a few different options to see what works best for you.
Make sure to also check the box that states "Create products with no variations as simple products" so that you can import both single products as well as parents and variations together in the same feed.

Link Assets
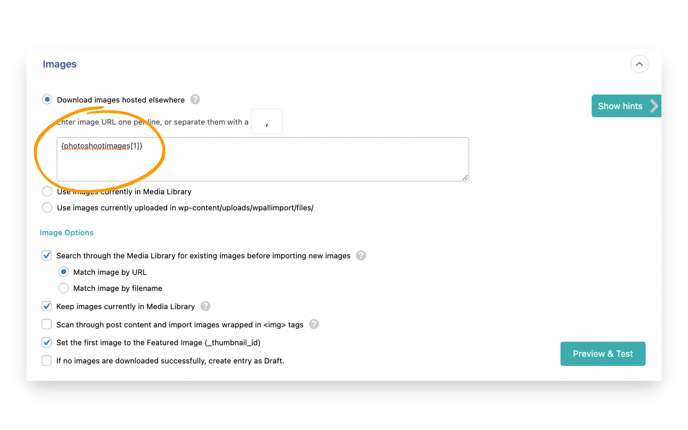
In the Images section, choose the attribute or attributes associated with your product photos. Drag and drop them to the text box that appears below the 'Download images hosted elsewhere' option.
Format Categories
In the "Taxonomies, Categories and Tags" section, choose the 'Products have hierarchical (parent/child) Product categories' option and 'An element in my file contains the entire hierarchy', then drag and drop the 'categories' system attribute from Plytix to the text box.
.png?width=688&name=Creating%20a%20URL%20Feed%20for%20WooCommerce%20via%20WP%20All%20Import%20(3).png)
Review Settings and Import
Check any other options where you'd like to add information. Then click 'Continue to Step 4'.
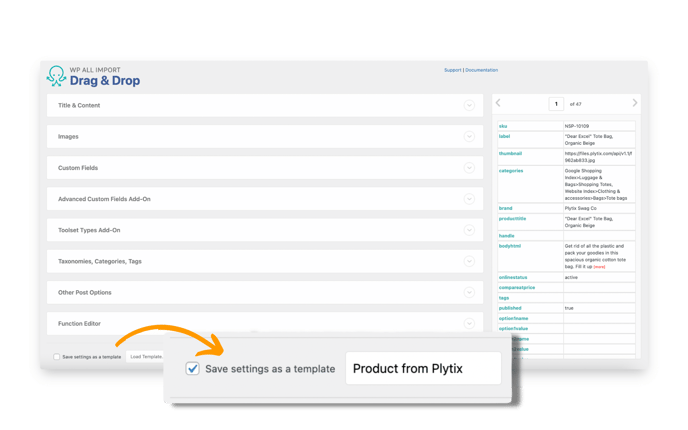
💡 If you wish to add multiple feeds, or you're not planning to schedule regular imports, select 'Save settings as a template' at the bottom of the screen to load your settings the next time you import your feed. Otherwise, feel free to skip it.
In this step, select your SKU as the "Unique Identifier" that WP All Import uses to create product listings.
.png?width=688&name=Creating%20a%20URL%20Feed%20for%20WooCommerce%20via%20WP%20All%20Import%20(2).png)
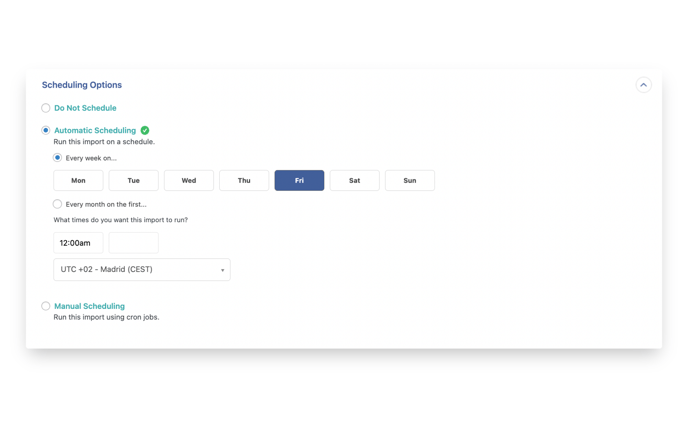
In this step, you can also schedule imports on a daily or weekly basis within the "Scheduling Options" section by selecting 'Automatic Scheduling'.
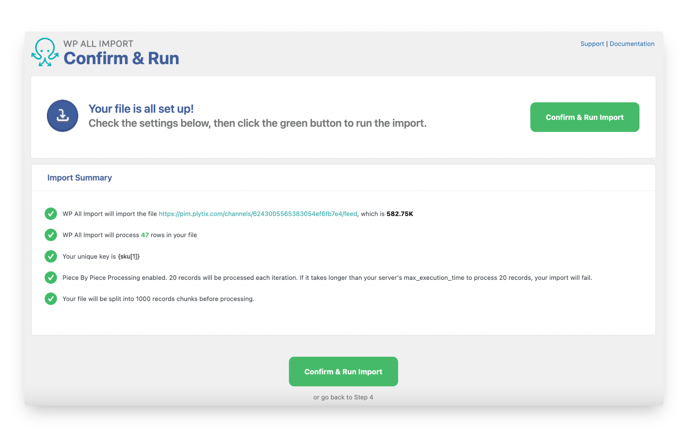
After you've completed Step 4, click 'Confirm & Run Import' to begin importing your data.
Once the import has finished, you'll see the following screen:
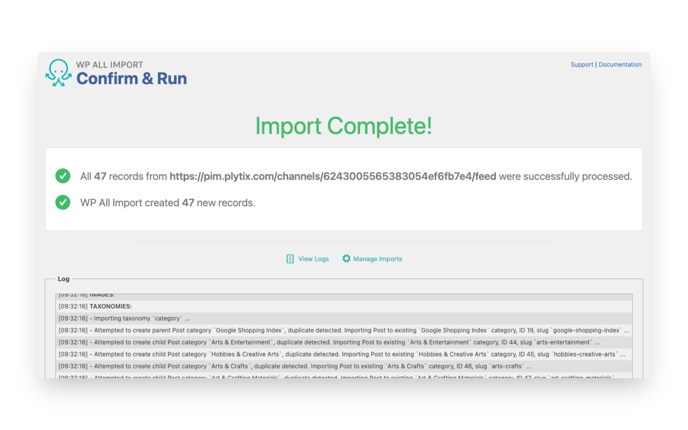
Your products will be available to view under 'Products' on the lefthand menu of your WordPress account.
What's next?
- Learn how to create and manage a Shopify channel
- Learn more about create an XML feed for Facebook Catalog Manager
- Learn how to define the output format for CSV and XLSX channels
