
Assets are all the images, videos, documents, and other files that make up your product content. You can get your assets into Plytix in a few different ways. This article will teach you how to get all your assets into the PIM.
💡 This article explains how to get files into Plytix, but if you're wondering about creating naming conventions for your files that will help you organize and match them to products, check out our recommendations here.
*Skip to any section in this article by clicking on the links above
Uploading Assets
Assets can be uploaded by dragging and dropping the source file into Plytix. There are a few areas where you can do this.
Asset Overview
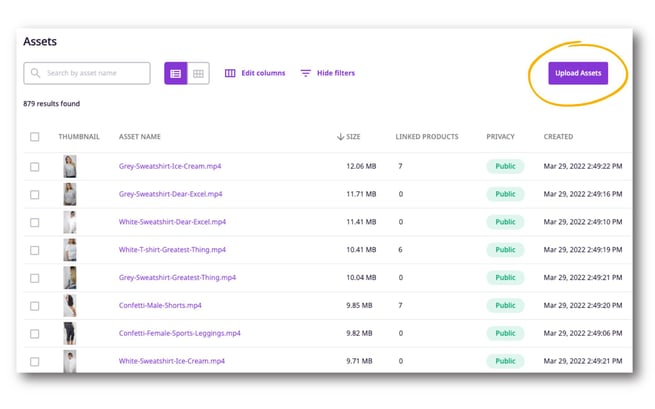
If you're not sure where your assets are going to live just yet, or they aren't directly related to any given product, drop them into the Asset Overview.
To upload assets to this area:
- Go to the 'Assets' tab in the top navigation menu.
- Then select 'All Assets' to go to the Asset Overview.
- Click the 'Upload Assets' button in the top right corner.
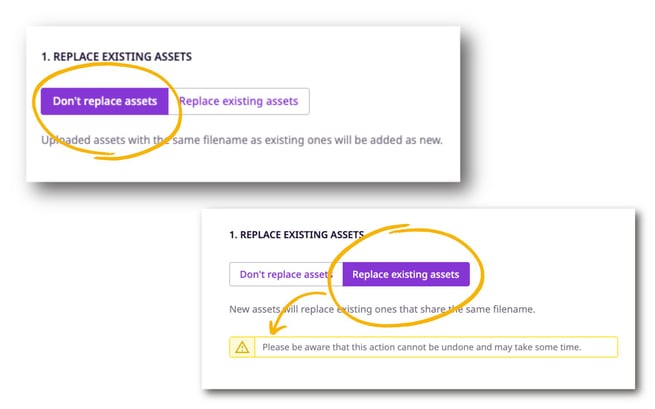
- Next you'll need to select the settings for the assets you want to upload. First, choose if you want to replace existing assets or not.
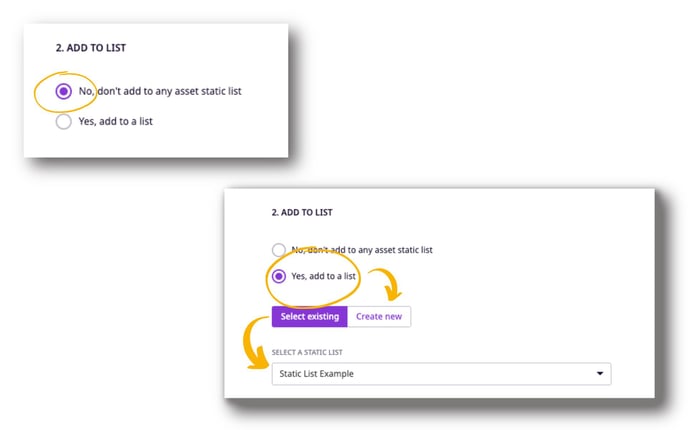
- Second, choose if you want to add assets to a static list. You can select from asset lists that already exist, or you can create a new list.
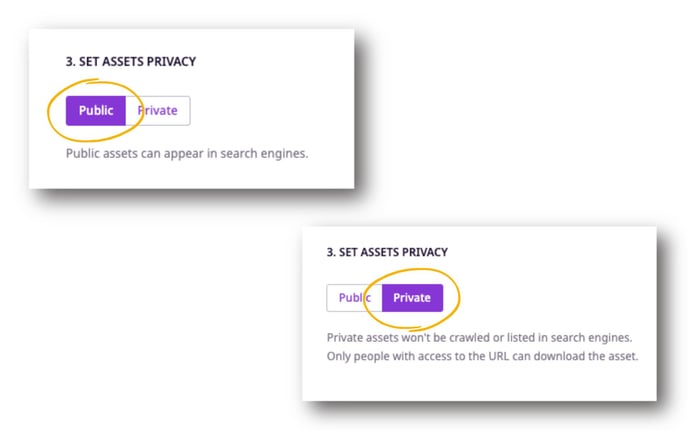
- Third, choose if you want assets to be visible in search engine results.
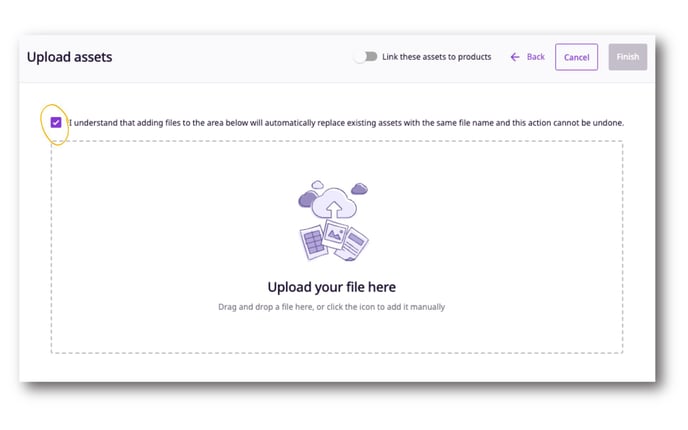
- If you selected 'Replace existing assets' in Step 1, you'll need to check a box to acknowledge that this action cannot be undone once you select files to upload.
- Assets that have been successfully uploaded will appear with a purple check mark. Click the 'Link these assets to products' toggle if you want to link a product/products to these assets.
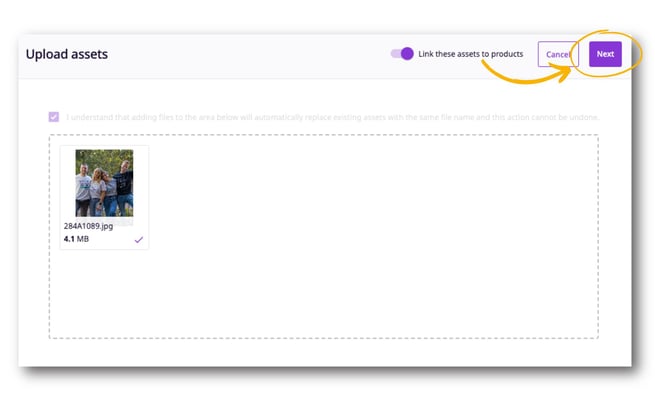
- Click 'Finish' to close the uploader, or move on to the next step to link your assets to products.
- If you selected 'Link these assets to products,' you will now be able to choose which product or products to link. Then click 'Next.'

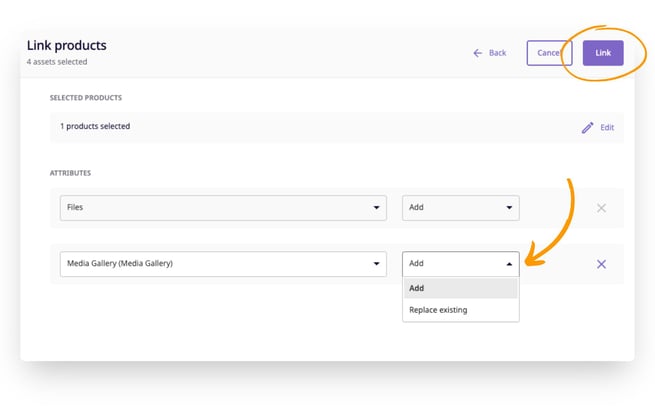
- Click on '+ Add attribute.'
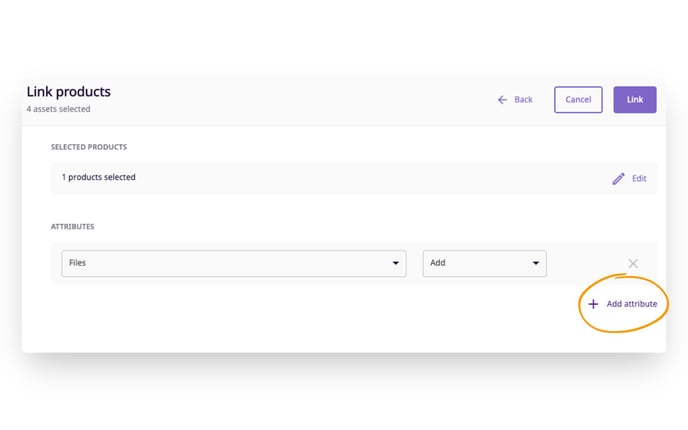
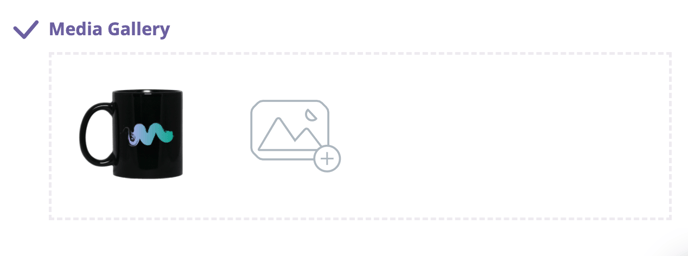
- Now, select which attribute you want the assets to populate. If you have uploaded a single asset, you can choose from thumbnail, media single attributes, or media gallery attributes. If you have uploaded more than one asset, you can only choose media gallery attributes.
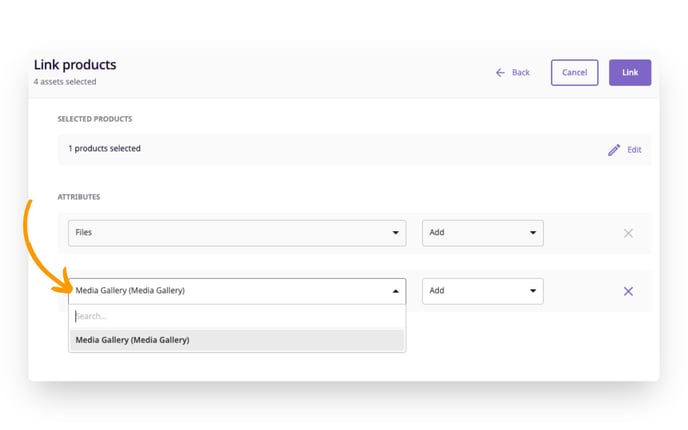
- Lastly, select whether you want to add these assets to existing assets, or use them to replace existing assets. Click 'Link' to finish.
Your newly uploaded assets will now appear in the Assets Overview area and in the 'Assets' tab of any product to which they have been linked.
ℹ️ Using this method, you can upload up to 1000 assets at a time.
ℹ️ If any asset appears with a warning sign upon upload, you can hover over the asset to find out why it failed to upload.
Product Page - Media Attributes
You can also upload assets directly to your products by linking them to Media Attributes.
To upload assets directly to your products:
- Go to the detail page of the product to which you want to add assets.
- Find the Media Attribute to which you want to add assets.
- Click the pencil icon to edit the attribute.
- Click on the add image icon to access the uploader.
- Select the file or files you want to add, or drag and drop them into the space provided. Your upload will start automatically.
- Assets that have been successfully uploaded will appear with a purple check mark.
- Click 'Finish' to close the uploader
💡You can also bulk upload your assets to any product by going to the 'Assets' tab in the product detail view. This is helpful if you aren't sure what attributes your assets will be assigned to yet.
Importing Assets
You can also upload your assets along with your products within a CSV file.
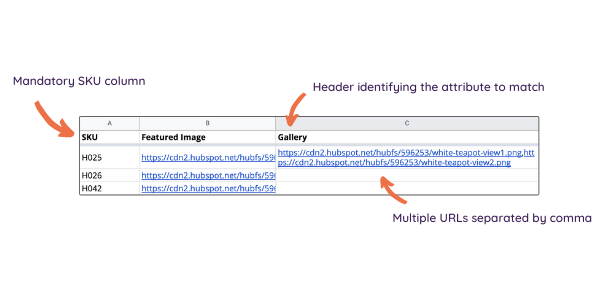
Your CSV file must contain the following elements:
- An "SKU" column to identify the product you want to match your asset(s) to
- Columns defining which media attributes you want to assign your assets to
- A publicly accessible URL where Plytix can fetch your files from
- If there is more than one file listed in the same row, there should be a separator like a comma
For example:
Once your CSV is prepared for import, then you can import your assets.
- Go to the 'Products' tab in the top navigation menu.
- Select 'Import'.
- Then drag and drop your CSV into the space provided.
- Complete the matching process.
- Click 'Start Import'.
Once your import is completed, your assets will appear in the Assets area as well as linked to your products.
What's next?
- Learn how to link and unlink assets to products
- Learn how to download assets
- Learn how to rename assets