How to set up API Keys in Plytix
Plytix offers an API which enables other applications to create, edit and extract information from Plytix directly. This is essential in case you need to integrate an ERP system or any other service with Plytix. In this article, you will learn how to access the API documentation, and how to create and manage API Keys.
ℹ️ Only Owners and Admins can create and manage API keys.
Creating API credentials (keys)
*Skip to any section in this article by clicking on the links above
Documentation
In order to learn how the API works in detail, jump over to http://apidocs.plytix.com to access the technical documentation.
Creating API Keys
API Keys are required before you can create a successful integration with the Plytix API.
⚠️ The API credentials allow access to manipulate the data in your account, so only share the API credentials with trusted contacts and services.
To create API credentials, you must have Admin rights.
How to generate an API Key
- Go to accounts.plytix.com
- Locate the API tab.
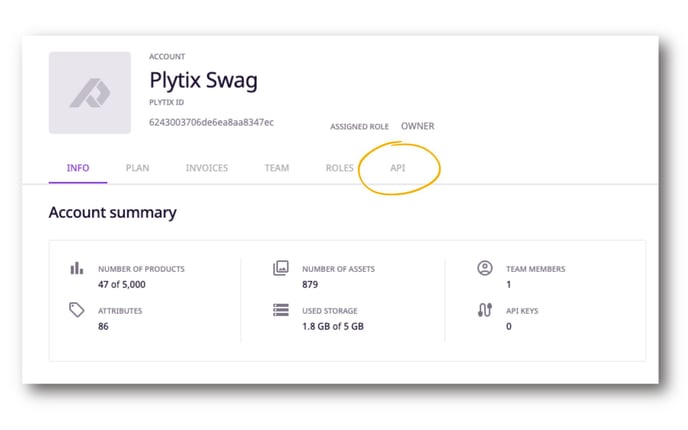
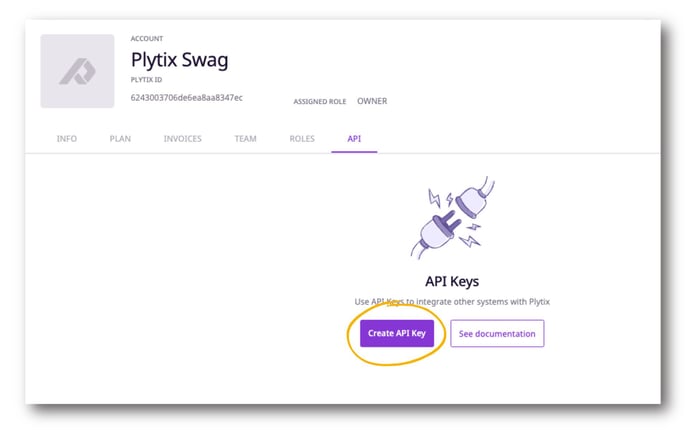
- Click 'Create API Key.'
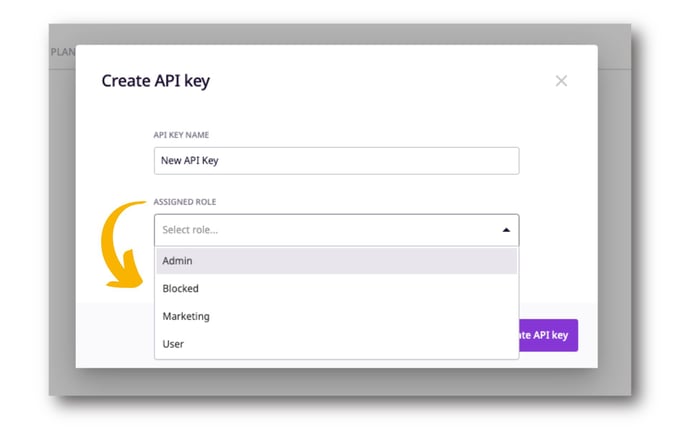
- Give your Key a name and set the role of the API key, which will determine access rights.
- Click 'Create API Key' to save.
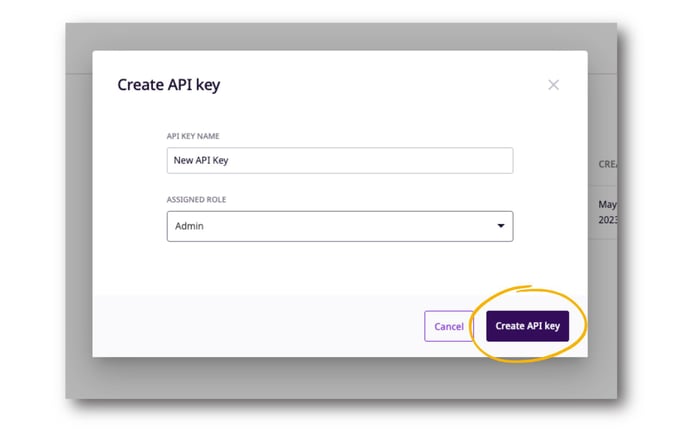
💡 We recommend identifying the integration or party who will be using the Key directly in the name so that you know who has access to a particular Key.
To reveal the API Password, hover near it and click the eye icon.
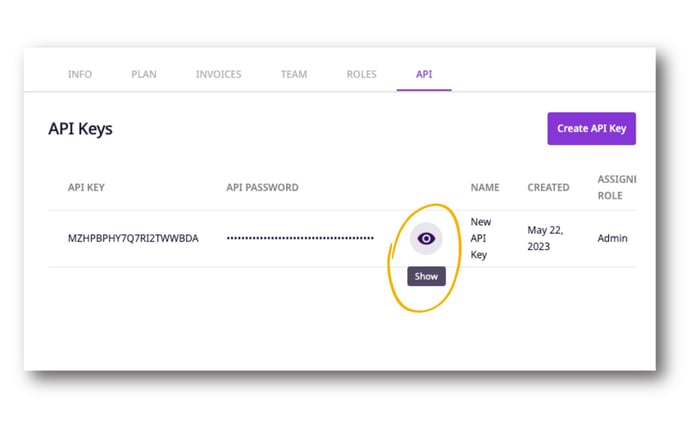
You can also edit and delete API keys using the icons next to the assigned role. 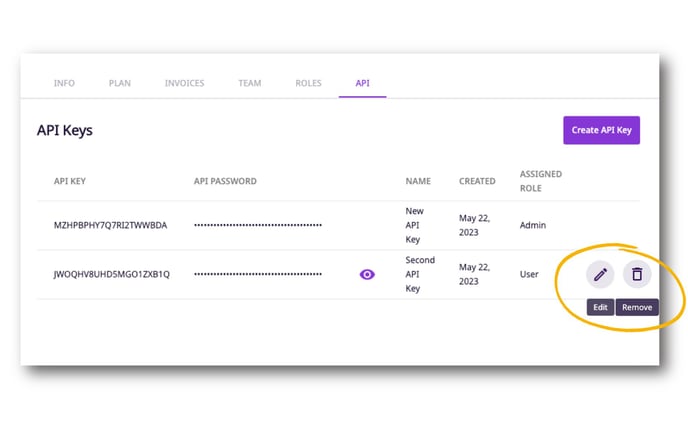
Assigning API Roles
API Roles allow you to determine how much access the API Key has to your data in the PIM. You can assign and change an API key role in the 'API' tab in the Account Administration section of Plytix.
To assign an API Key to a new role:
- Go to the API Key you want to edit.
- Click the pencil icon on the right and a pop up will appear.
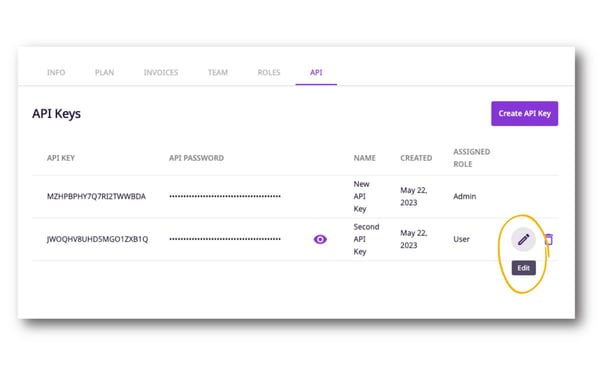
- Edit the Key name or choose a new role from the dropdown.
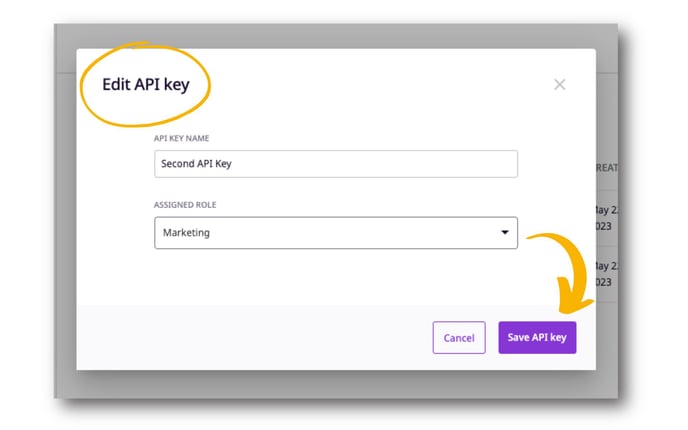
- Click 'Save API Key' to save and apply your changes.
⚠️ Changing an existing API Key Role can result in the malfunctioning of your integration. Check before you change!
ℹ️ API Roles are managed the same way as user roles in the Account Administration section under the "Roles" tab. The two types of user roles are System Roles and custom Team Roles.
What's next?
- Learn more about creating custom team roles
- Learn about setting up permissions
- Learn about attribute types