
After you've set up the connection between Plytix and your desired BigCommerce storefront, it's time to configure your channel preferences to start sending your products to your store. In this article, we'll walk you through the different tabs of your channel: adding products, mapping BigCommerce fields, setting up automatic processing, and understanding your process log, so you can add the information you need and be all set to go live.
ℹ️ If you'd like to get access to Plytix's BigCommerce channel, please contact your Account Manager.
Creating a BigCommerce Channel
*Skip to any section in this article by clicking on the links above
Creating a BigCommerce Channel
To create a BigCommerce channel, you first need to set up the connection between Plytix and your store through the Plytix app. It's a simple process with no coding required. To learn how to set up this connection, check out this article.
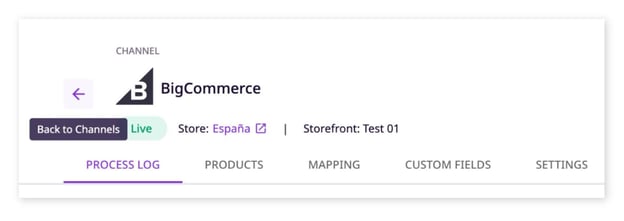
Channel Dashboard
The channel dashboard gives you essential information about the channel. Here are some of the elements you'll find:
Channel Name and Status
At the top left, you'll see a section showing the channel name and type.

Here you can:
1. Change the channel name by clicking on it, then hitting "Enter" to save. rename
Processing Information
At the top right, you'll find information related to processing the channel.

Information:
- Created: the time the channel was created.
- Modified: the last time the channel was updated in any way.
- Processed: the last time the channel was processed, either manually or on a schedule.
Actions:
- Process Now: starts the channel processing, which pushes information to your BigCommerce store.
💡 You can also set up scheduled processing so that your products are automatically sent to your store at your preferred frequency and date.
- Arrows: take you to the previous/next channel.
- Trash icon: deletes your BigCommerce channel.
Process Log
The process log shows the records of the last time information was sent from Plytix to BigCommerce. If you haven't processed your BigCommerce channel yet, you'll see the 'Instructions' tab here until you process it for the first time.
The log shows:
- Start Date: the date and time the process started.
- Finish Date: the date and time the process completed.
- Status: whether the process is "Syncing," "Processing," "Canceled," or "Finished."
- Products: how many products were processed.
- Result: "Success" if the information was sent correctly, or a note with the number of errors if it wasn't.

ℹ️ The number of products processed into your BigCommerce store is the total number of parents and singles in your product list. The number of products synced (listed in the Log Detail) is the total number of products that were actually updated.
Log Detail
If there are any errors during processing, you can review what happened at a product level by clicking the Start Date of a process. This takes you to the log detail.
Here you can review error messages from BigCommerce to understand how to fix them. Click the 'info icon' to see more details about a specific error.
In the log detail you can also see:
- Action: whether the product was "Created," "Updated," or "Skipped." A product is marked "Skipped" if it was already cached and hasn't changed since the last sync
ℹ️ The first time you process a BigCommerce channel, processing times will be longer since products are being created or updated for the first time. On subsequent runs, Plytix automatically creates a cache (essentially, a memory) for those products. This makes processing much faster, since unmodified products stay cached while only modified or new products are updated.
- Result: "Success" if a new or updated product was processed correctly, or "Error" if there was an issue sending it to your store. If a cached product is processed again with no changes, it's skipped and the result will show as blank.
You'll also see a summary note showing the total number of parents and singles reviewed in your product list (processed), and the number of products that were created or updated in your storefront (synced).

Products
Under the products tab, you'll select a product list. This list defines which products will be sent to this BigCommerce store.
ℹ️ We recommend avoiding switching between different product lists when sending products to your BigCommerce channel. Depending on the products included in the old and new lists, you may need to completely resync some products from the old list to update the cache. To keep processing times fast, we recommend sticking with one dedicated product list per BigCommerce store.

Mapping
In the mapping tab you will match attributes from Plytix to BigCommerce fields. Find a detailed guide of how to map BigCommerce fields in Plytix here.
To map a new attribute:
- Click 'Match attribute' in the 'PIM Attributes' column.
- Select the attribute you want to match, or create an Attribute Transformation.
- Click 'Apply'.
- To save your changes, click 'Save changes' in the save bar that appears at the top.

To unmatch an attribute, click the "Unmatch" icon.

Formatting Attributes
Just like with other channels in Plytix, you can apply attribute transformations for certain attribute types. To do this:
1. Hover over the attribute you want to edit.
2. If it has transformation options available, a Settings icon will appear to the right.
3. Click the Settings icon to see all available options. Settings-Channel
4. Make your changes.
5. Click 'Apply'.
5. Click 'Save Changes' to save your transformations.Custom Fields
Custom fields are additional fields you can create in your BigCommerce store, beyond those listed in the 'Mapping' tab.
1. Click 'Create custom field'.

2. Give it a name and confirm by clicking "Create custom field" again.
3. Click "Match attribute" to match your new field with a Plytix attribute. Just like the Mapping section, you can match it with an existing Plytix attribute or by creating a new attribute transformation.
4. After selecting the attribute, click ‘Apply’.
If the attribute type you matched your custom field with allows for formatting options, you will view the Settings icon in the “Formatting” column.

Settings
In the settings tab, you can:
- Schedule periodic processing of your channel
- Manage custom field processing preferences
- Clear the cache
To schedule periodic processing: toggle the option on, then select the frequency, day, and time you'd like your channel to automatically process.
For custom fields: in the "Custom fields" section, set your preference for how fields with empty values should be handled: either ignored, or set to overwrite an existing value.
To clear your channel's cache: click "X Clear cache."
⚠️ Clearing the cache will cause future syncs to take longer until the new cache is created.

What's next?
- Learn how to connect Plytix to your BigCommerce store
- Learn how to generate a backup of your data
- Learn about the different channel options available in Plytix