
Creating a product taxonomy does more than just keep your products organized. It makes your products more searchable and thus easier for your clients to find. In Plytix, you can assign products to as many categories as you'd like, optimizing them for every channel.
ℹ️ This article explains how to assign categories to a product. Check out how to create and manage product categories.
Assigning Categories Upon Import
Assigning Categories from the Product Overview Page
Assigning Categories from the Product Detail Page
*Skip to any section in this article by clicking on the links above
Assigning Categories Upon Import
When you import a spreadsheet, you can include a column reflecting the category hierarchies you want your products to have.
ℹ️ If these categories don't yet exist in your Plytix account, then the system will create them on import. If the categories exist in your account, then by importing you can assign, edit, or remove them from a product.
To do this:
1. Include a SKU column.
2. Include a column called "Categories" in your spreadsheet. This will ensure that it is automatically matched to the Plytix system attribute.
3. In the "Category" column, format your categories including a hierarchy separator as well as a multi-value separator.
4. Follow the steps to import a spreadsheet.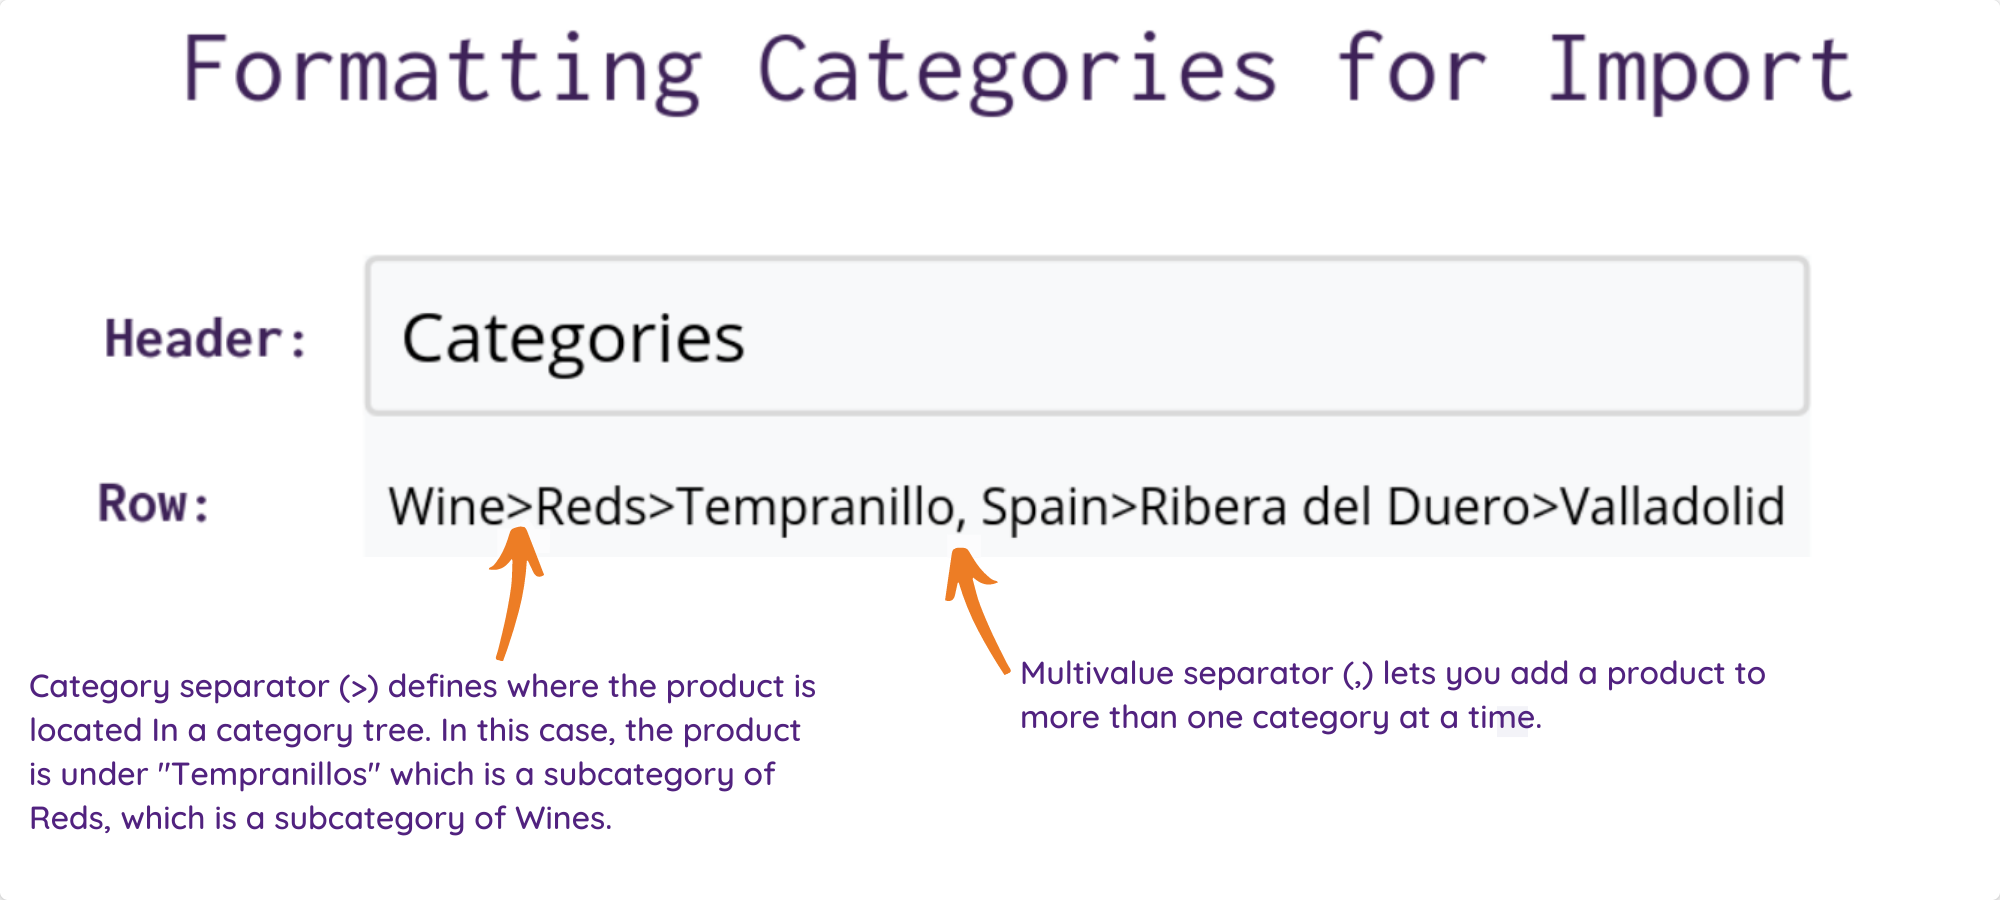
⚠️ Keep all the categories for a product in one cell and in the same row as the product.
ℹ️ The category and multivalue separators shown in the illustration are the ones set on default, however, these can be defined by you.
Assigning Categories from the Product Overview Page
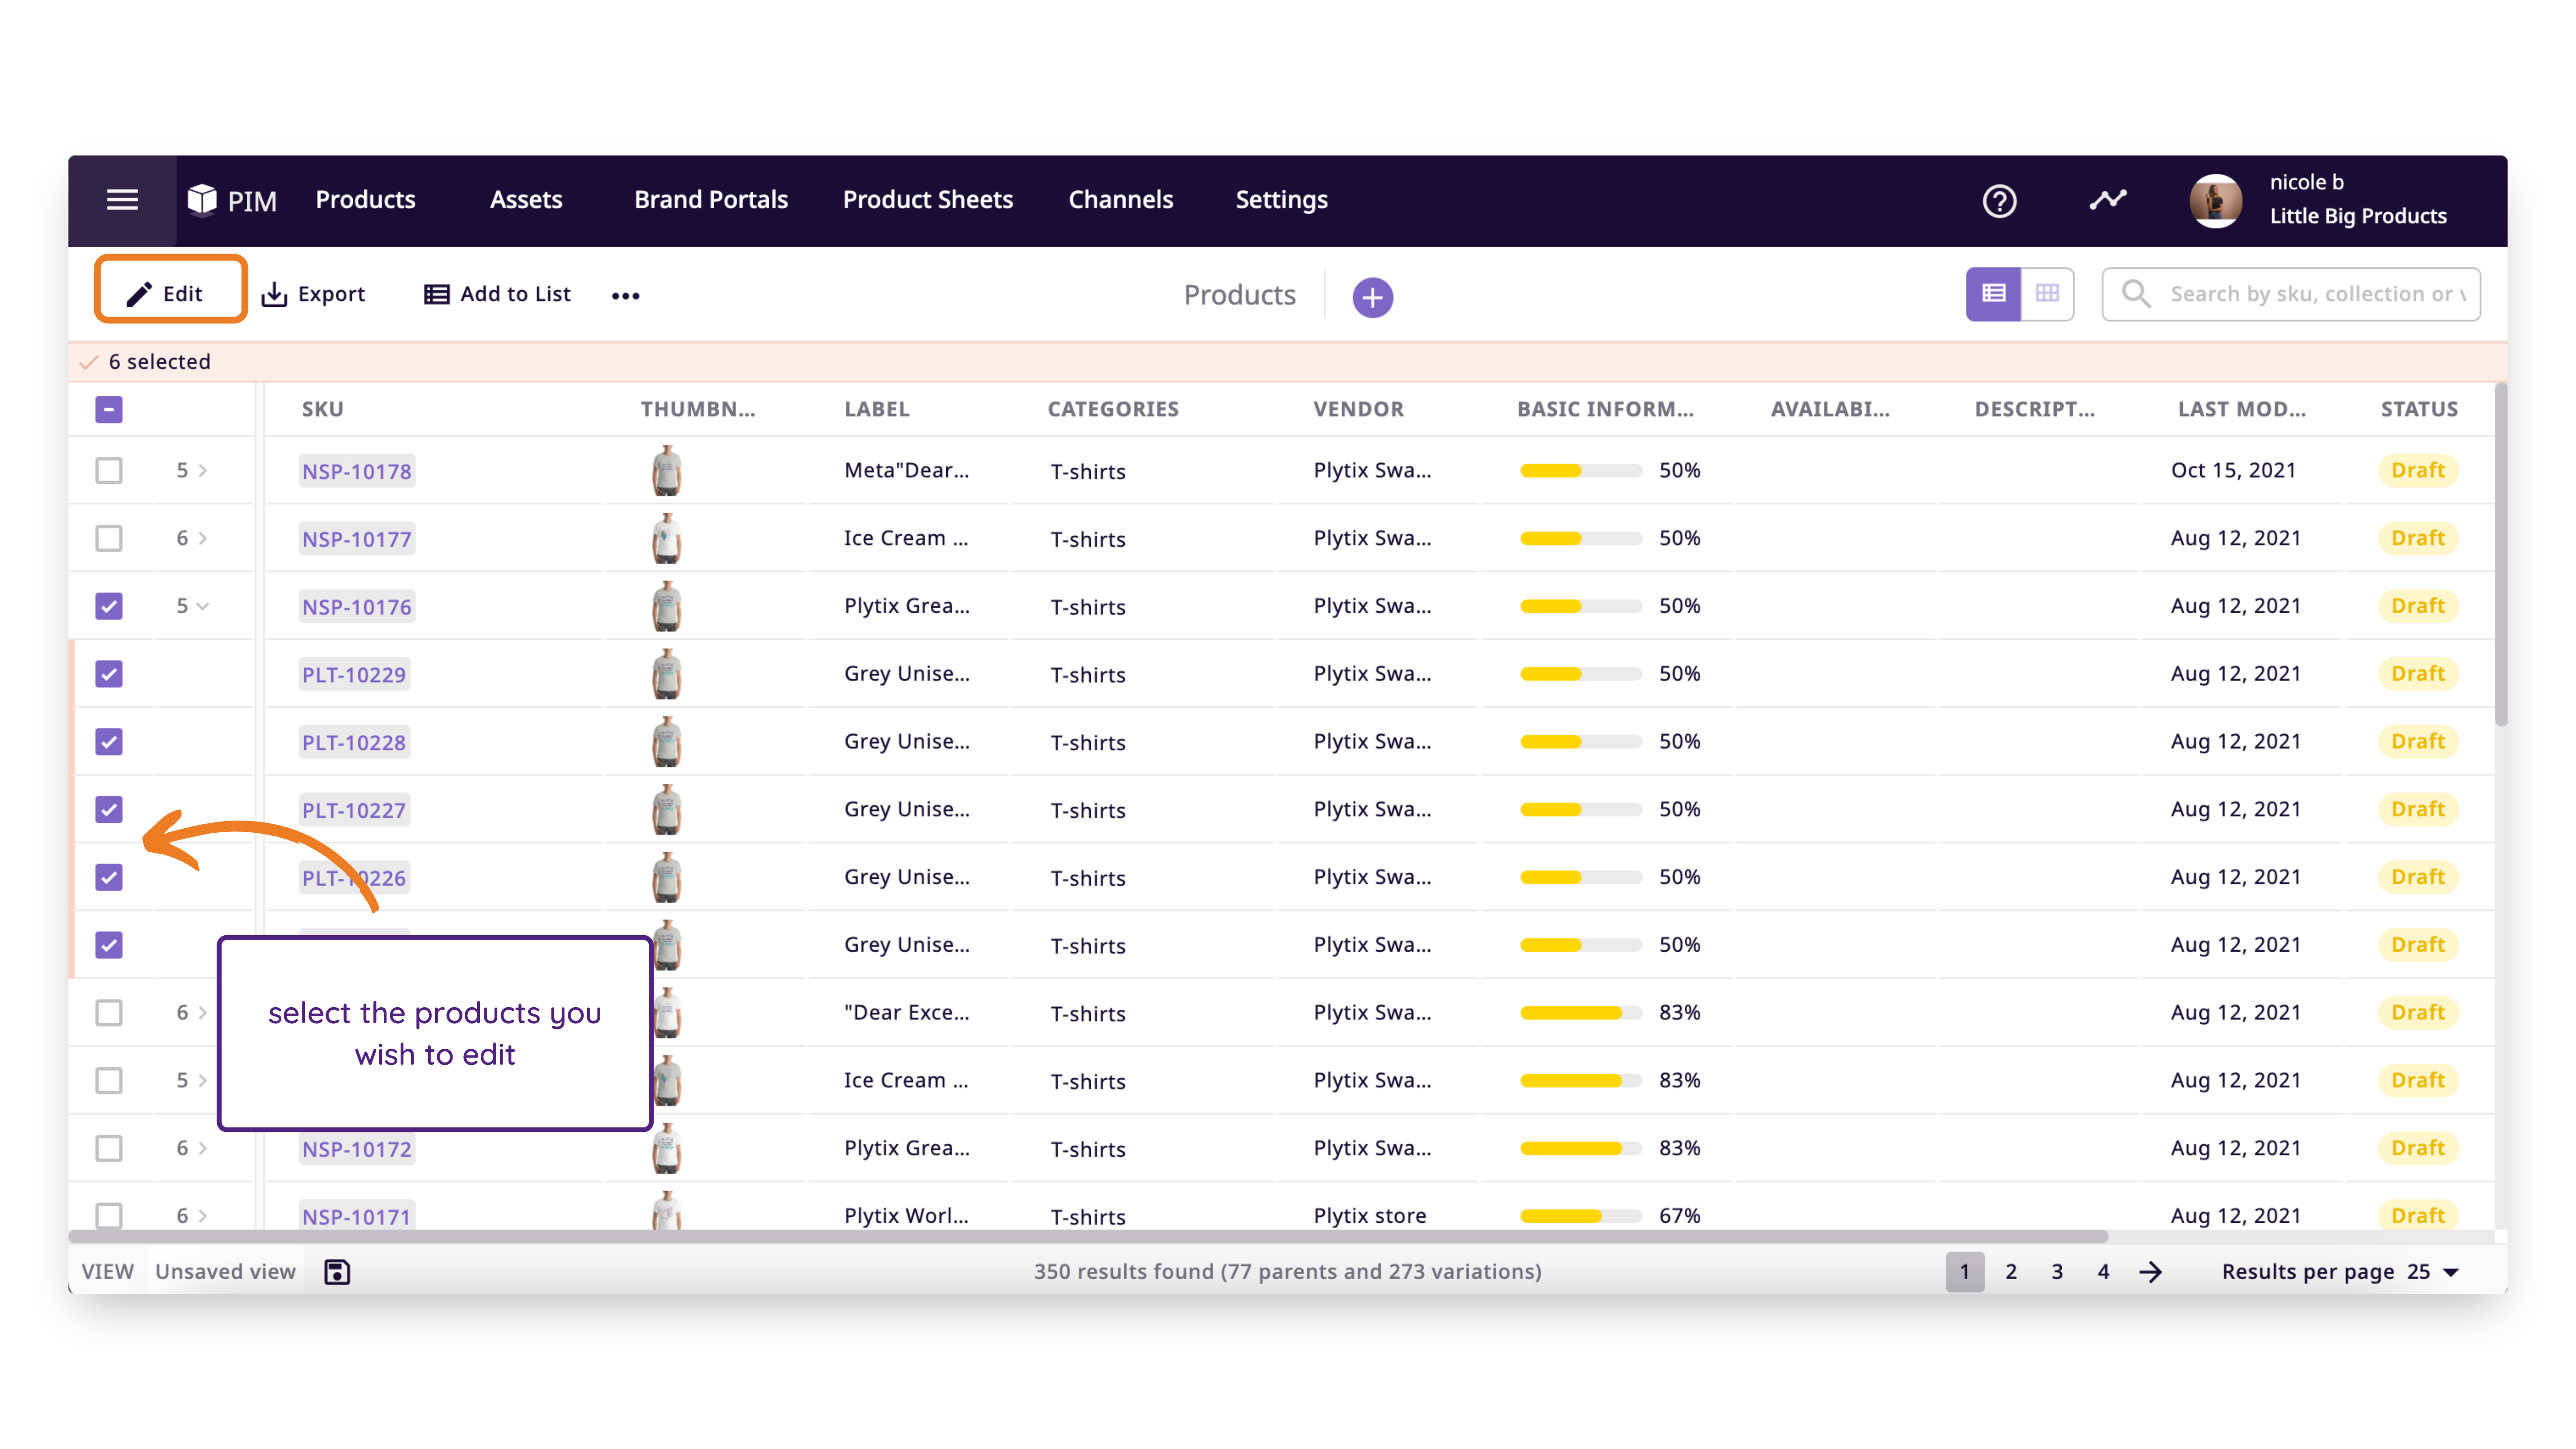
From the "All products" page, you can assign categories to products in bulk.
- Select the products you want to edit
- Click "Edit products"

- Select "Edit categories"
- Select the action you want to perform: Add, Replace or Remove categories
- Select the categories
- Click "Save"
Assigning Categories from the Product Detail Page
You can also create categories and assign products to categories straight from your Plytix account.
To do this:
- Navigate to a product by clicking on its SKU from the product overview table.
- Click on the "Categories" tab.
- Select the branch of each category you want your product to fall under.
- Review and/or save your changes.

Categories your product falls under will appear to the right, in the "Selected categories" section.
💡 Drag and drop categories in your "Selected categories" section to choose how your product categories will be displayed in your outputs.
ℹ️ Products can belong to multiple categories.
What's next?
- Learn how to create and manage categories for assets.
- Learn how to organize your assets in categories.
- Learn how to work with product variations.