
In this article, you will learn how to import a CSV file into Plytix. This includes import settings, how to match existing data, and how to create new attributes from the importer.
ℹ️ If you would like to know how to import data via an automated scheduled CSV feed, check out this article.
ℹ️ If this is your first import, check out how to prepare your CSV for a successful import. We'll show you required fields and how to format your data correctly.
*Skip to any section in this article by clicking on the links above
Importing a file
To import product data:
- Go to the navigation menu and click "Products".
- Then click "Import" from the dropdown and you will be taken to the import area.
- In the Import Mode dropdown in the top right corner, confirm that Create or update products is selected. This is the default setting and is required for standard imports.
- To import a new CSV file, just drag and drop a file into the space provided, or click the box to see the file selector.

Here you can also:
- Learn how to prepare your spreadsheet for import
- Download an example CSV to see how it works
- Set up automated scheduled feed imports
- View and manage Import Profiles
- See your Import Logs
File preview and import settings
The first thing you will see when you import a new file is a preview of the first 15 rows. This lets you confirm if the file has been read correctly by Plytix. If you are happy with your preview, click "Next" to continue.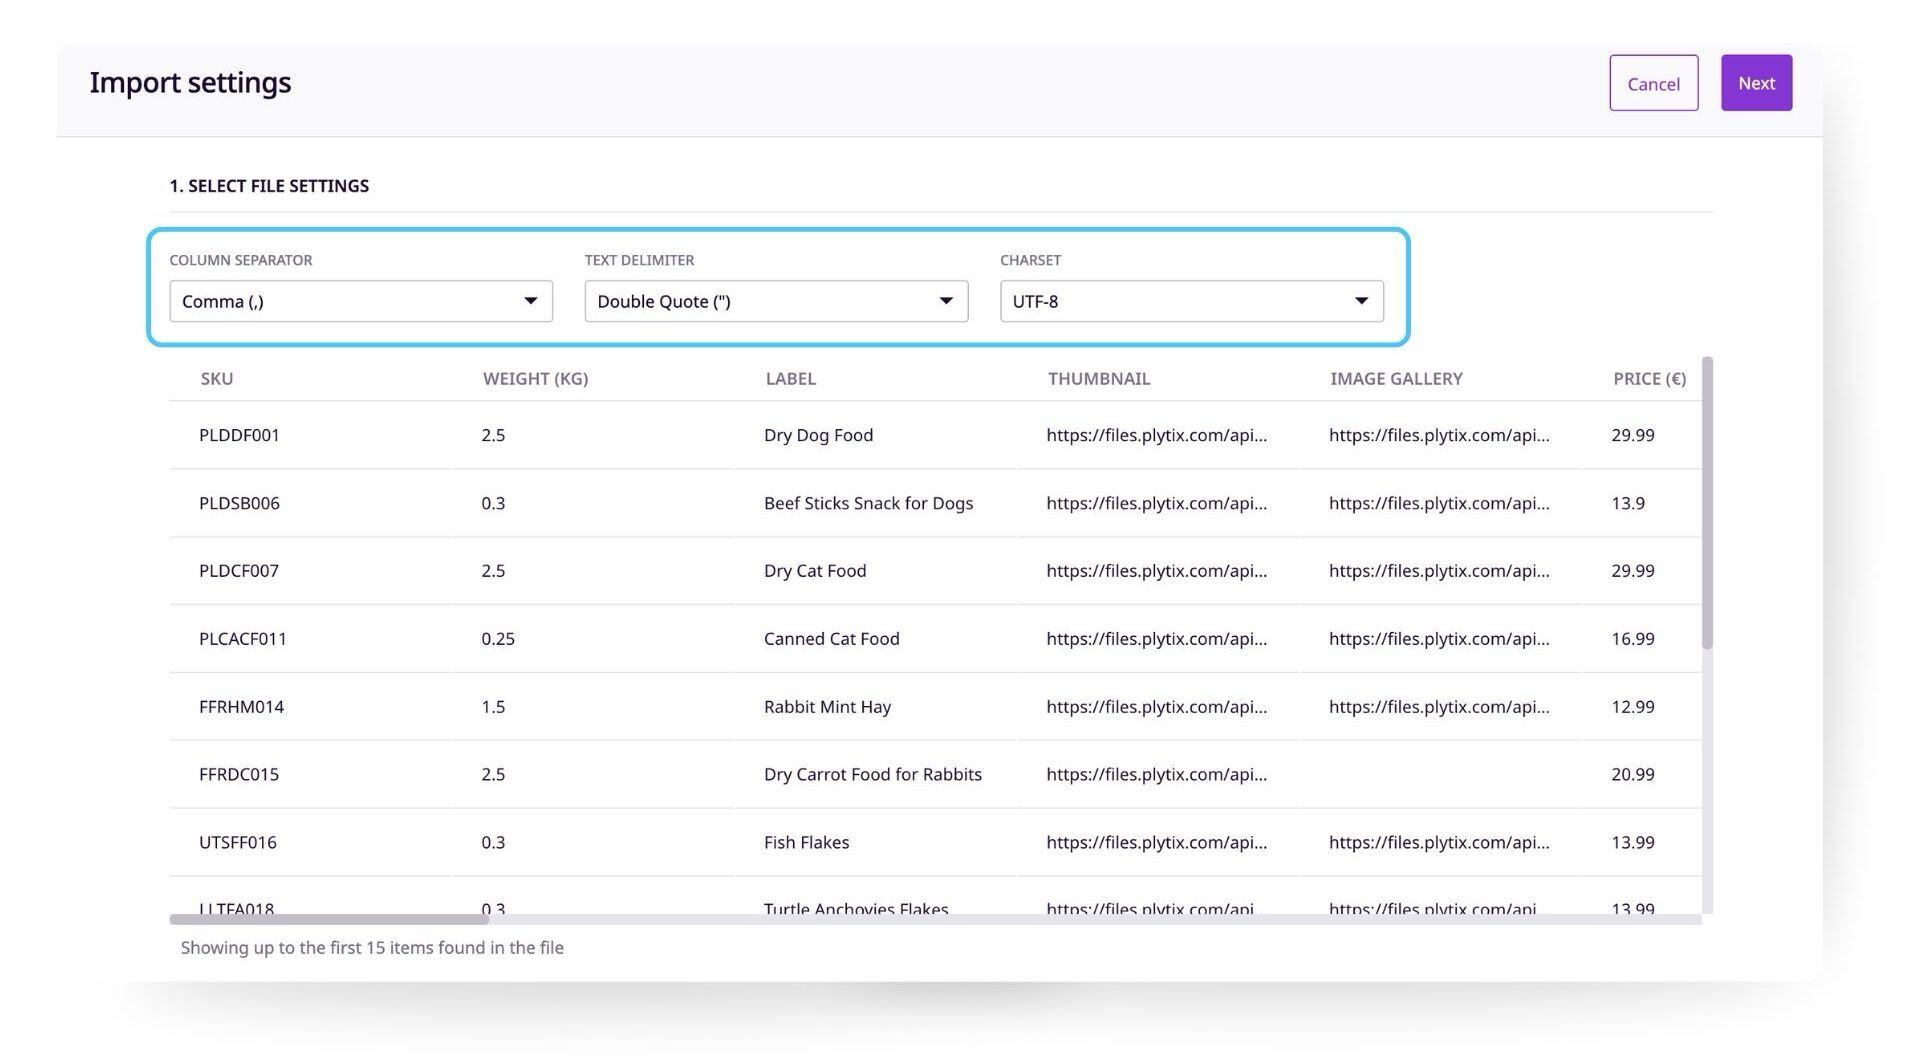
ℹ️ If the preview does not look correct, try changing the file settings (column separator, text delimiter, and charset). All file settings are auto-detected but if they're not correct, you can manually choose the right settings.
File settings
Column separator
CSV files have a separator character in their format, this is traditionally a comma, but in some cases we see other separator characters. From here you can choose between:
- Comma (,)
- Semicolon (;)
- Pipe (|)
- Tab ( )
Text delimiter
As CSV files are using normal text characters to separate data values, a text delimiter is introduced to encapsulate your content in case your content uses the Column separator. You can choose between single or double quotation marks.
Charset
At its core, all content is encoded into numbers when you save a file. The Charset defines what system/dictionary the PIM uses to translate the encoded numbers into readable text. Today, almost everyone uses UTF-8 to ensure worldwide compatibility.
* This setting is auto detected, but you have the option to change it.
Import Options
In the next window that appears you have a couple of settings that will decide how products and assets included in your file will be processed on import.
💡 For your very first import, it's not necessary to change these settings.
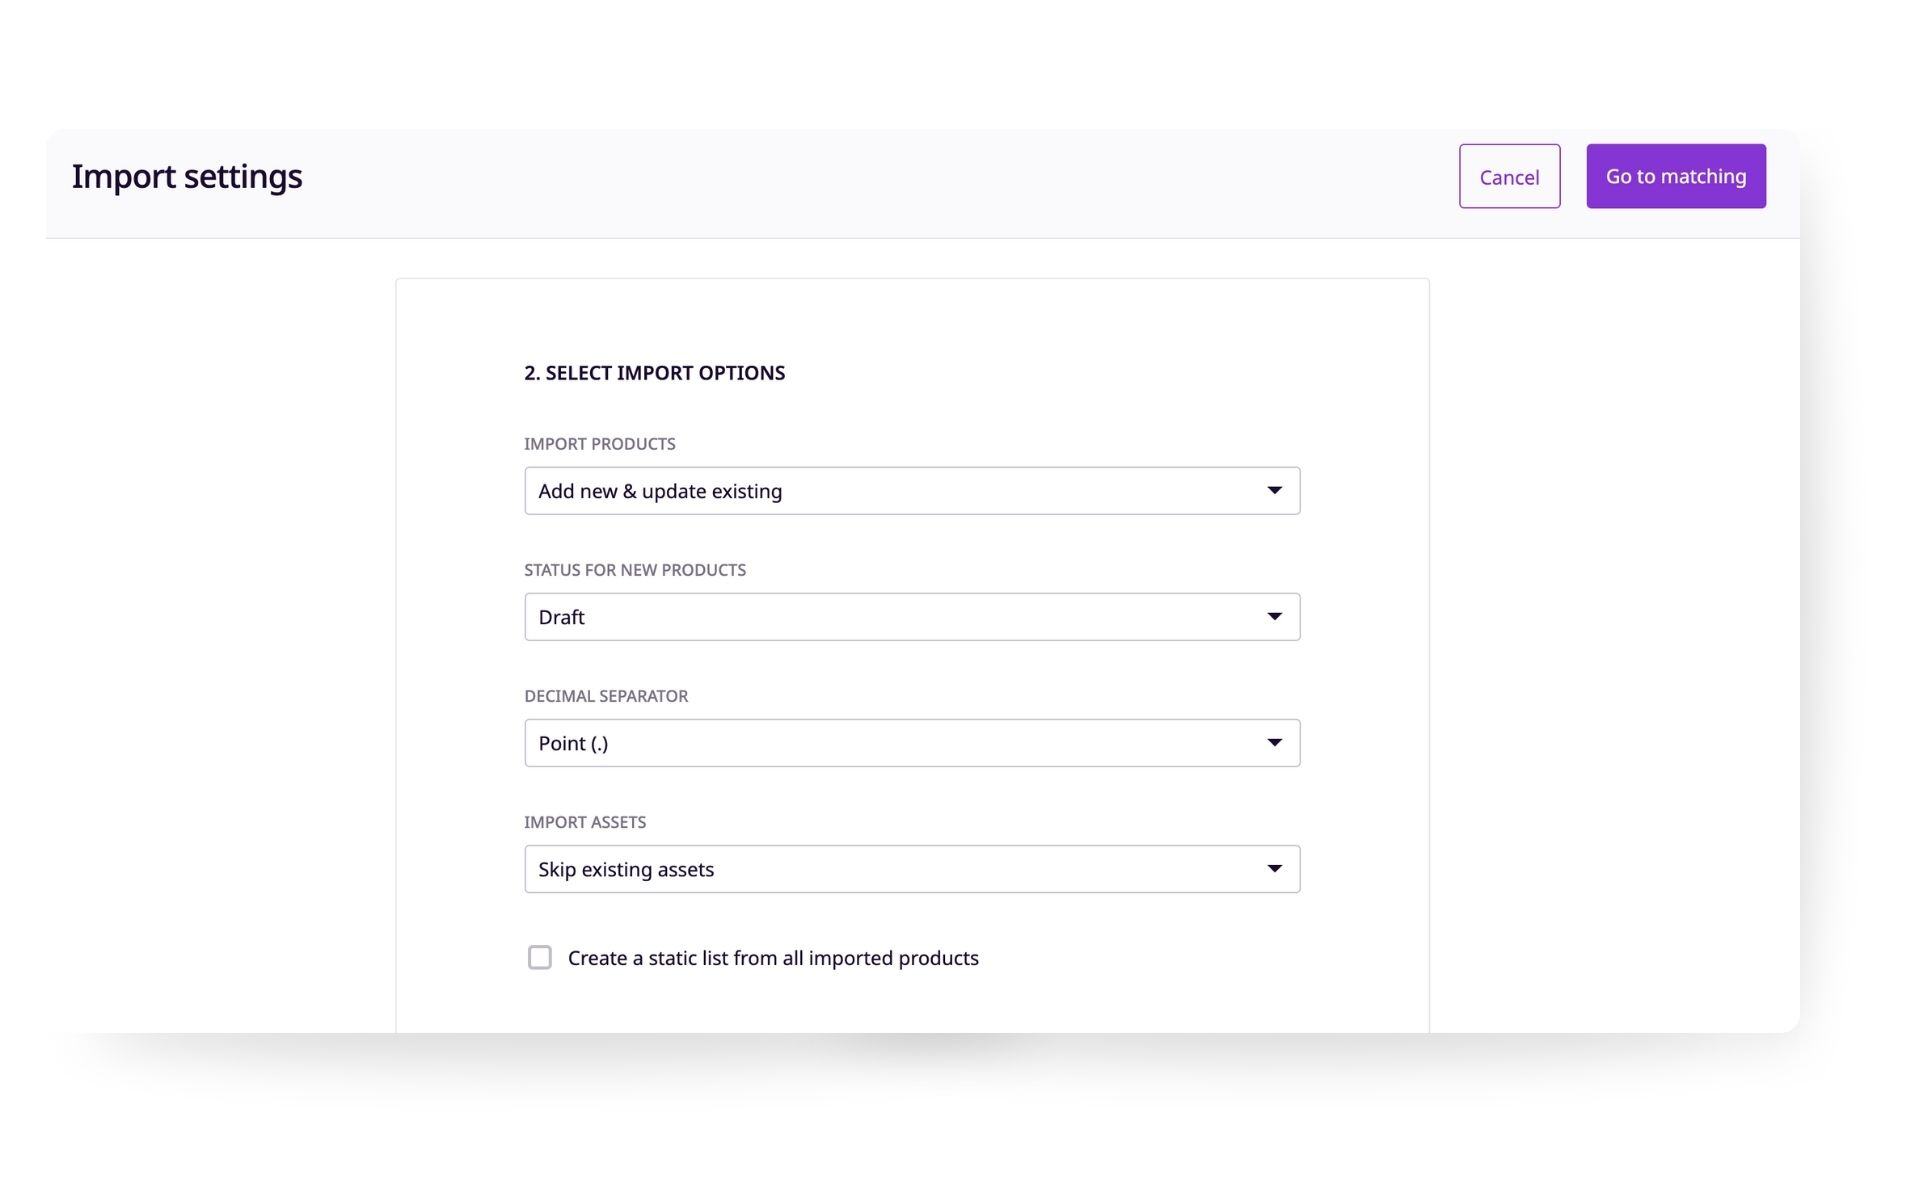
The "Import Products" dropdown lets you choose the following options:
- Add new products & update existing products (default)
- Only add new products
- Only update existing products
The "Status for New Products" dropdown lets you choose the following options:
- Draft
- Complete
ℹ️ Learn more about product statuses and how to use them.
The "Decimal Separator" dropdown lets you choose the following options for decimal values in your data:
- Point (.)
- Comma (,)
The "Import Assets" dropdown lets you choose the following options:
- Skip existing assets
- Import all assets
The checkbox allows you to import the products from the file into a static product list that will be named with the file name plus a timestamp in UTC. This can be useful if you want to maintain a list of products from each time you import.
Family Options
In this section you can choose your preferences for attribute values within a product family.
ℹ️ You can also assign products to families via import. Learn more about creating and managing product families.
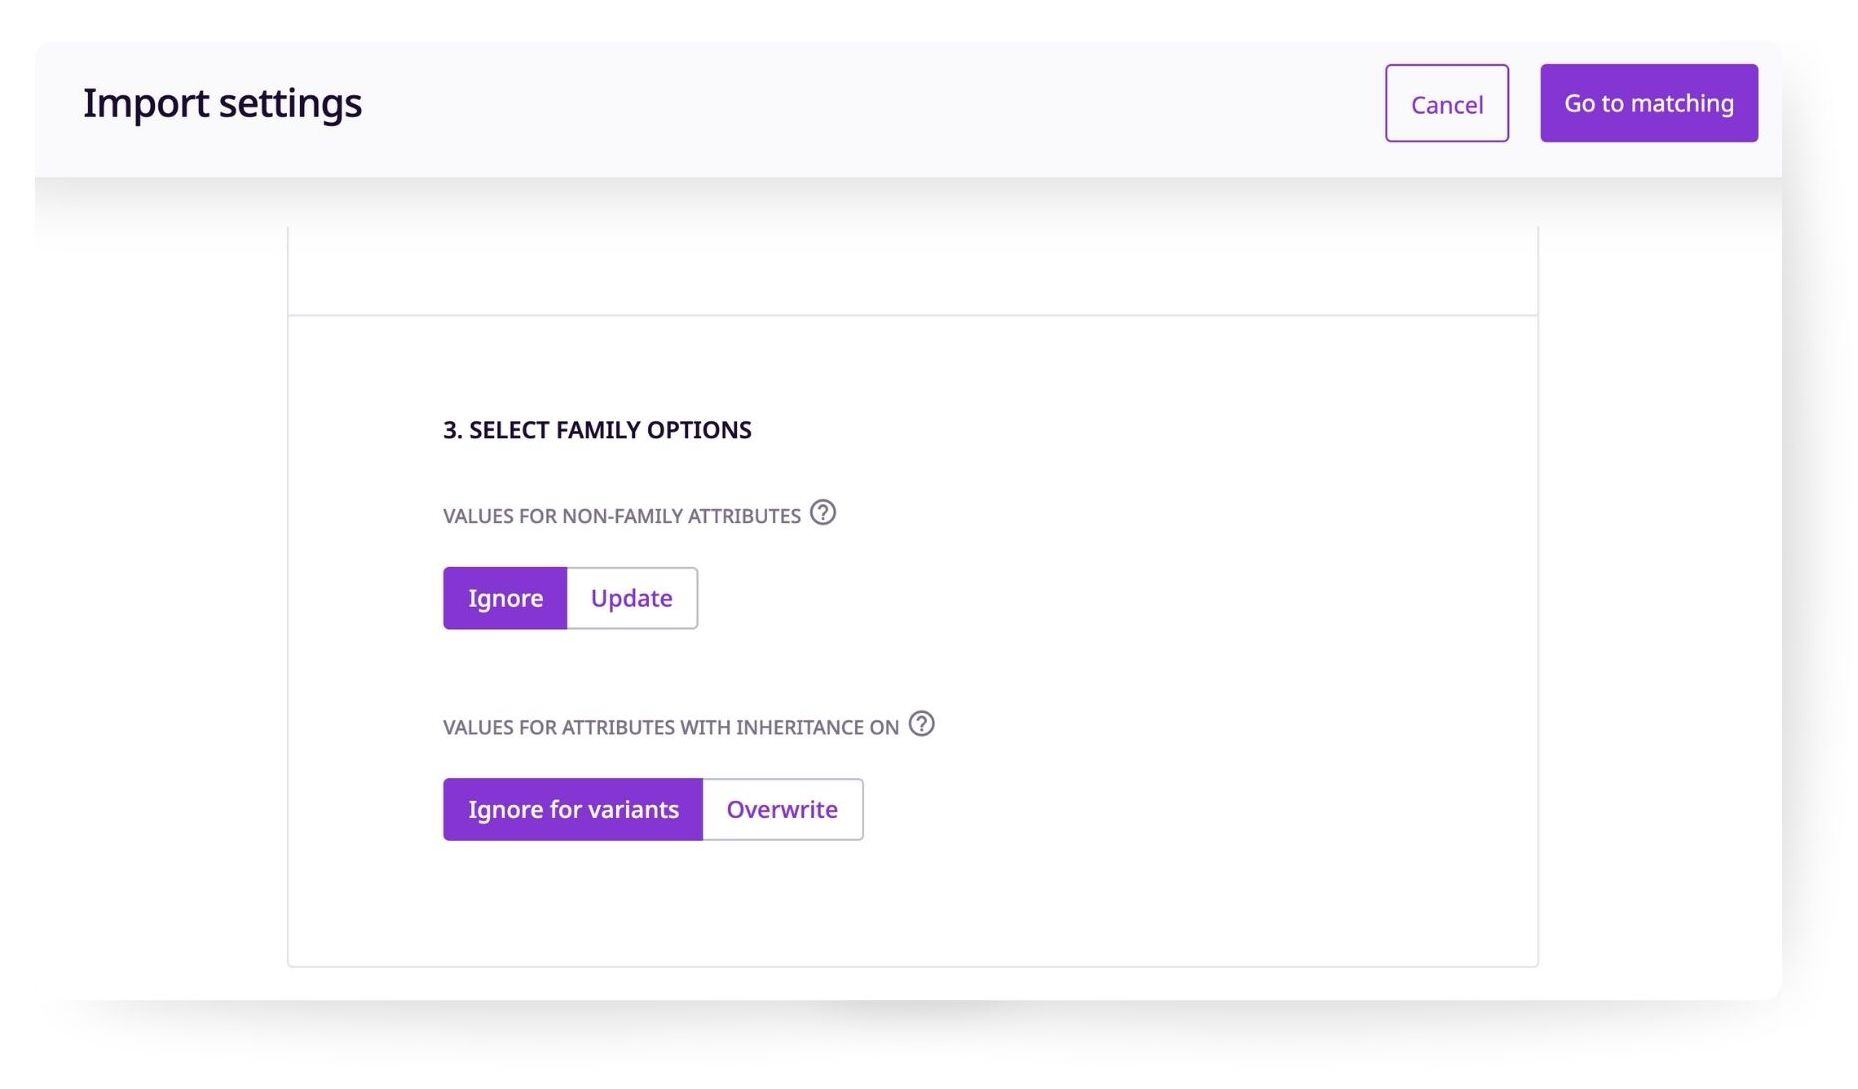
Here you can choose whether you would like to ignore or update values for attributes that don't belong to the given family your products belong to.
Then, choose your preferences for values of attributes that have the inheritance status on. Choose "Ignore for variants" if you wish to maintain the inherited value from the parent, or "Overwrite" if you wish to overwrite the inherited value with a new value for a given variant.
ℹ️ Learn more about editing an attribute's inheritance status.
⚠️ Any families specified in your CSV must already exist in your PIM. First, create a product family in Plytix.
Once you have defined all options, you can go to the matching process.
Import overview
After you have configured your import settings, you will see a new screen. This is where you can define how your information will be imported into Plytix.
File name and status
At the top of the screen, you will see the file name of the CSV you are importing and its status.
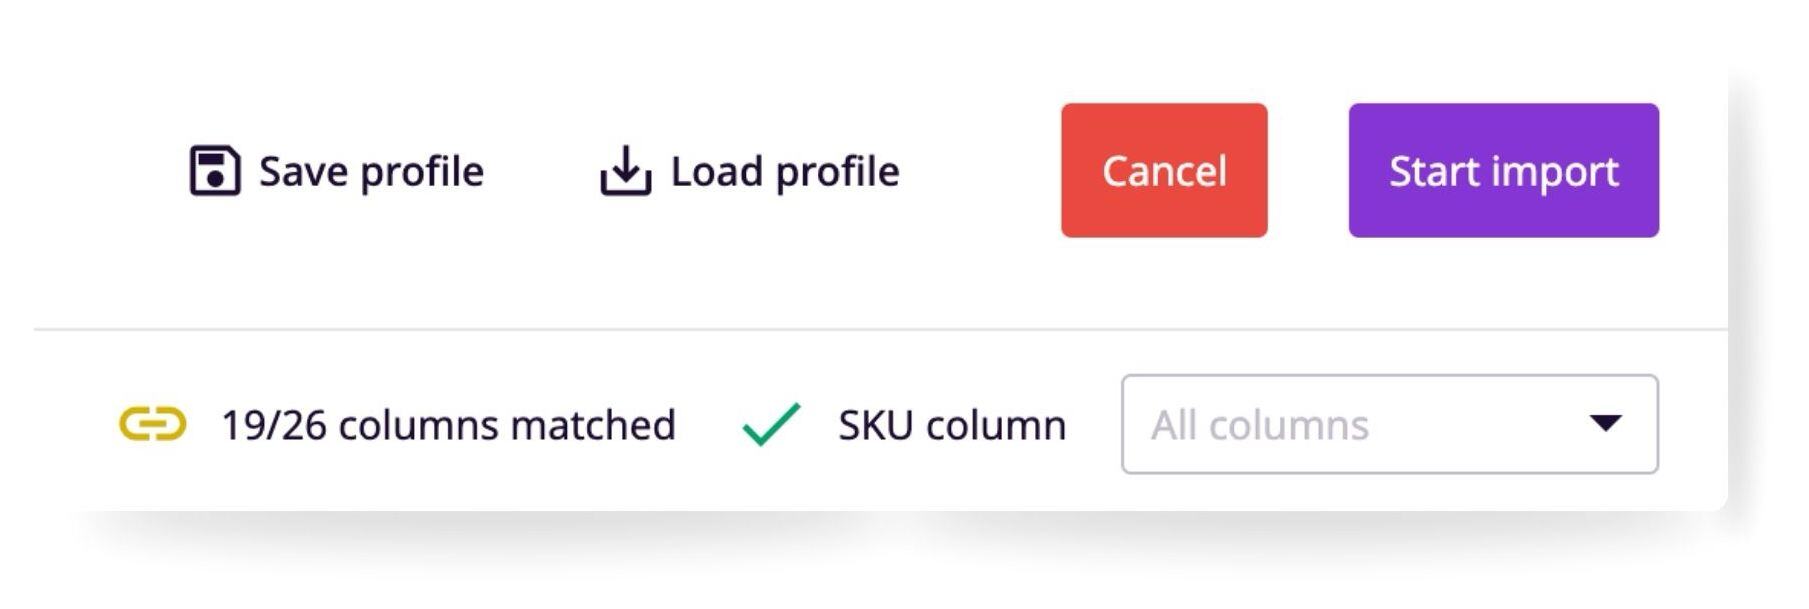
The status area identifies how ready your CSV is for import and will check the following things:
- That you have identified an SKU column (required)
- How many columns out of the total are matched to data in the PIM
- If there are any duplicate attributes detected

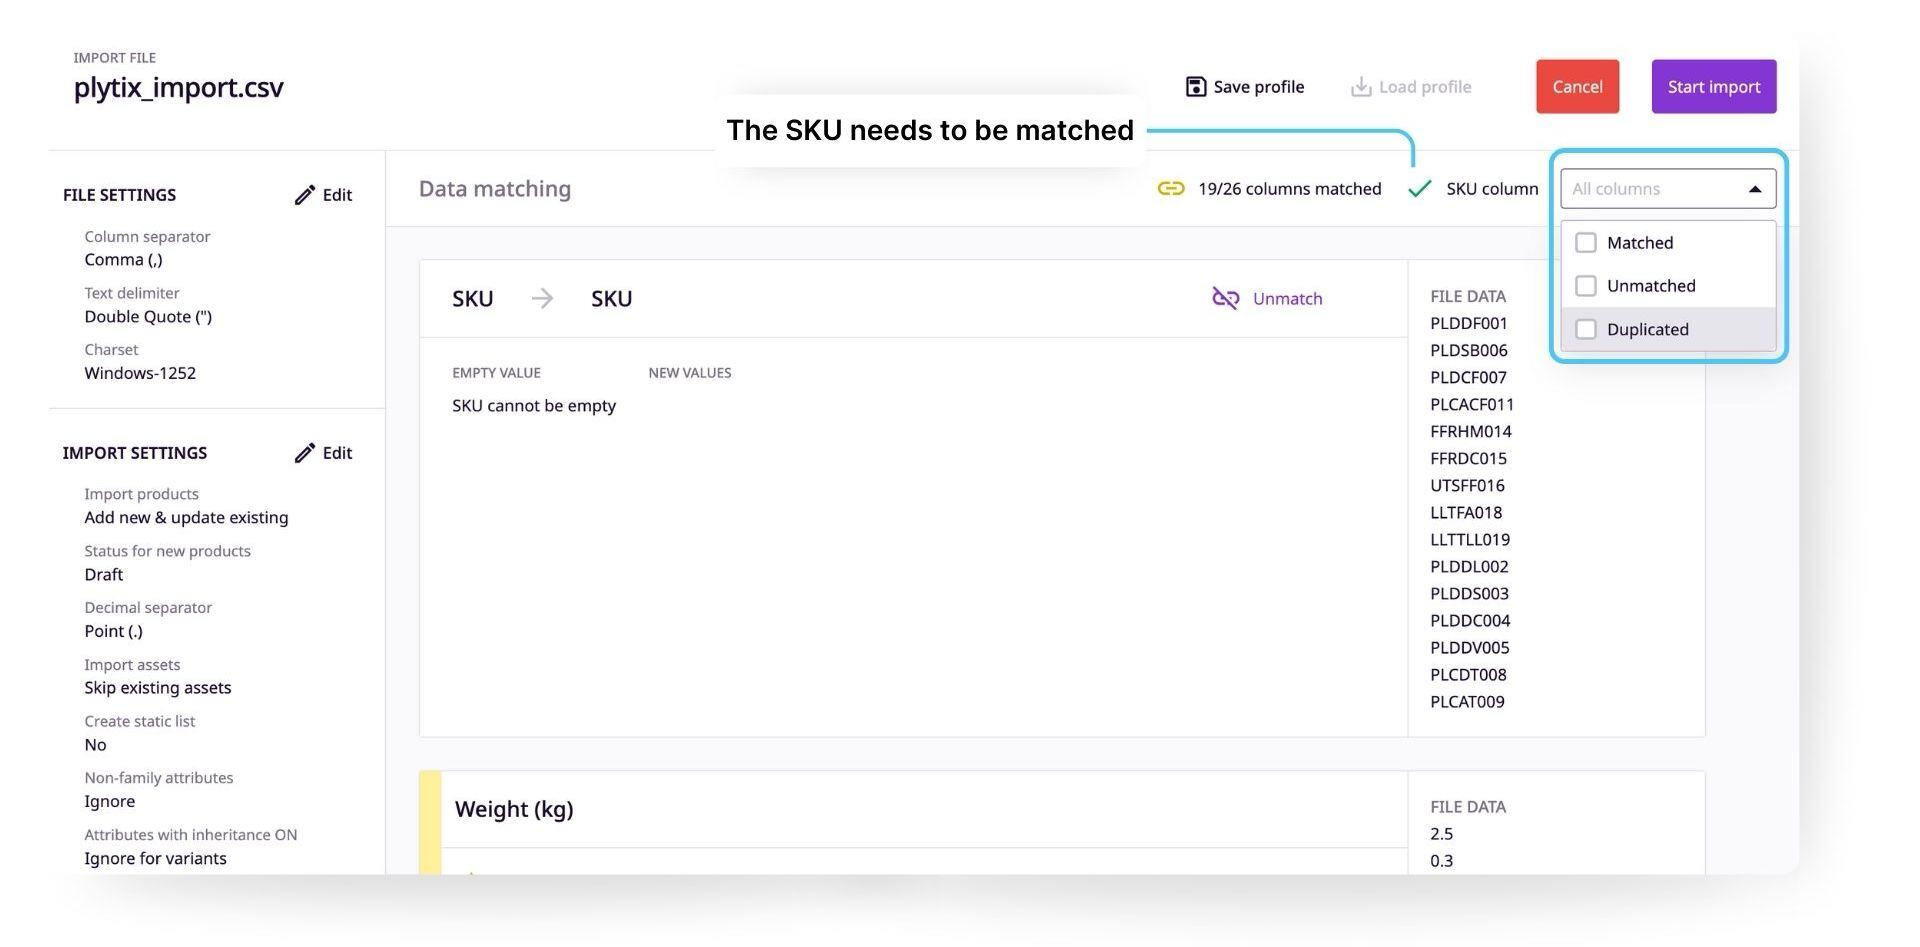
ℹ️ You do not need to match all columns to start your import. The only column that needs to be matched is the SKU. Other columns that are not matched will be ignored and can be matched for import later on.
File Settings
These are the file settings as mentioned in Step 1. You can modify them here as well.
Import Settings
These are the import settings that you have previously defined and that tell Plytix how to ingest the data coming in. At this point you can change the import settings if needed.

⚠️ If you change the file settings, you may distort or modify how your data is understood by Plytix.
Import Profiles
If you have any saved Import Profiles, click on "Load profile" to automatically apply the settings and data matching you have set up for a particular data set.
You can also save a new profile by clicking "Save profile".
ℹ️ Learn more about Import Profiles and how to use them.
💡 Don't save a new Import Profile until after you have finished matching all your relevant columns.
Attribute Matching
This is the part of the Import Overview where you can map the data from your CSV into data you have in Plytix.
In Data Matching, you will see a list of all the headers in your spreadsheet, that will appear as matched or unmatched. To sort these attributes, select which ones you want to view from the dropdown on the right. You can also view any attributes that have been matched to the same column by selecting 'Duplicated.'

Auto-matched attributes
Plytix will automatically match attributes in the system with column headers in your spreadsheet. Automatic matches will happen when the name of the header and the name of the existing attribute are an exact match (case sensitive).
Matched attribute columns will appear like this:

You can unmatch these columns by clicking the "Unmatch" button on the top right.
⚠️ Unmatched columns will not be imported.
In the top left-most section, you will find the header from your spreadsheet.
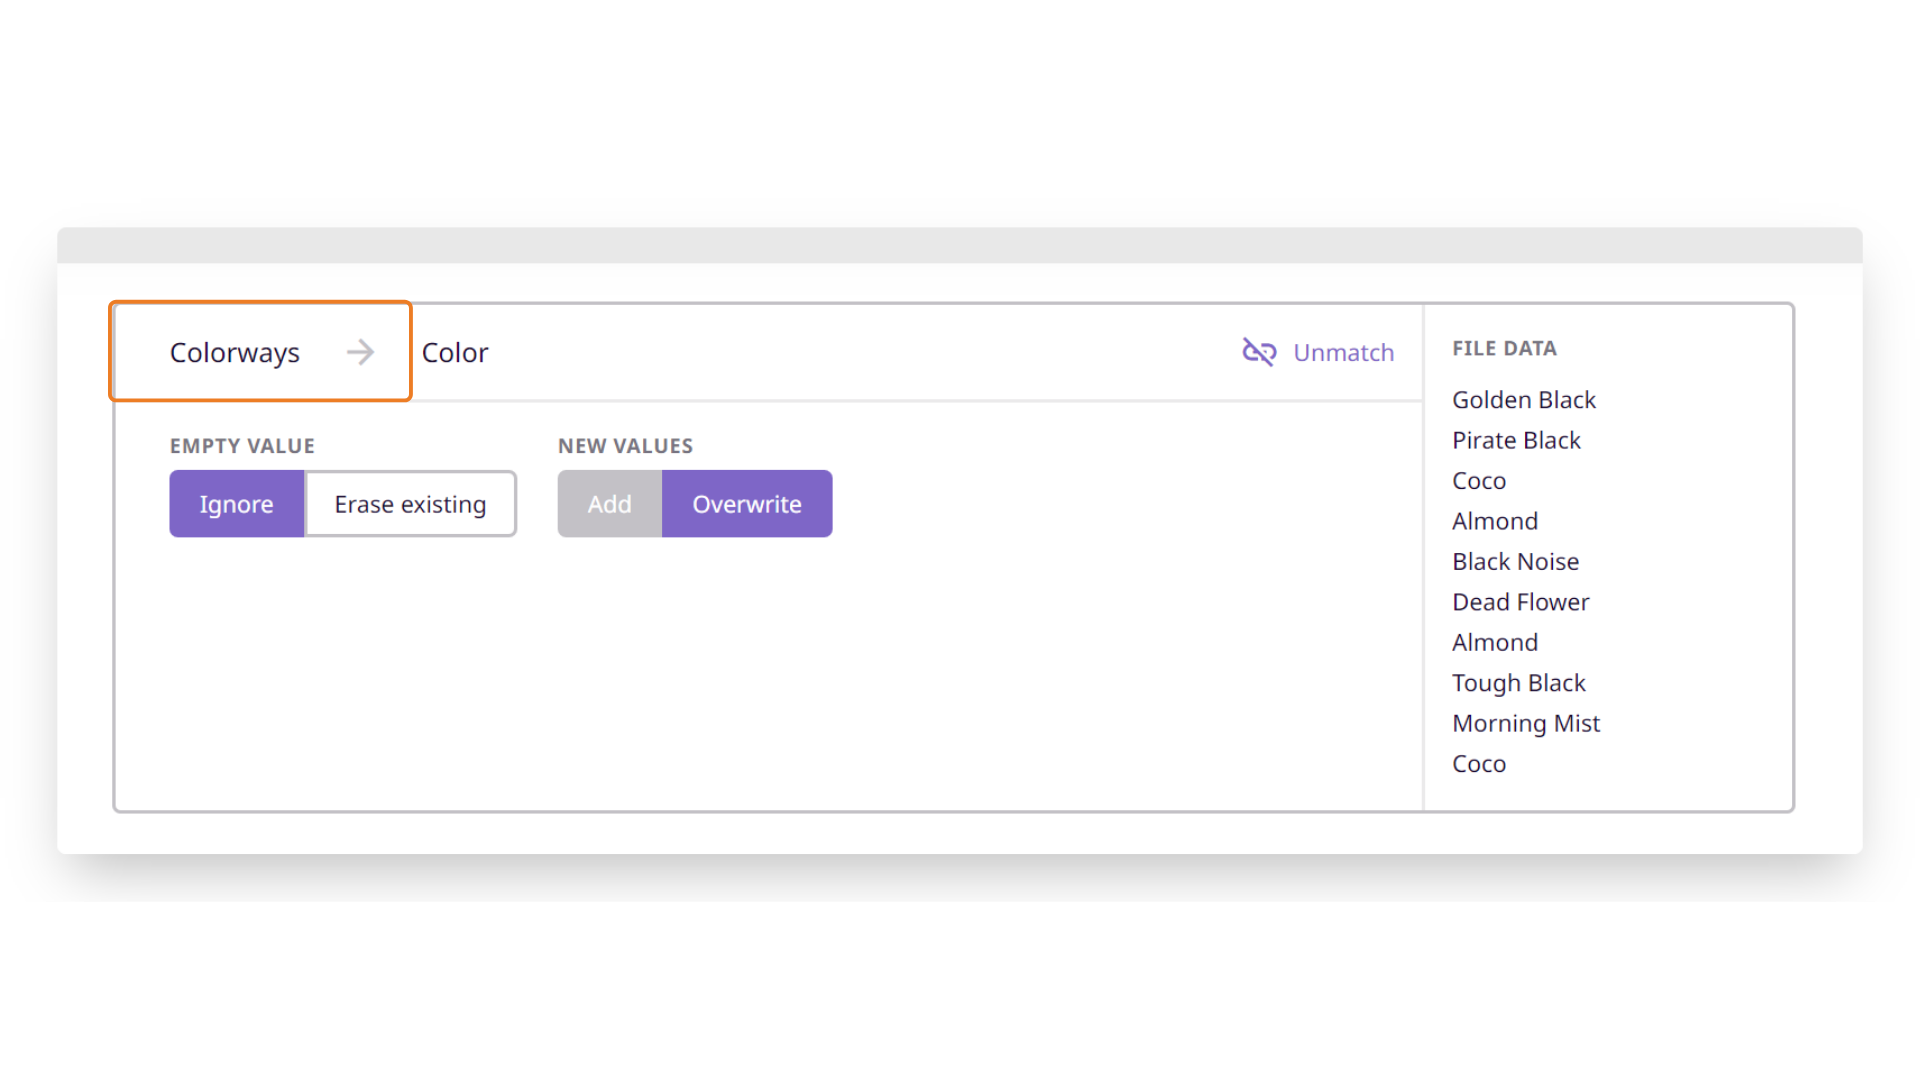
Next to that will be the matched attribute or relationship.
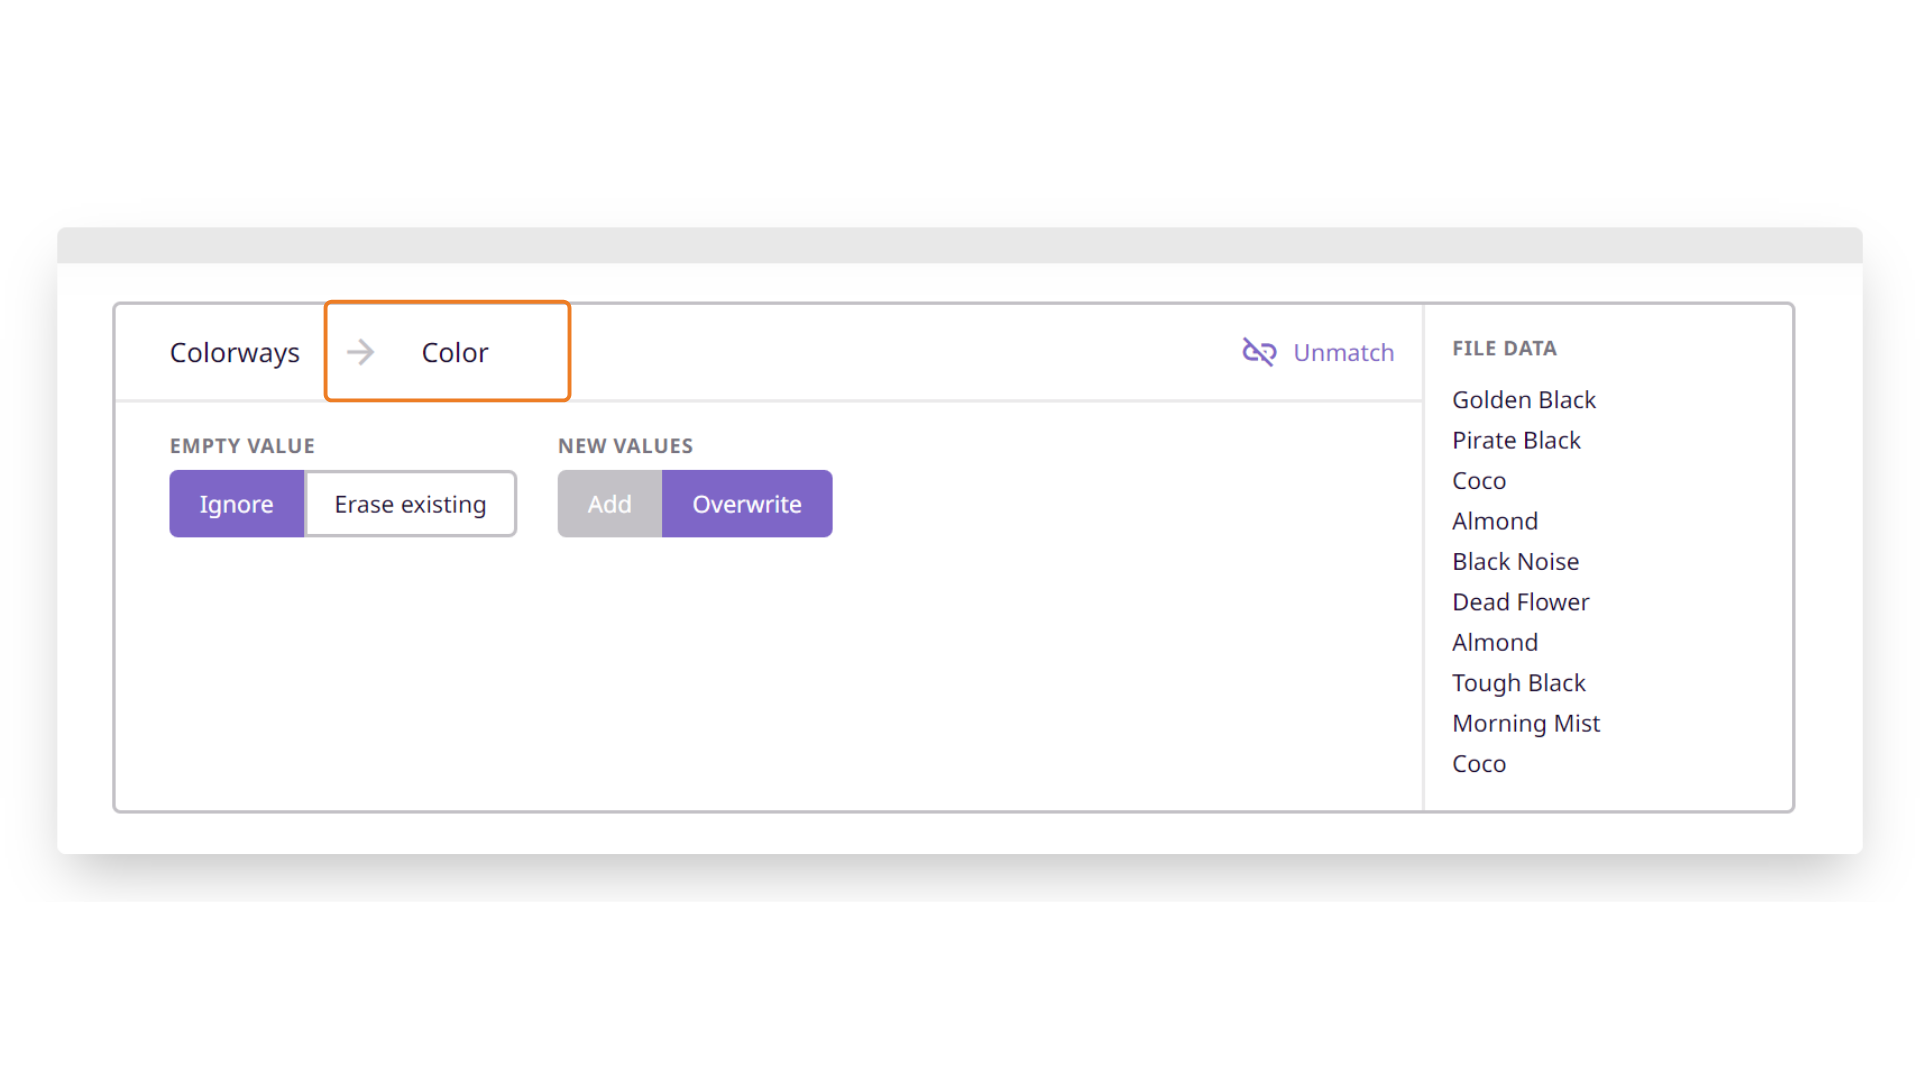
Below this, you will see different advanced settings for how to translate and ingest your data. These vary based on the attribute type.
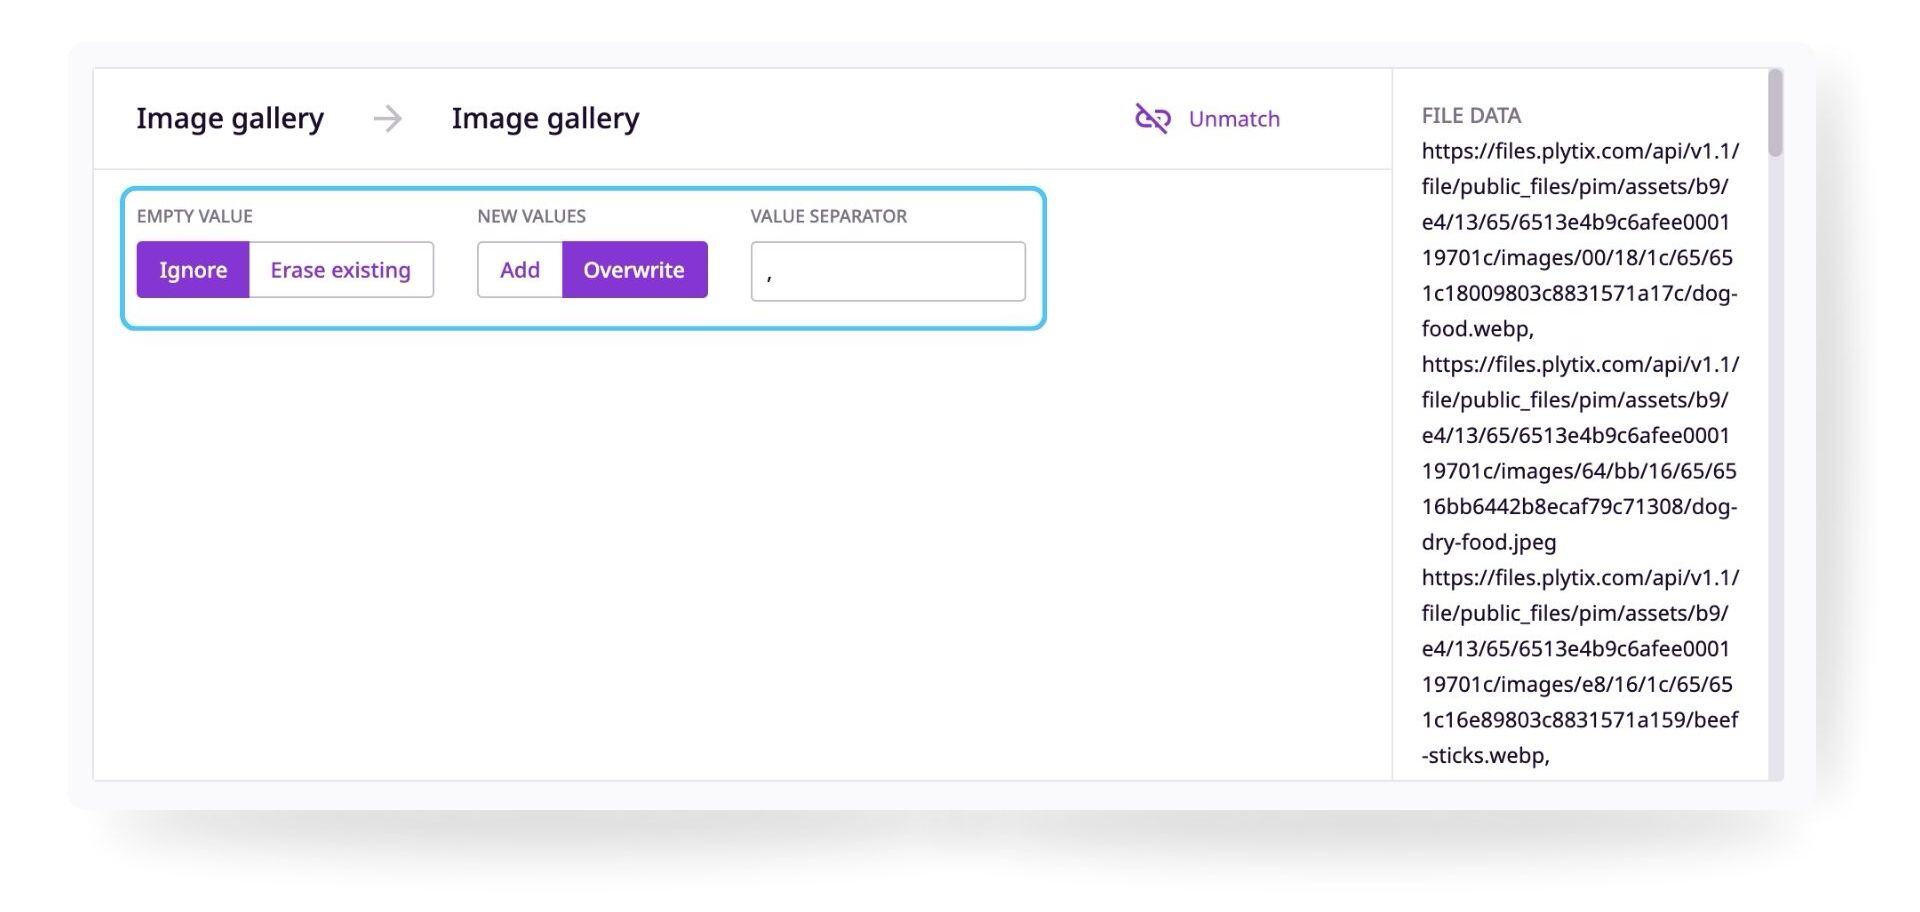
Empty Values
In case the incoming data value is blank when updating an existing product, you can choose if the PIM should 'ignore' and leave the existing value untouched (if any), or 'erase the existing' value.
New Values
In the "File Data" section to the right, you will see the preview data from your file. This helps you choose the right attribute type.
Unmatched attributes
If an attribute does not have an exact match in Plytix, it will not be matched automatically. You will have to either match your data to an existing attribute or create a new attribute or relationship.
Unmatched attributes columns will appear like this:
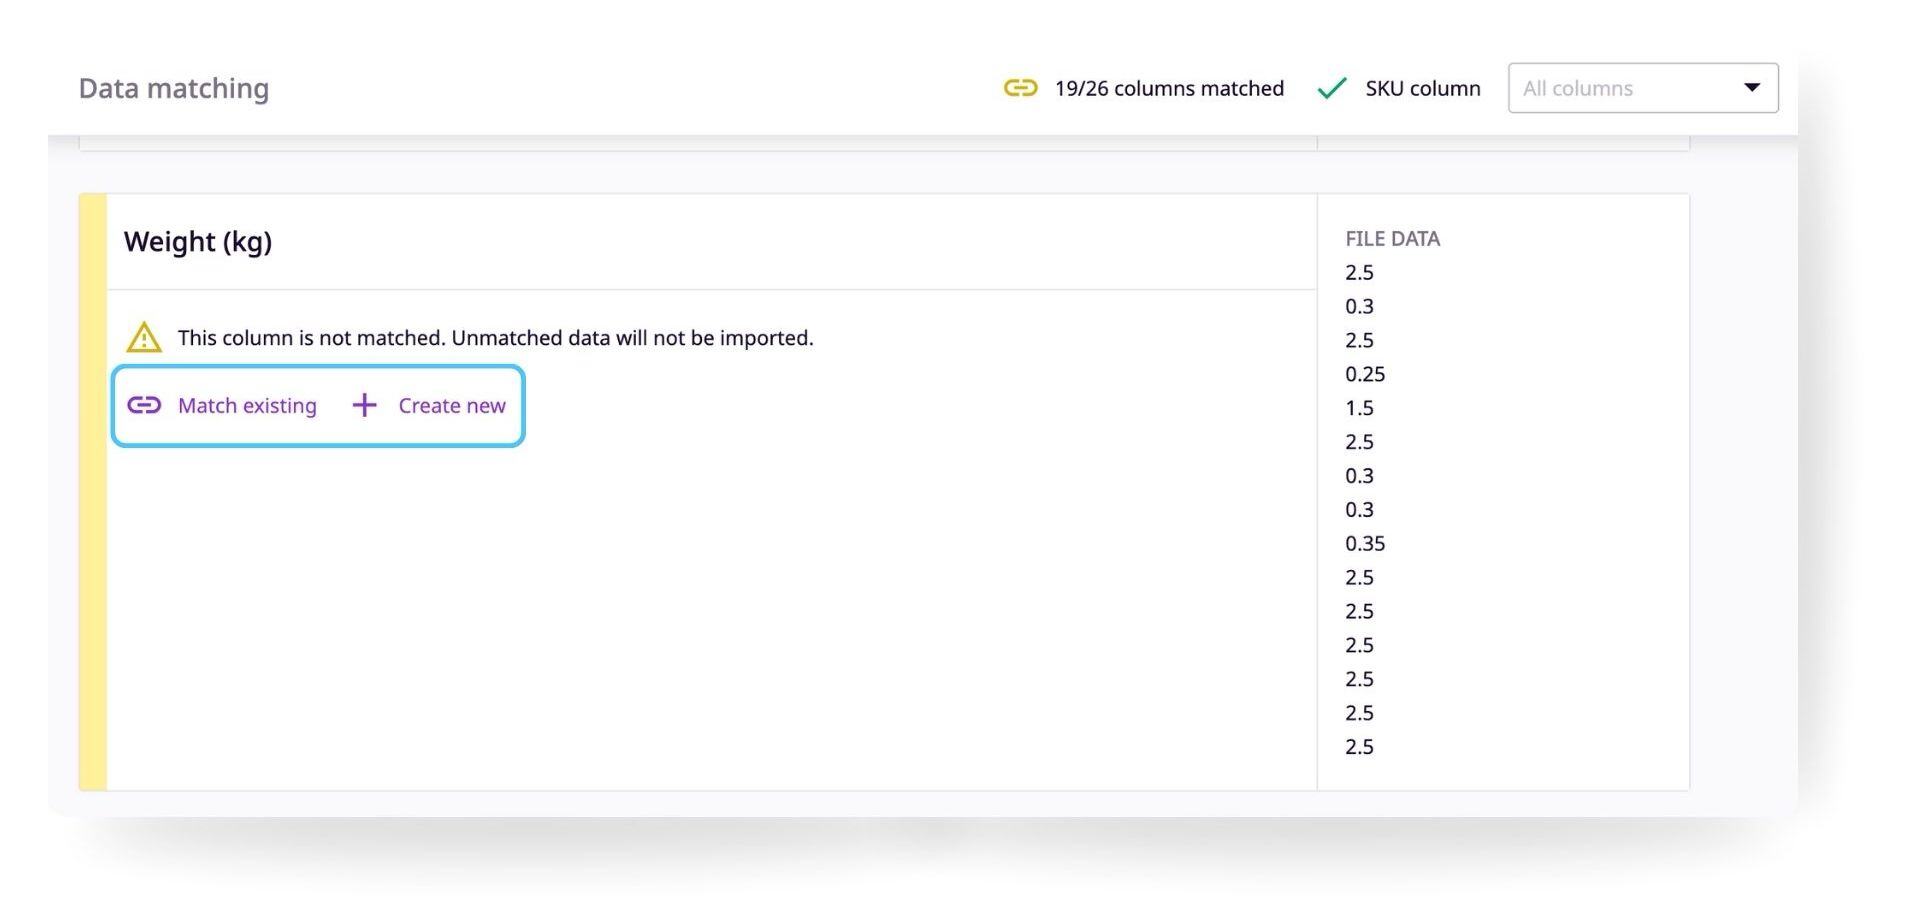
You can match the data to an existing attribute or relationship by clicking "Match existing" or create a new attribute or relationship to match to by clicking "Create new".
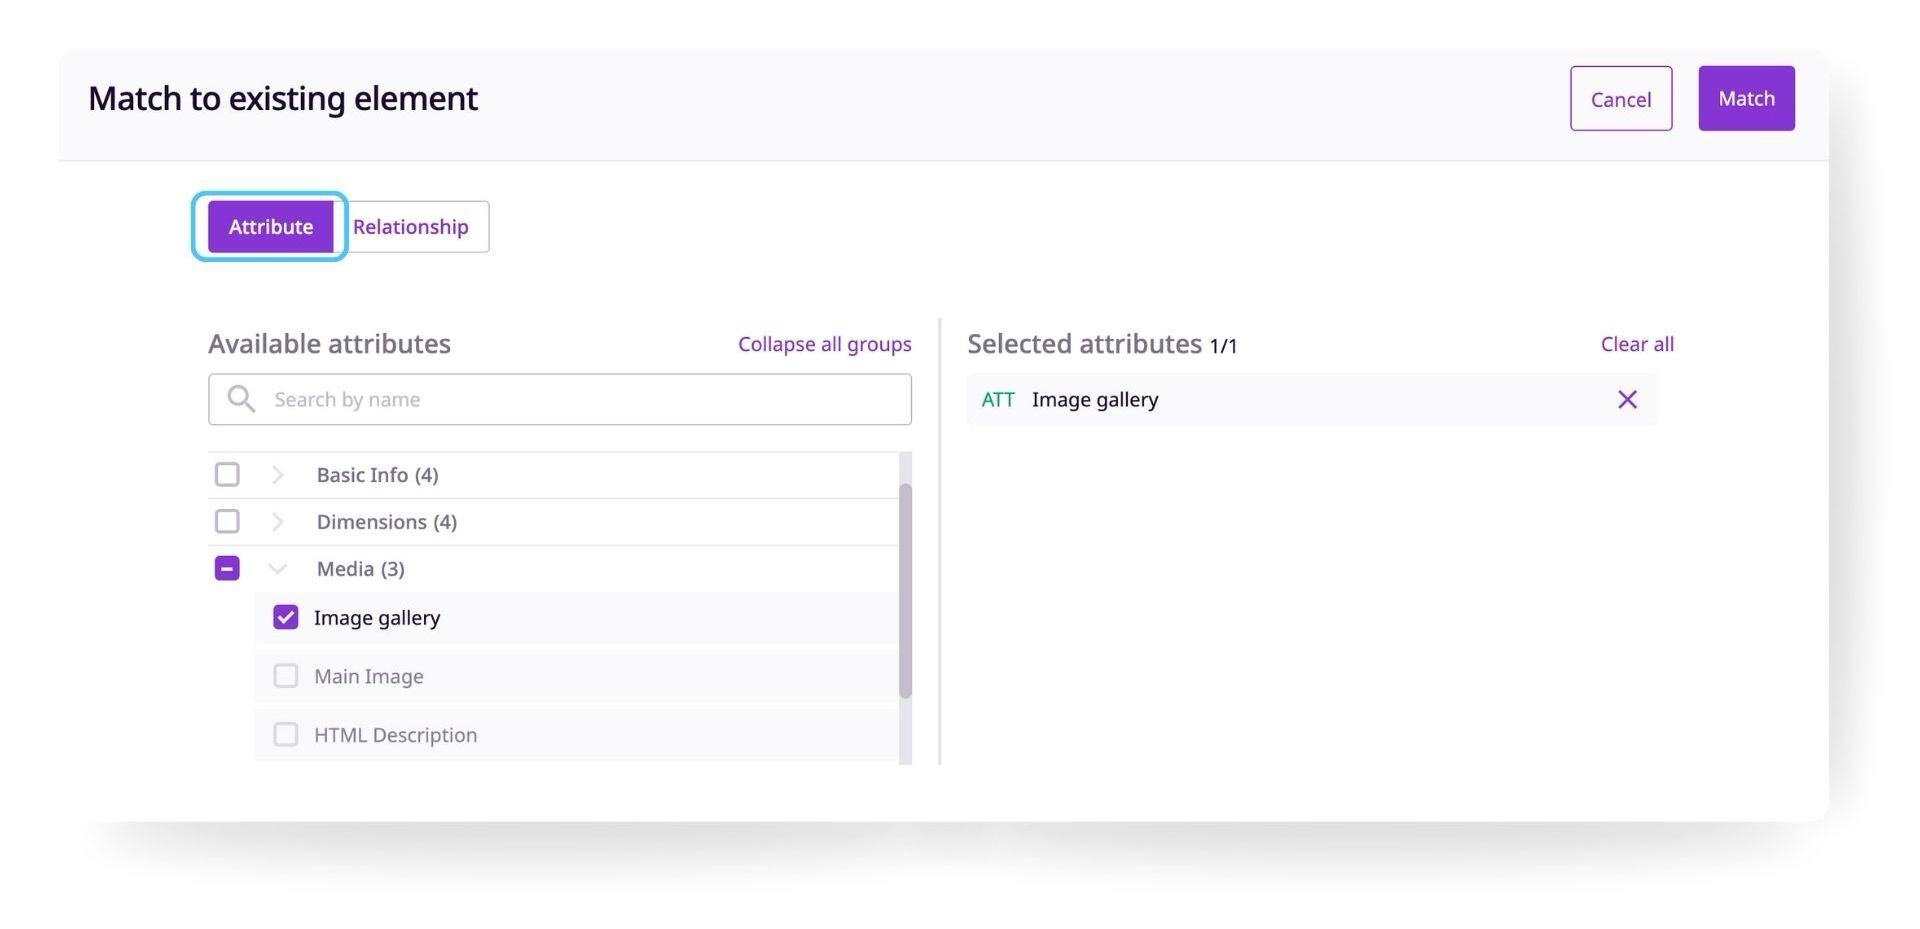
How to match existing data:
- Click "Match existing"
- Choose if you want to match an attribute or relationship
- Choose the element you want to match
- Click "Match"
How to create new data matches for attributes
- Click '+Create new'
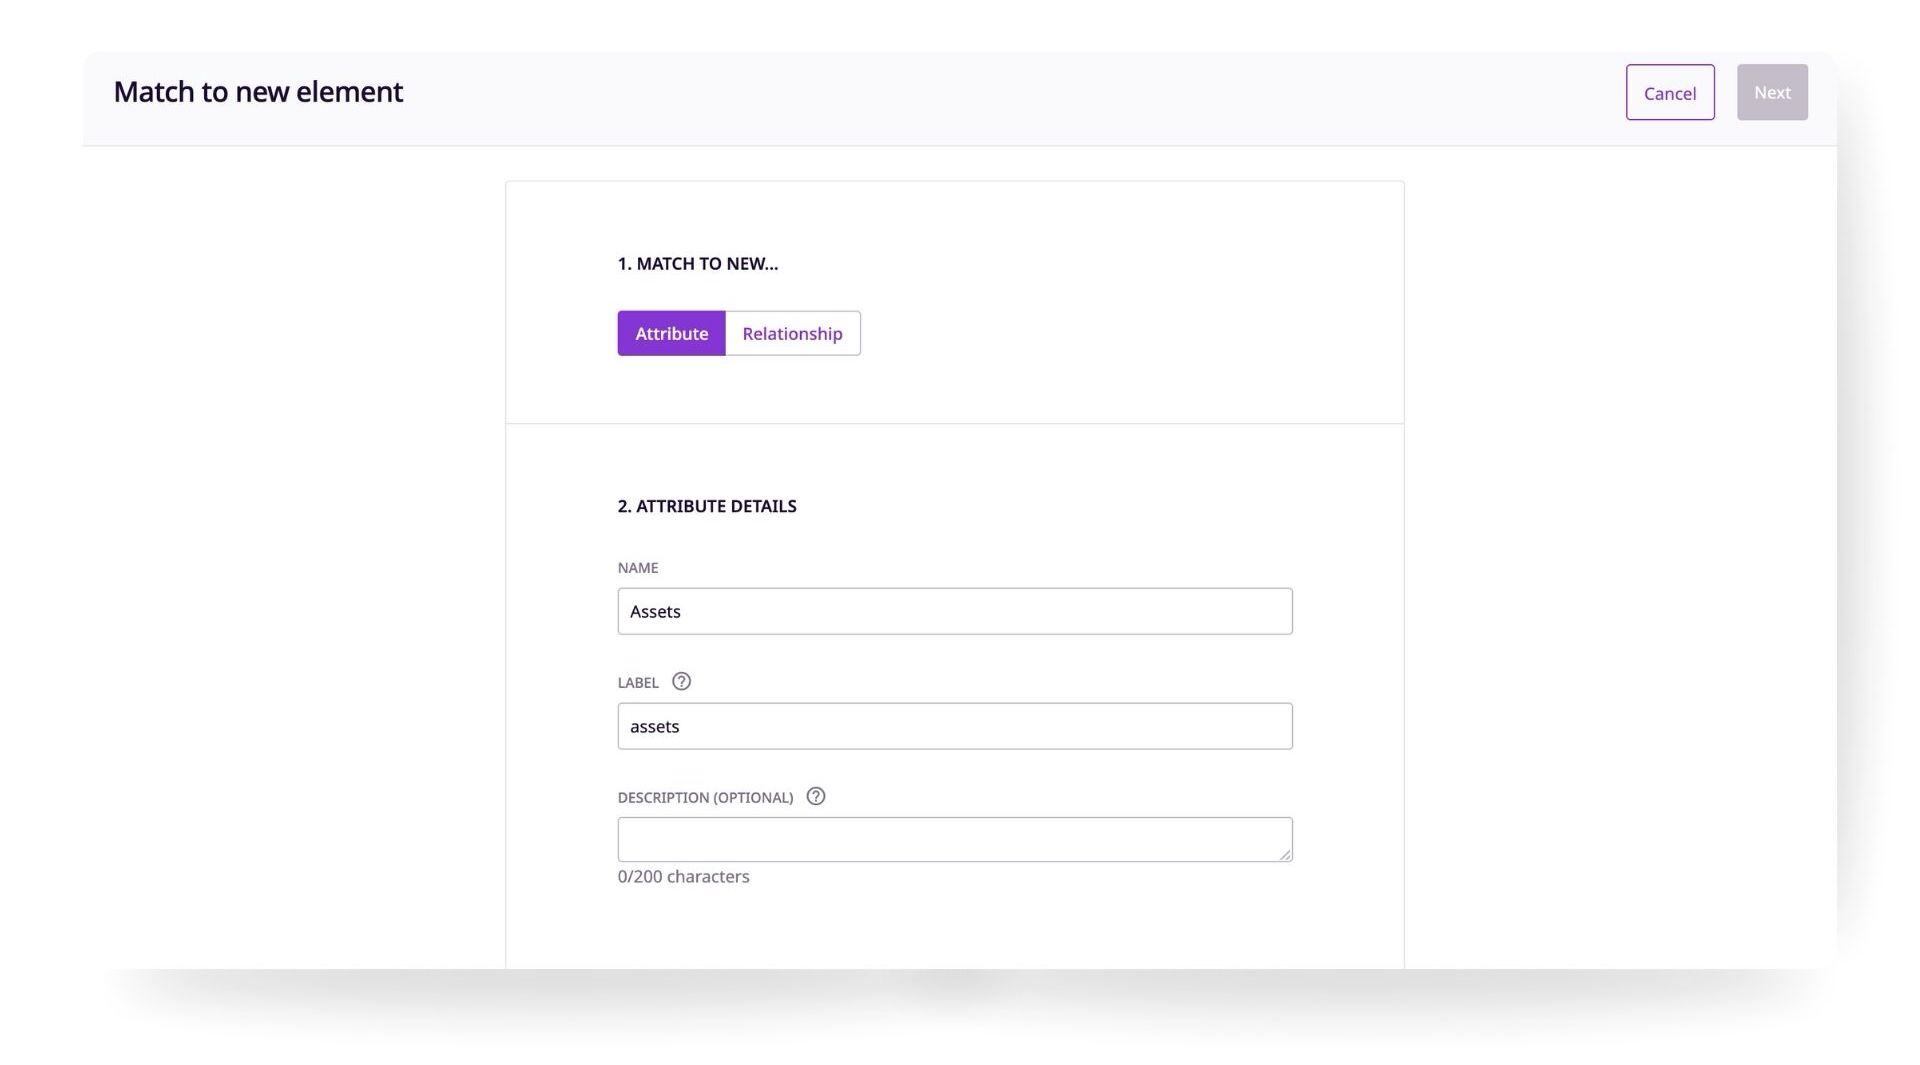
2. Choose the attribute type you want to create
ℹ️ Learn more about attribute types and how to choose the best one for your data.

3. Review and change the name if necessary
4. Click 'Match'
ℹ️ The system will automatically import all multi-value options for Multi-select and Dropdown attributes that are included in the spreadsheet. You do not need to add any options in order to match them.
How to create new data matches for relationships
- Click '+Create new'
- Choose the option for "Relationship"
- Review and change the name if necessary
- Choose the direction
- Click 'Match'
ℹ️ Learn more about product relationships and how to set them up.
What's Next?
Now that you know how to import product data:
- Check the status of your import with Import Logs
- Learn how to use and apply filters
- Learn how to upload assets