
Feed Management Tools (FMTs) are platforms that take your product information and reformat it to match what each marketplace needs, so you don't have to do it by hand. They're not a substitute for a PIM: FMTs don't act as a central source of truth for data accuracy and consistency, especially across recurring updates and team collaboration.
Instead, think of them as a distribution layer, once your product data is centralized and accurate in Plytix, an FMT automates getting it into the right format for each marketplace. Pairing Plytix with an FMT gets you the best of both: accurate, centralized data plus automated, platform-specific distribution. Plytix includes 10 pre-made FMT templates that match your Plytix attributes to your FMT's fields. This article walks through how to use them.
Creating a Feed Management Tool Channel
Uploading your File into your Feed Management Tool
*Skip to any section in this article by clicking on the links above
Creating a Feed Management Tool Channel
To access a specific Feed Management Tool template, head over to the Channels icon in the left sidebar and click the Add Channel button. Name your channel, then select a template for the Feed Management Tool you use.
These are all the Feed Management Tool templates available in Plytix:
- Feedonomics
- Channable
- Channel Engine
- Datafeed Watch
- Products Up
- Shopping Feed
- Lengow
- Channel Pilot Pro
- GoData Feed
- BeezUp
Managing your Channel
Once you've created a new channel for the template of the FMT you chose, you will find the following tabs:
Process Log
Before you process your channel for the first time, this tab will be the Instructions tab, where you can find general information about your channel and the step-by-step to process it.
ℹ️ Processing your channel generates the downloadable feed that you can then import into your selected Feed Management Tool.
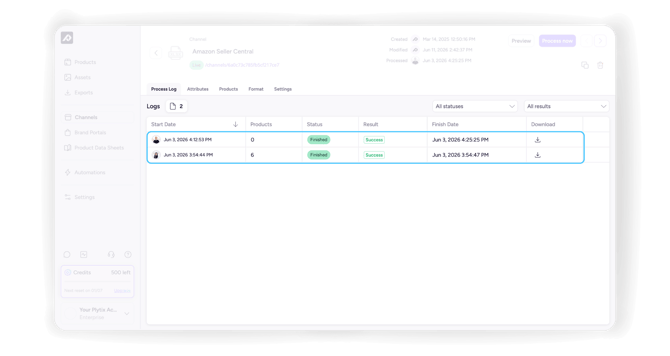
Once you've processed your channel for the first time, this tab will become your Process Log tab, where you can find a record of your previous processes and download past files you generated in the channel.
Products
A Channel is a Destination, so products are added to it by assigning them directly, there's no separate product list step. In the Products tab:
- Click the Add products button.
- In the Add products window, use the All products and Selected tabs to browse everything available or review what you've already checked off.
- Use the Search by SKU or label field to find specific products, or tick the Select all checkbox to select everything shown.
- Tick the checkbox next to each product you want to include in the file.
- Click the Save button to confirm, or the Cancel button to back out.
While you're still in the Add products window, you can deselect a product before saving by heading to the Selected tab and clicking the X icon beside it.
To remove a product that's already assigned to the Channel, tick the checkbox next to it (or multiple checkboxes) in the Products table, then click the trash icon in the bulk action bar at the bottom of the screen and click the Remove from destination button to confirm.
💡 You can also assign products to this Channel from outside the Channel itself, for example, from Product Overview using the bulk action bar, from a product's own Detail page under its Destinations tab, or via an Automation. Learn more in Understanding and Managing Destinations.
Mapping
In this tab you will find three columns:
- Plytix attributes: This is where you can select the Plytix attributes you would like to match with the fields from the Feed Management Tool you're using.
- Feed Management Tool fields: A list of the most common fields for the tool you selected.
ℹ️ The list of fields will vary according to the Feed Management Tool you chose when adding the channel.
- Formatting: Some attribute types allow for formatting options, so you can match the requirements of your marketplace without changing the attribute in Plytix. You can format date attributes and assets, or create a new formula operation to transform your attribute values.
Depending on your product type and the Feed Management Tool you're using, you may need to include additional fields that aren't included in this list.
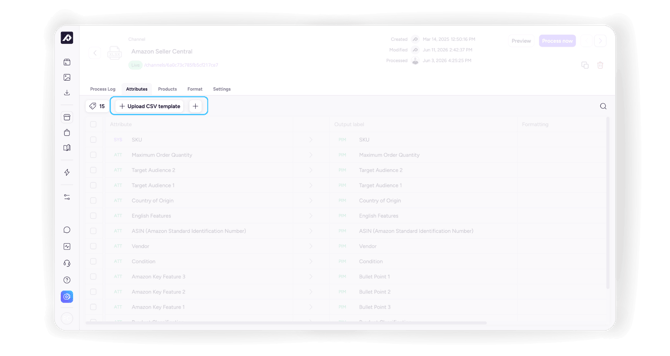
To include additional fields in your file, click the + Add attributes button. If you already have a list of fields you'd like to include, you can upload a CSV template.
Settings
In the Settings tab, you can manage the following information:
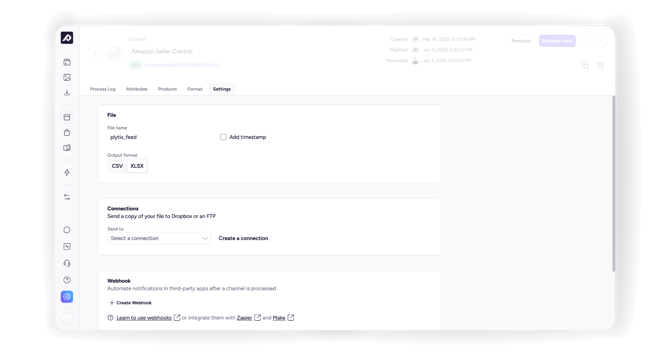
- File: You can customize how your file will be named when you download it. You can also choose to add a timestamp to the file name for reference.
- Connections: If you have a FTP or Dropbox account, you can send a copy of your feed's file. To do so, click the + Create a connection button.
- Webhooks: Automate notifications in third-party apps with information about your processed channel. Learn how to get started with Plytix Webhooks here.
- Scheduling: Set up a periodic processing for your feed if you wish to have your channel processed automatically at a specific time and frequency.
Processing your channel
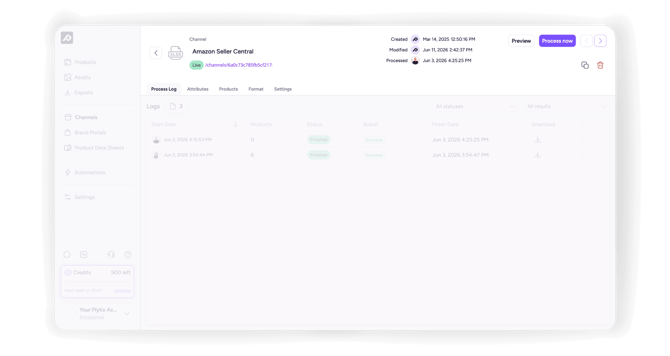
To process your channel and generate the file you will then upload into your Feed Management Tool, click the Process now button.
To learn more about processing preview options, check out this article with more details about it.
After you've processed your channel, a feed URL will be automatically generated. Click on it to download it.
Uploading your Feed into your Feed Management Tool
After you've generated your feed URL in Plytix with the pre-populated fields from your PIM matched to the requirements of your tool, you can upload that file into your preferred Feed Management Tool. Below you will find general instructions for how to upload your Plytix feed into most of the Feed Management Tools included in our template options.
Channable
- Go to Channable's setup page and select the Setup import option.
- Choose CSV as the import option, then paste the URL generated by Plytix after processing your channel.
- Map the fields from Plytix to Channable's fields (most will auto-map).
- Click the Save & Import button, and wait until the status says Finished.
ℹ️ Sometimes Channable will warn you that some fields are missing in the mapping. For example, if you're missing a field called title: find the row for that field, turn off the Custom toggle, and select title from the Internal Channable Field dropdown instead.
For more information, access Channable’s Help Center.
ChannelEngine
1. Head to the Product feeds page in ChannelEngine, then click the Add product feed button.
2. Paste your Plytix feed URL, select the correct CSV delimiter, and name your feed.
3. Configure additional settings like parent product generation and feed status.
4. You will then need to fill the following fields for the feed import:
-
Name: the name of the product feed. If you plan to use multiple feeds, make sure to distinguish them by using different names. E.g.: Amazon product feed, Product feed refurbished items, Product translations feed - DE, etc.
-
Additional: marks a feed as additional. Additional feeds are meant to update attributes of existing products (e.g.: stock, content, etc.).
-
Use comma separator in numbers: ChannelEngine expects a period as the decimal separator by default (e.g. EUR 9.95). If your feed uses a comma instead (e.g. EUR 9,95), enable this setting, otherwise your prices will show up 100 times too high.
-
Generate parent products: if products in your feed are grouped under a parent SKU but that parent product isn't itself included in the feed, enabling this setting tells ChannelEngine to generate it automatically. This only applies to a leading feed.
-
Product feed status: feeds are Inactive by default. Enable this setting to make the feed Active and start the import; disable it to pause the import and deactivate the feed.
For more information, access ChannelEngine's Help Center.
Lengow
- In the Catalogues tab, click the Add a new catalogue button and select the A direct link import method.
- Paste your Plytix feed URL, then proceed to map the attributes.
For more information, access Lengow's Help Center.
ProductsUp
- Go to Data Sources from the main menu and select the Add data source button.
- Search for Feed URL and select the Add button. Give it a custom name and click the Continue button.
- In the Source URL field, add your Plytix feed URL. As an option, you can edit the name of the data source under the Description field.
- Click the Save button. Under Content Options you can access the CSV Settings, where you can edit or replace header rows and define the encoding, delimiter, enclosure, and the number of headers used in your CSV file. By default, Productsup detects the encoding, delimiters, and enclosures in CSV files automatically and considers the first row in your file to be the header.
For more information, access ProductsUp's Help Center.
GoDataFeed
- Go to GoDataFeed > Products > Import Source and select HTTP.
- Enter the HTTP Address: this is the URL of your HTTP file location. It usually begins with http:// or https://
- Under the File Format field, select CSV as the format for the Plytix URL you are importing.
- Click the Save button to import your products.
For more information, access GoDataFeed's Help Center.
Data Feed Watch
- Navigate to the Shops tab. Click the Add Shop button.
- Select CSV as the file format.
- Enter your file's address, this will be the Plytix Channel URL generated after processing the channel for the first time.
- Next, schedule your update frequency in the Updates Schedule field.
- Click the next tab to proceed.
- Set up your Internal Fields rules.
- Click the Finish button.
For more information, access Data Feed Watch's Help Center.
Beez Up
- In the main menu, go to the Importation tab.
- Choose CSV as the file format for your product feed.
- Provide the Plytix URL generated by your channel after being processed.
- Set the text qualifier to Double quotes and check the CSV contain Column Names and Should Not Use CSV Column Names checkboxes.
- Click the Start importation button and wait until it loads. You will be automatically redirected to Importation > Mapping (or Mega-Mapping) once it finishes.
- Fill out the Mapping.
- When the mapping is done, click the Validate and Import button.
- Click the Set as Automatic Import button.
For more information, access Beez Up's Help Center.
What’s Next?
- Learn how to set up product feeds for Google Shopping or Amazon.
- Explore how to create custom channels in Plytix.
- Check out our guide on managing multiple channels in Plytix.