
You may change the format for exporting these media attribute types:
- Media Single
- Media Gallery
- Thumbnail
For images, you can resize or convert image formats. For all media attributes you can rename assets and concatenate (combine) up to 20 media attributes into a gallery.
Concatenating Media Attributes
*Skip to any section in this article by click on the links above
Resizing Images
There are times when a client requests product images in a certain size, or a channel you are selling on has different image requirements than what you have in your account. Whatever the case, you can quickly resize your product images on export from Channels or Brand Portals. This means you can store your images in Plytix in one size, and choose the size you want them to appear in your outputs.
ℹ️ Resizing images is not available for quick exports from the product overview table.
To resize images on export:
- Go to the Channel or Brand Portal where you'll share the image
- Click on the 'Attributes' tab of the Channel or Brand Portal
- Add the media attribute to the channel or brand portal
- Hover over the row of the attribute you want to resize and click on the settings icon


- Select the 'Resize image' checkbox:

- Choose the new pixel dimensions
- Select 'Lock ratio' to maintain image dimensions (optional but recommended).
- Click 'Okay'. Please note that entering an incorrect value when setting image resizing parameters will result in an error, which will be displayed in the corresponding field
.jpg?width=655&height=383&name=Export%20Settings%20for%20Media%20Attributes-resizing%20(1).jpg)
9. Click 'Save changes'
⚠️ Locking the ratio of the image ensures the new image dimensions stay proportional. Not selecting "lock ratio" can affect the quality and presentation of your images.
💡 Original image resolution will be maintained when images are resized.
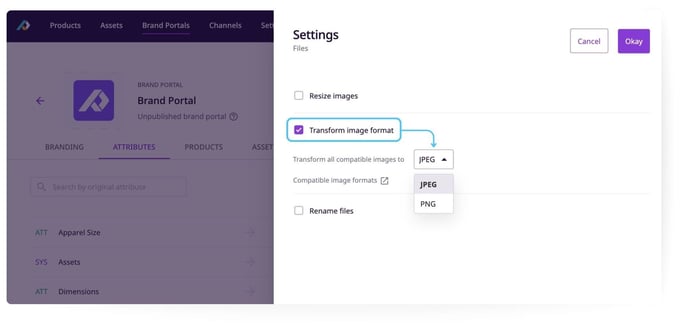
Transforming Image Format
When formatting your attributes for a Channel or Brand Portal, you can convert images into two different formats: JPEG and PNG. You may convert the following types of images:
- PNG
- JPG/JPEG
- TIFF
- GIF
- WEBP
ℹ️ For Brand Portals, images are converted when you export. For Channels, images are converted when you process the channel.
To convert image format:
- Enter the details page of the Brand Portal or Channel you want to modify by clicking on its name.
For this example, we will convert the format of images in a Brand Portal, but you can apply the same steps to Channels. - In the 'Attributes' tab, hover over the attribute you want to convert (it must be a media attribute) and click the 'Settings' icon
 .
. - A popup will appear with several options. Check the 'Transform image format' box.
- Choose the format from the dropdown: 'JPEG' or 'PNG'. Then click 'Okay'.
5. Click 'Save changes' on the Brand Portal/Channel detail page.
Now all the images in that attribute will be converted to the format you selected upon export or processing.
Renaming Files
Depending on where you need your product assets, you may need to rename them. You can do this when building Channels or Brand Portals.
ℹ️ Renaming images is not available for quick exports from the product overview table.
You can also permanently rename assets in the files section. The process explained below is only for renaming files upon export while keeping the same name in the PIM itself.
- Go to the 'Attributes' tab of the Channel or Brand Portal you are building
- Select the media attributes you want to include and click 'Add attributes'
- On the table, hover over the image attribute you want to rename. Click on 'Settings'

- Check the 'Rename files' box
.jpg?width=671&height=342&name=Export%20Settings%20for%20Media%20Attributes-4%20(1).jpg)
- Change the file name by setting up a custom formula. Please note that when setting a renaming rule, entering an incorrect value will cause an error, which will be displayed in the corresponding field

- Click 'Okay'
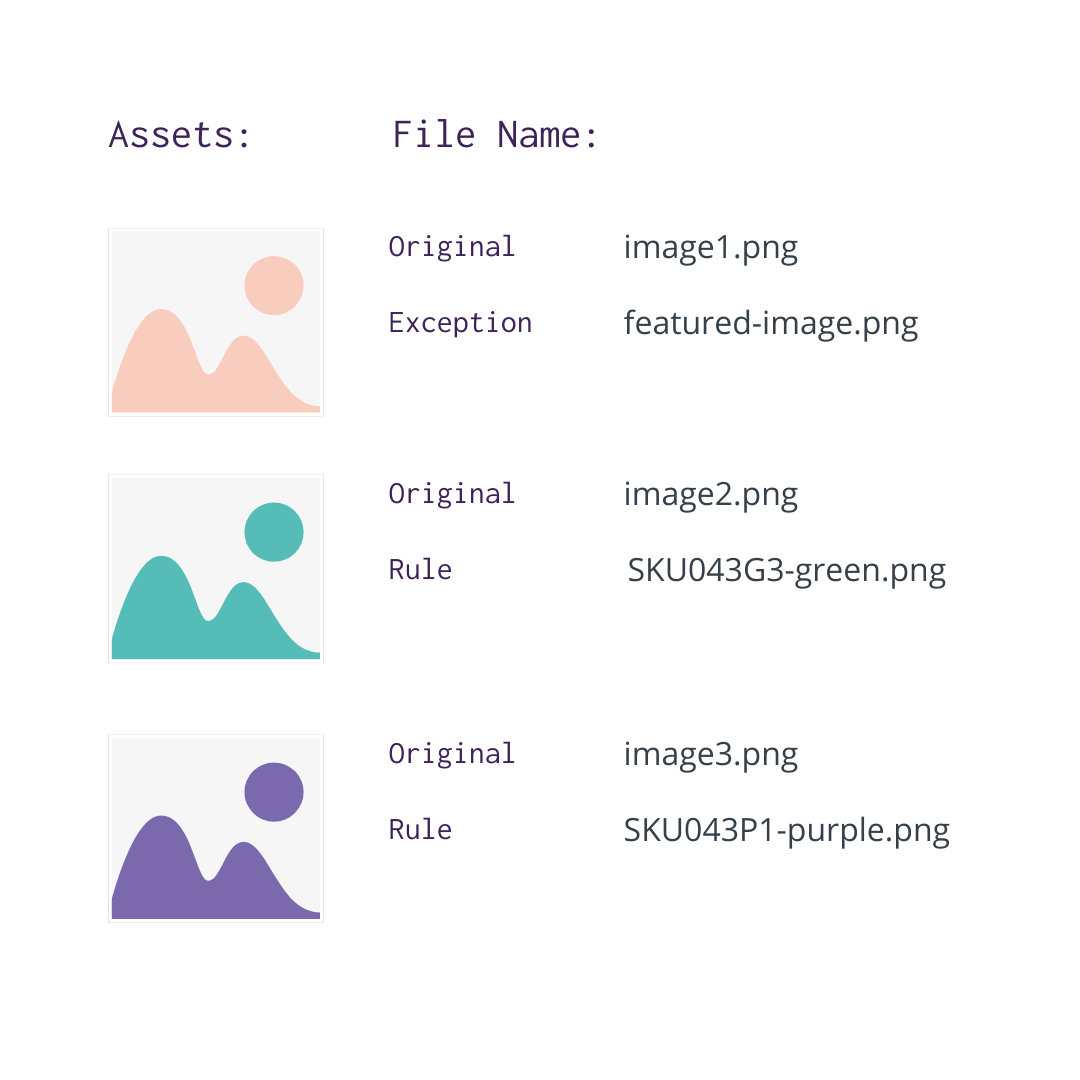
Setting up a Custom Formula: RULE vs EXCEPTION
The "Rule" naming is for all files included in this attribute. The default rule is named by SKU.
The "Exception" naming is for adding different naming patterns for the first, second, third... asset. After all exceptions, the rule will kick into effect.
In this example, you can see there are 3 assets. The exception applies automatically to the first image, while the rule is applied to the other two images.
 Creating Naming Patterns
Both Rules and Exceptions follow the same process for building naming patterns. You can create naming patterns out of two different elements: text and attributes.
- Text is a static text that will be the same for all assets included in the rule or exception. Separators are also static texts.
- Attributes are dynamic and will be populated based on the product the asset is being exported with.
You can add as many combinations as you would like of these elements.
To create a naming pattern:
- Click on '+ Add element' to add an attribute or text element to your name pattern
- Click on the dropdown under the "Value" column to change the existing element outputs
- Drag and drop the order of elements
The Pattern Output Example will show you how your naming pattern will look.
.jpg?width=688&height=430&name=Export%20Settings%20for%20Media%20Attributes-5%20(2).jpg)
Concatenating Media Attributes
You may change the format for exporting these media attribute types:
- Media Single
- Media Gallery
- Thumbnail
In addition to resizing images, renaming assets, and converting image formats, you can also concatenate up to 20 media attributes when exporting.
To concatenate media attributes:
1. In the settings area of one your media attributes (within a Brand Portal or Channel), tick the box for 'Concatenate Media Attributes,' then click on the '+ Add Media Attributes' button that appears.
Select the media attributes that you want to concatenate, then drag and drop to adjust the order if necessary. When you're finished, click okay, and then be sure to save your changes.

For example:
Imagine that images for each of your products are maintained in three attributes in your account: media single attributes, media gallery attributes, and the thumbnail attribute.
When exporting to a particular platform, you want to combine all of these attributes into a single gallery. When you "Concatenate Media Attributes" you select the attributes mentioned above to export the public URLs within your thumbnail, media singles, and media gallery all together as one list.
What's next?
- Learn how to define the export format for other attribute types
- Learn about exporting product data
- Learn how visitors to your brand portals can resize images on download