
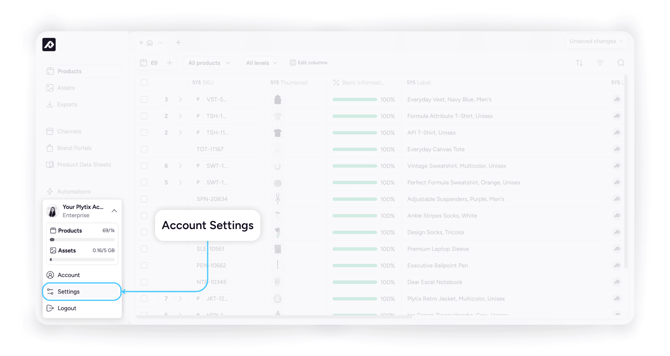
Accessing the account administration area
There are two ways to access the Account Administration area.
1. Directly by navigating to accounts.plytix.com.
2. By clicking on your profile picture in the bottom-left corner of the platform, then on the settings icon in your profile overview.
Info
Account Summary
When you enter the Account Administration area, you will be taken to the account information area, which contains a summary of all of your account's data, including:
- Number of products
- Used storage
- Team members
- Attributes
- CDN traffic
- API keys
- Channels, Brand Portals, and Product Sheets
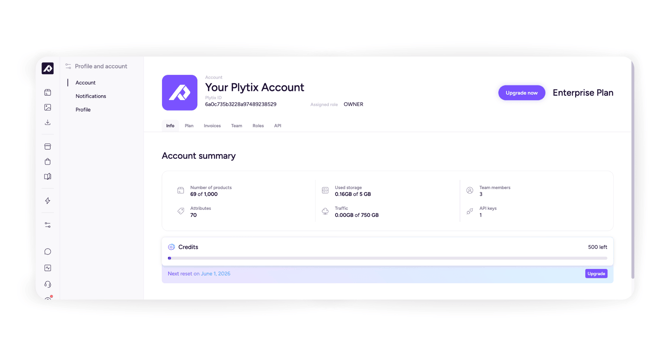
Credits
In the Account Summary you can also see your AI credits balance, showing how many credits remain and how many have been consumed. It also displays the date of your next credits reset. If you need more credits, there is an Upgrade button available to change your plan.
Add-ons
Below the account summary, you will find your Add-ons section. Here you can see which add-ons are active on your account, along with the quantity in use for each one.
At the top of the account settings area you will find your account information:
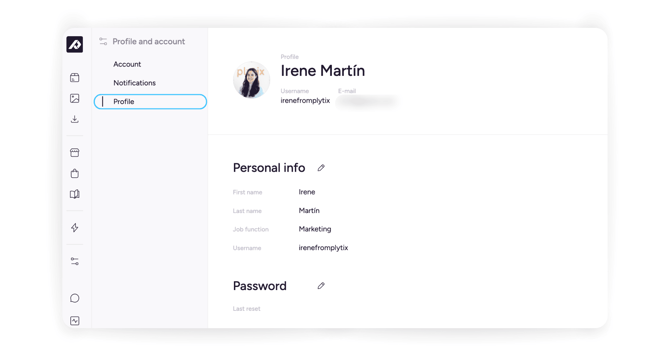
Profile
On the left menu of the Account Information area, you'll see that below account you can click on 'Profile' to display information specific to the user who is logged in. Here you can edit personal information including:
- Name
- Job function
- Username
- Password
Notifications
Under the 'Account' tab you can find the 'Notifications' tab. Here each user can configure their notification preferences individually.
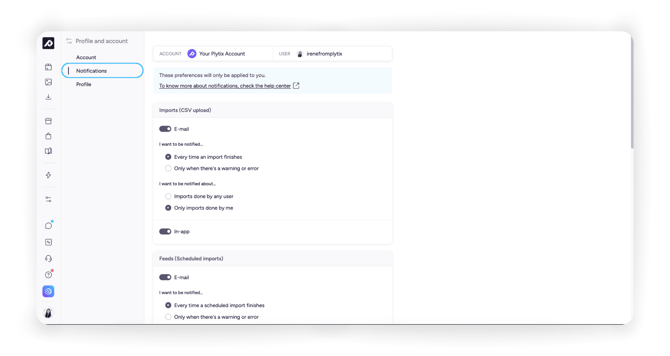
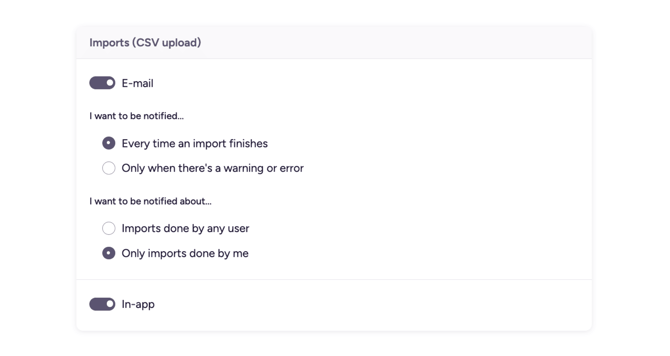
Imports (CSV upload)
You can toggle Email and In-app notifications on or off for imports. When email notifications are enabled, you can configure:
I want to be notified...
- Every time an import finishes
- Only when there's a warning or error
I want to be notified about...
- Imports done by any user
- Only imports done by me
Feeds (Scheduled imports)
You can toggle Email and In-app notifications on or off for scheduled imports. When email notifications are enabled, you can configure:
I want to be notified...
- Every time a scheduled import finishes
- Only when there's a warning or error
I want to be notified about...
- Feeds created by any user
- Only feeds created or processed by me
I
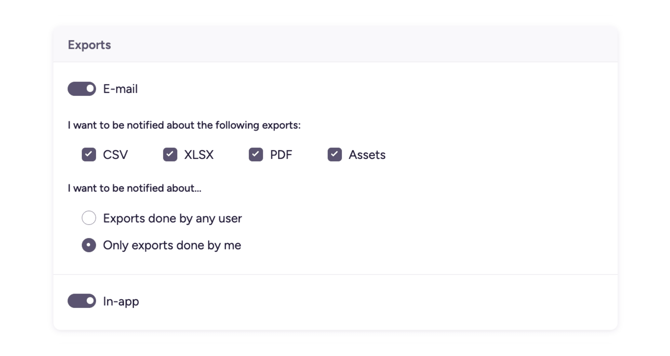
Exports
You can toggle Email and In-app notifications on or off for exports. When email notifications are enabled, you can choose which export types to be notified about:
I want to be notified about the following exports:
- CSV
- XLSX
- Assets
I want to be notified about...
- Exports done by any user
- Only exports done by me
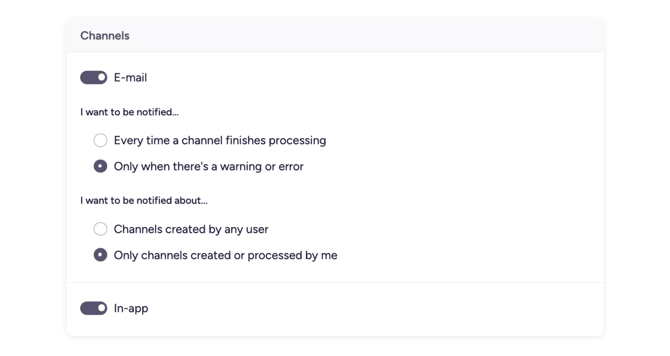
Channels
You can toggle Email and In-app notifications on or off for channels. When email notifications are enabled, you can configure:
I want to be notified...
- Every time a channel finishes processing
- Only when there's a warning or error
I want to be notified about...
- Channels created by any user
- Only channels created or processed by me
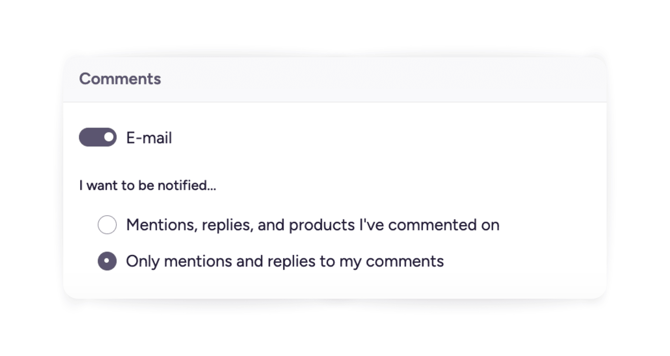
Comments
You can toggle Email notifications on or off for comments. When enabled, you can configure:
I want to be notified...
- Mentions, replies, and products I've commented on
- Only mentions and replies to my comments
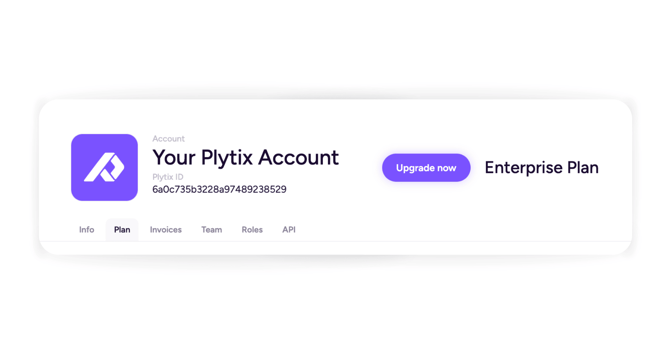
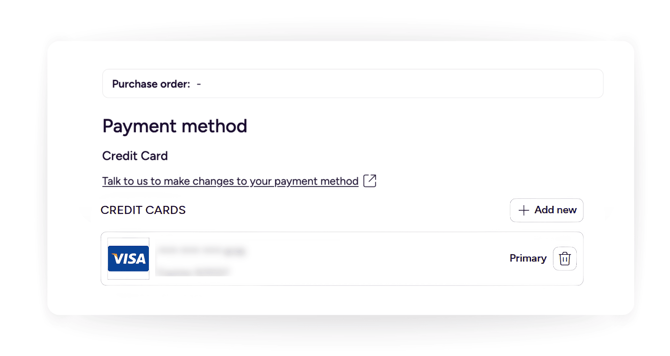
Plan
The details of your subscription live in this section. This is where you can manage your subscription plan, add or edit company details, and add or change your credit card on file and view your payment method.

ℹ️ Learn more about changing your account plan or updating billing and payment method.
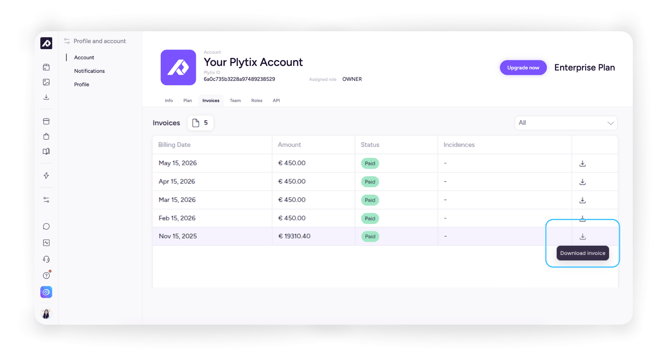
Invoices
Keep track of all your invoices here. Use the filter to sort invoices by year issued.
ℹ️ Learn more about how to view your invoices.
Team
From here you can invite, block, and remove users. You can also assign users a role.
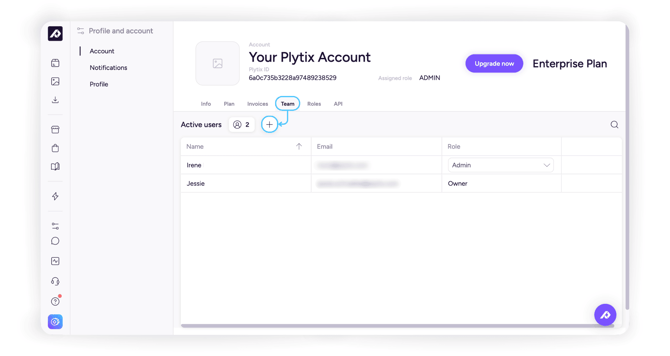
ℹ️ Learn more about inviting users and managing your team in Plytix.
Roles
In this section, you can view and create permission schemes for your users.
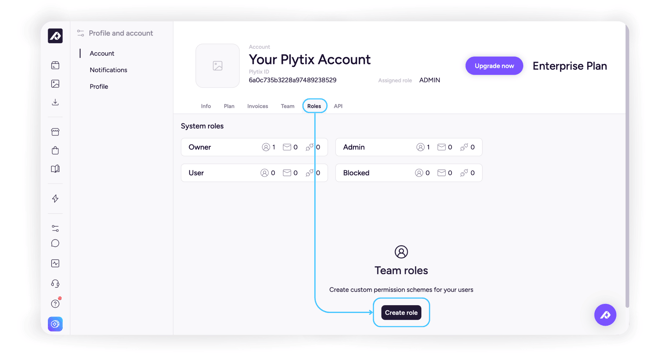
ℹ️ Learn more about how to create a new user role and how to set permissions for a role.
API
In this section, you can generate new API keys to use for integration with other tools.
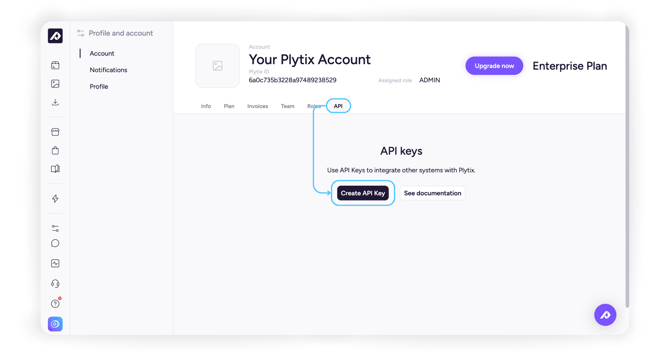
ℹ️ Learn more about assigning API keys.
What's next?
- Learn how to manage and switch between Plytix accounts.
- Learn how to edit your user profile
- Learn about inviting new users to your account